React provides a number of powerful patterns to compose components; for example, Containment, Specialization, and Render Props. Today we’ll dive into the Containment pattern which, on the surface, looks like an easy-to-understand interface — but the example provided in React docs doesn’t have an explicit explanation of how to pass data from the parent container to its children. Who knows — this very well may help you when cracking React interview questions!
Here is a code snippet from React docs example to refresh your memory:
function FancyBorder(props) {
  return (
    <div className={'FancyBorder FancyBorder-' + props.color}>
      {props.children}
    </div>
  );
}
function WelcomeDialog() {
  return (
    <FancyBorder color="blue">
      <h1 className="Dialog-title">
        Welcome
      </h1>
      <p className="Dialog-message">
        Thank you for visiting our spacecraft!
      </p>
    </FancyBorder>
  );
}
Let’s try to pass “color” prop from the FancyBorder component to its children.
At first glance, it’s not obvious. The only thing we see in the markup of the example is {props.children} that looks like an opaque prop. Working with it doesn’t look straightforward either. But here comes React.Children to rescue; React docs provide a special section for it.
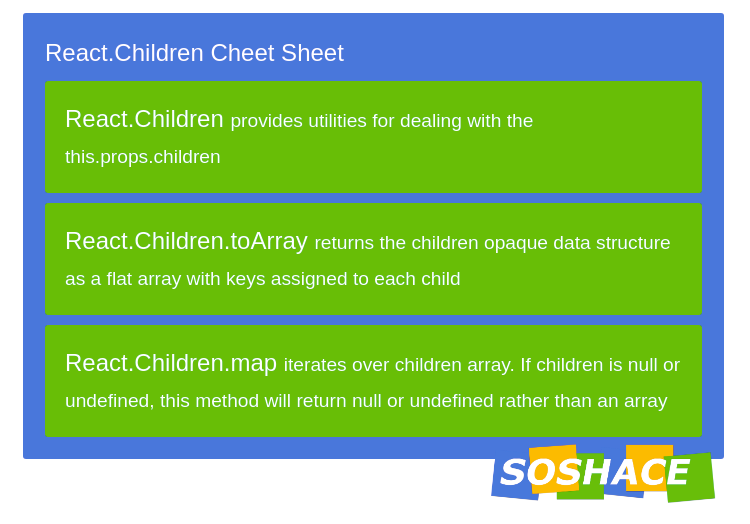
React.Children
What we need first is React.Children.map(children) to always handle children as an array because when there is only one component, it will not be an array by default. Next thing that we should use is React.cloneElement(element, props) that is used to work around the fact that all React elements are immutable. Finally, we might come up with the following code:
const FancyBorder = ({ children, color }) => {
  const childrenWithProps = React.Children.map(children, element =>
    React.cloneElement(element, { style: { color } })
  );

  return (
     <div className={'FancyBorder FancyBorder-' + props.color}>
          {childrenWithProps}
     </div>;
}
Now every child inside the FancyBorder receives the “color” prop passed down from the parent component. You might admit that, instead of passing down “color” prop from the FancyBorder parent component to all of its children, we could simply add “color” at the top level. That is correct. But there are cases when we can leverage Parent props: for example, when we need to calculate child props based on the parent props.
For example, we could have a Theme component that only takes a “type” name as a prop and provides some specific styling based on this type for all of its children.
Theming with React.Children
Let’s consider the following code:
const Theme = ({ children, type }) => {
  const style = type === "day"
      ? { color: "black", background: "white" }
      : { color: "white", background: "black" }
  const themedChildren = React.Children.map(children, element =>
    React.cloneElement(element, { style })
  );

  return themedChildren;
}

<Theme type="day">
     <h1>Welcome!</h1>
     <div>Some text inside</div>
</Theme>
Every child in this example has a color and background based on the “type” prop of the parent. Besides that, the code is easy to reuse: just wrap the Theme component around any children and they become “themed”.
React.Children toggler
“Just wrap and it works” pattern with zero configuration is so cool that I would like to build a component that has dynamic state passed to children. Is it possible? Can we have a simple interface that allows toggling content on a button click with the following markup, seen in the code below?
<Toggler>
  <button>toggle</button>
  <div>Content</div>
</Toggler>
Unbelievable, but yes, we can. Here is the code:
import React, { useState } from "react";

const Toggler = ({ children }) => {
  const [isVisible, setVisible] = useState(true);
  const renderChildren = React.Children.map(children, (el, index) => {
    if (index) return isVisible ? el : null;
    return React.cloneElement(el, { onClick: () => setVisible(!isVisible) });
  });

  return renderChildren;
};
The code in this example considers that toggler button is the first element inside a wrapper. You can change the order of elements and still have a toggle functionality if you verify toggler by some specific element prop like “type” or “isToggler”. Then you should check el.props.type instead of index in renderChildren function. In case of the content, we don’t need element cloning, as soon as no modifications are needed, so the code just renders the element or returns null.
In this example, I also use React Hooks API (here’s a great article about using React Hooks with RxJS) to showcase how to change the state of the component, but you could also use regular class component for that purpose as well.
Full code with comments on GitHub
Live example with code on CodeSandbox
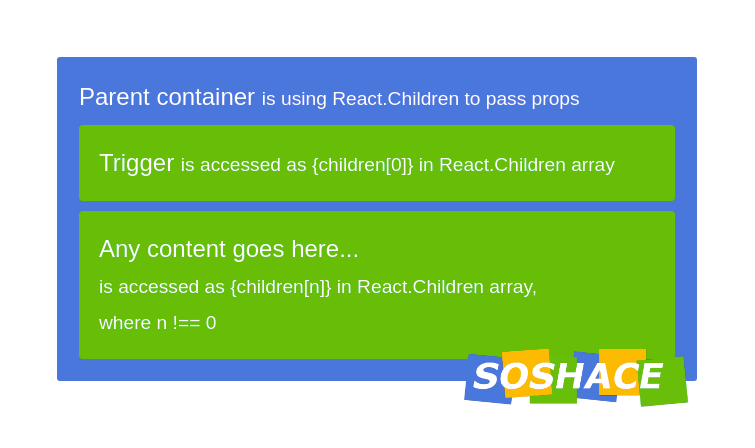
The simplicity of the Toggler example above has a limitation: button and content should be immediate children of the Toggler component. That is probably an option in many cases, but should we just give up in case there is some nesting? The answer is: we can work around nesting, but nothing comes without tradeoffs, so we should add some extra markup.
Let’s add some nesting to reproduce the issue with simple React.Children approach. Also, we should wrap each child that is related to Toggler in a sub-component (I will explain the reason for it a bit later). Please check the following markup:
<Toggler>
    <div>...here comes some markup that is not related to the toggler...</div>
    <div>
        <Toggler.Trigger>
            <button>toggle</button>
        </Toggler.Trigger>
    </div>
    <div>...here comes some markup that is not related to the toggler...</div>
    <div>
        <Toggler.Content>
            <div>Content</div>
        </Toggler.Content>
    </div>
</Toggler>
To achieve the goal of toggling the Content with click on the Trigger, Toggler.Trigger and Toggler.Content sub-components should share state with their parent Toggler. In this case, multiple other benefits are gained:
- The order might be different.
- There could be multiple
Toggler.Contentas well as multipleToggler.Triggercomponents. - The level of nesting also doesn’t matter.
- We could add any amount of extra markup, but it’ll still work.
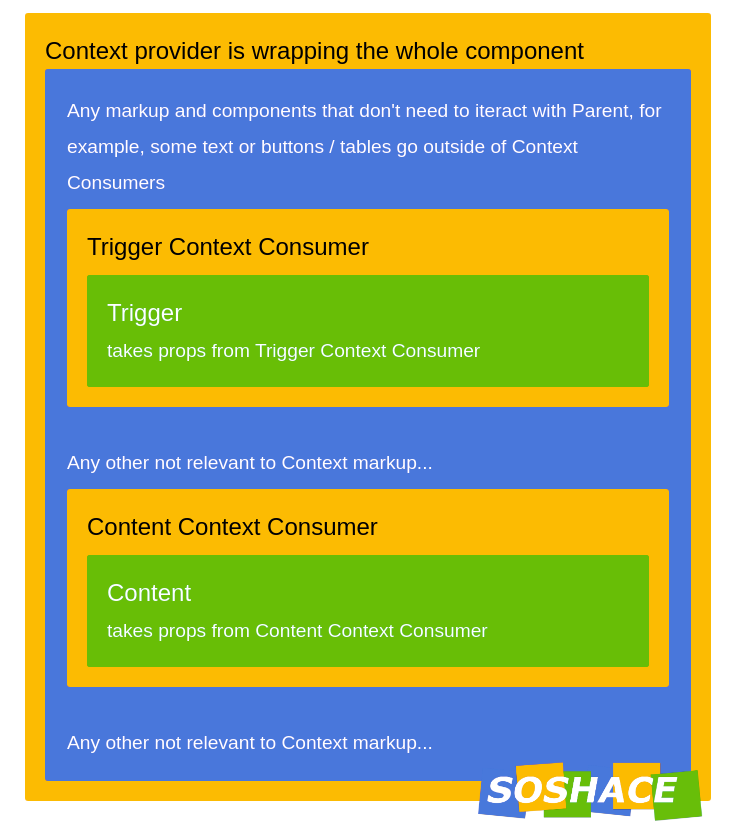
And that all is possible thanks to React.Context API.
React.Children and React.Context
Let’s check the code for the React.Children + React.Context toggler implementation:
const Context = React.createContext();

const addPropsToChildren = (children, props) =>
  React.Children.map(children, el =>
    React.cloneElement(el, props)
  )

class Toggler extends React.Component {
  state = { isVisible: true };

  setVisible = () =>
    this.setState(({ isVisible }) => ({ isVisible: !isVisible }));

  static Trigger = ({ children }) => (
    <Context.Consumer>
      {({ setVisible }) =>
        addPropsToChildren(children, {
          onClick: setVisible
        })
      }
    </Context.Consumer>
  );

  static Content = ({ children }) => (
    <Context.Consumer>
      {({ isVisible }) => isVisible ? children : null}
    </Context.Consumer>
  );

  render() {
    return (
      <Context.Provider
        value={{
          isVisible: this.state.isVisible,
          setVisible: this.setVisible
        }}
      >
        {this.props.children}
      </Context.Provider>
    );
  }
}
The code above is a pretty standard React class implementation with a few lines that probably need a bit of explanation:
- First of all, take a look at
Context.Provider. It is passingisVisibleprop andsetVisiblefunction down to all of theContext.Consumers. - There are 2
Context.Consumersin the code:Toggler.TriggerandToggler.Contentthat are implemented as static fields of theTogglerclass. addPropsToChildrenis a simple helper that adds any props to children passed.
Props merging
In a real-world app, there could be a case when there is a need to call some Content function and hide Content after that. React.cloneElement replaces the prop completely, so if we want to have both functions called while working with Content, we should merge them. Let’s look at one example:
<Toggler>
    <Toggler.Trigger>
        <button>toggle</button>
    </Toggler.Trigger>
    <Toggler.Content>
        <div onClick={e => console.log(e)}>Content</div>
    </Toggler.Content>
</Toggler>
The Content static field of the class might look like this:
 static Content = ({ children }) => (
    <Context.Consumer>
      {({ isVisible, setVisible }) =>
          React.Children.map(children, el =>
              React.cloneElement(el, {
                  onClick={e => {
                      el.props.onClick(e);
                      setVisible();
                  }
              })
          )
      }
    </Context.Consumer>
  );
The code above replaces the onClick prop of the child component with a new function that will execute both the original callback of the element as well as the setVisible function of the class that is used to toggle visibility of the element. This way any prop of a child might be modified.
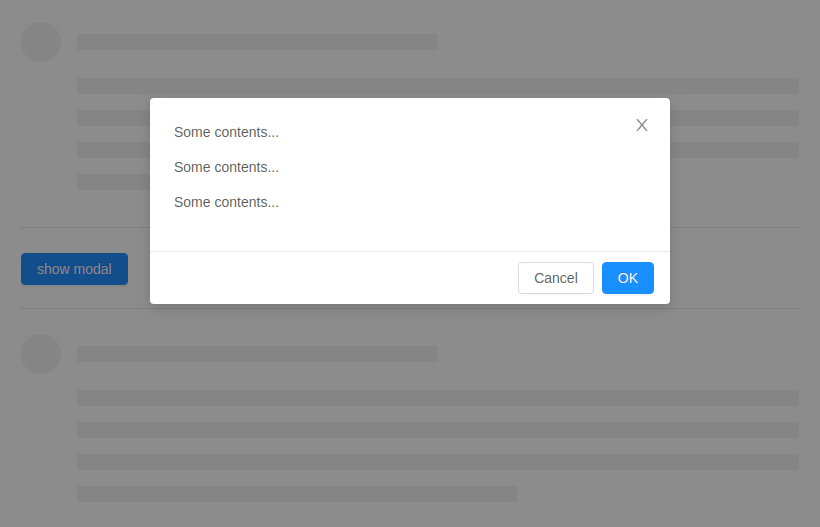
Real World example
As a real-world example, let’s take ant-design Modal component to show how it can be integrated with a Toggler component written using React.Children and React.Context composition pattern.
 <Toggler>
    <Toggler.Trigger><Button>show modal</Button></Toggler.Trigger>

    <Toggler.Content>
      <Modal onOk={() => console.log('Do anything')}>
        <p>Some contents...</p>
      </Modal>
    </Toggler.Content>
  </Toggler>
There are at least 3 props that are commonly used in Modal: onOk, onCancel, and visibility, but in the markup example above we only need the onOk handler; the rest of the implementation might be hidden. Here is a code snippet with props merging function example that works under the hood:
    (context, el) => ({
        visible: context.isVisible,
        onCancel: context.setVisible,
        onOk: () => {
          context.setVisible();
          el.props.onOk();
        }
      }
As you can see, the onOk handler needs merging, while visible and onCancel props are just passed from parent context. In this code el is the currently cloned React.Children item while context is React.Context. I omit the rest of the implementation to not repeat myself as soon as everything else was already mentioned in the article text above. But in case you are curious about the details, please feel free to check out the code on GitHub, or live code on CodeSandbox.
Full code on GitHub with comments
Summary
To sum up the above: using Containment composition with React.Children and React.Context is a very powerful pattern that works like a zero configuration “just wrap and it works” approach. You can build reusable components on top of it that encapsulate all implementation details but still provide a lot of flexibility. I hope you enjoy it!