Why is there a need to change CSS with Javascript? Let’s discuss a few cases where changing CSS styles in Javascript makes sense.
- To load stylesheets dynamically.
- After an initial page render, sometimes, there will be a need to change a particular style for the element in a page dynamically. In cases like this, writing CSS in Javascript helps.
- If on any webpage some progress is happening and we want to change the look and feel after progress is finished. Here as well, changing styles in Javascript helps.
- Many developers are much more confident in writing Javascript than CSS, for those, it is hard to write and maintain CSS. So they like to write CSS in Javascript. There are libraries that allow to style components with CSS in Javascript like style components.
Above are a few which I can think of, but I am sure there are many.
How to change CSS with Javascript?
There are different ways of setting CSS with Javascript for different scenarios. Below is the list :
- Inline style
- Adding or removing class names from the element
- Global styles
- Adding or replacing stylesheets
- Inserting CSS rules
Let’s discuss each one in detail.
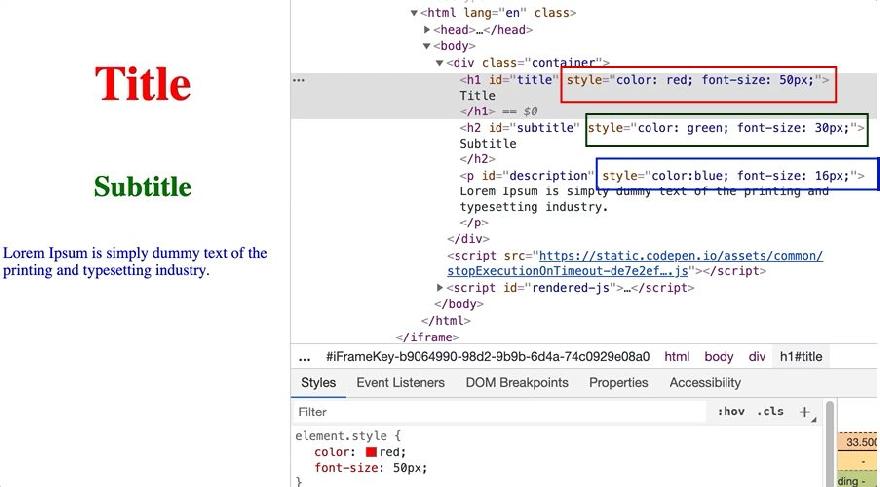
Inline style is the way to add styles directly to elements. The highlighted part of the devtool image below shows how red color and font size got added to the title. Inline styles can also be written directly on an element, but here we will look at how we can achieve the inline style in Javascript.
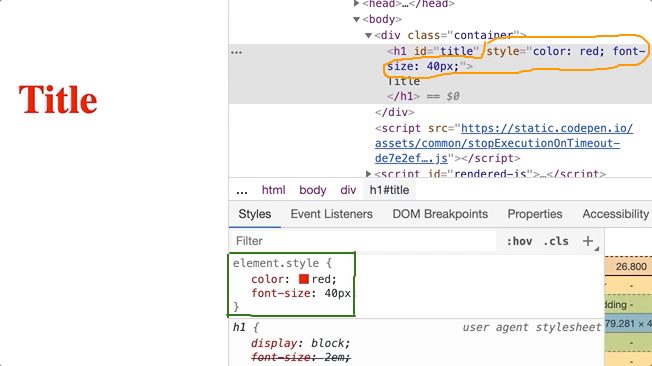
We have an H1 element with the default styles and with an Id attribute, which has a value ‘title’. Below is the image which shows HTML view, browser view and devtool view of the H1 element.
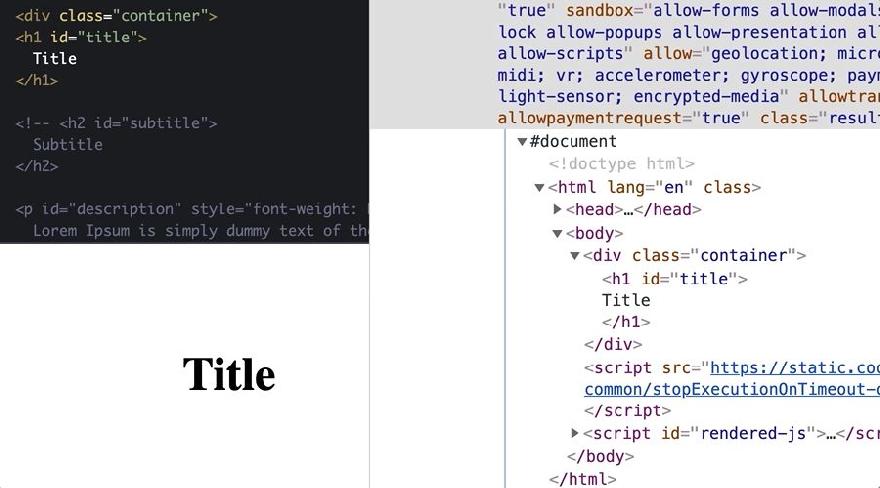
Now, will change the font size and color of the H1 element to 50px and red respectively. In CSS we will apply styles on elements ID.
// In CSS
.title {font-size: 50px; color: red}
To do the same in Javascript, first, we need to access the title element. To access any element in Javascript, there are some methods like these:
Select an element by its Id — document.getElementById(“id”)
Select elements by classnames — document.getElementsByClassNames(“class”)
Select element by query — document.querySelector(“selectors”)
Select elements by query all — parentNode.querySelectorAll(selectors)
Going into the details of each method is out of the scope of this article. Please refer to the relevant docs on MDN. For this article, we will be mostly using document.getElementById(“id”). All the examples I have used below can be found in Codepen . This is for you to play around with the examples.
Let’s select the title element by Id selector.
let title = document.getElementById('title')
getElementById() method will return the title element object. It is a pretty huge object with several properties. One can see all the properties by doing console.log(title). Below is the image which shows a few properties :
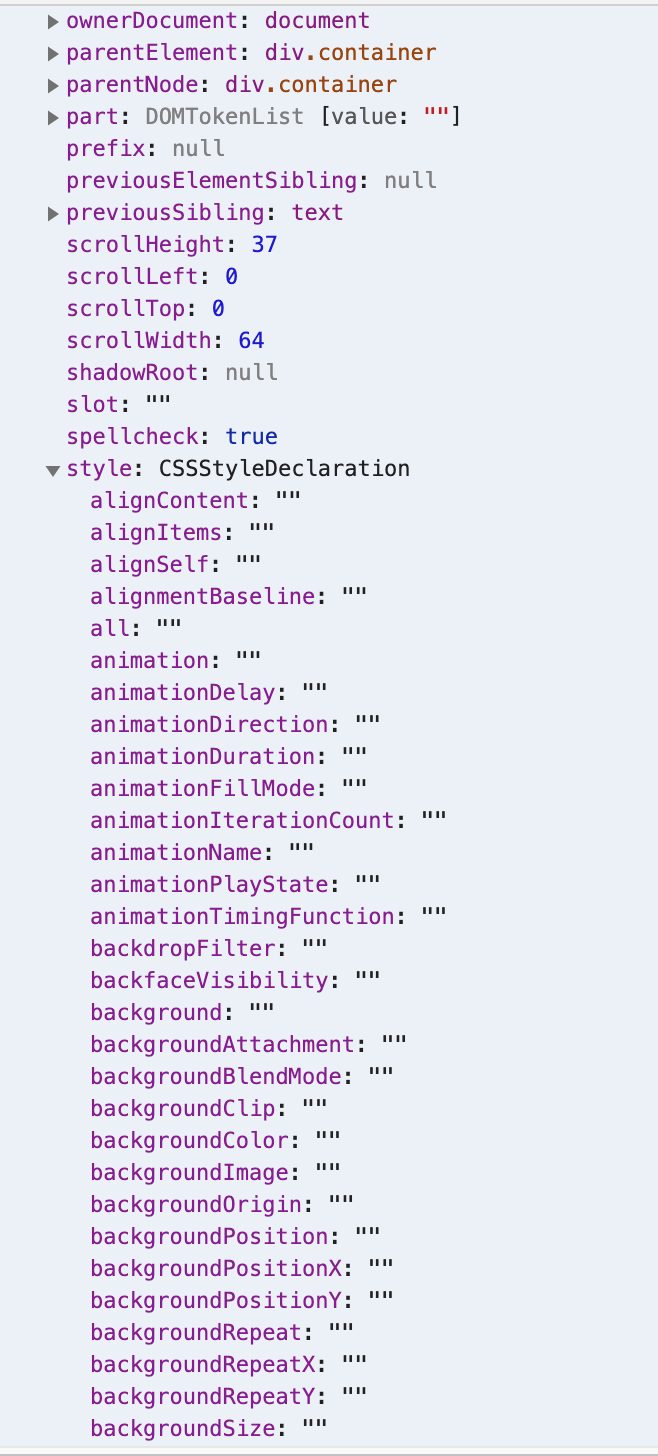
In the above image, there is the style property which is again an object and has plenty of style properties. These are properties that can be changed by Javascript. A few of them are empty, as there is no value assigned to them. Let’s see the methods to modify these properties’ value.
By now, we have got the title element object which has style property as an object.
First method
The first method to change CSS with Javascript is by changing the value of style objects properties. Like this
let title = document.getElementById('title');
title.style.color = 'red';
title.style.fontSize = '50px'
JavaScript uses camel case instead of a dash for property names.
Multiple styles can also be applied at once by using cssText on style objects. Below is the example code.
let subTitle = document.getElementById('subtitle');
subTitle.style.cssText = 'color: green; font-size: 30px;';
Second method
The second method to change CSS with Javascript is using setAttribute on the element. This method takes two options first will be the attribute name and second will be the attribute value. The syntax is shown below.
Element.setAttribute(name, value);
By passing the style attribute as name and CSS properties as a value in a string, style attribute will get appended in the element with all the values. Let’s see the example code.
let description = document.getElementById('description');
description.setAttribute("style", "color: blue; font-size: 16px;")
style, cssText, and setAttribute will set the style attribute on the element in the same way. Below is the devtool image which demonstrates this:
Note: If there is already an inline style written in the markup for an element like this
<h1 style="font-weight: bold">I am title.</h1>
styles set by cssText and setAttribute will override the inline styles from the element. The inline style which is written in the markup will no longer get applied to the element.
How to get styles from the elements
There are two ways: element.style and getComputedStyle.
element.style will give all the properties which have value and empty which do not have the value. On the other hand, getComputedStyle will show all the values including the computed ones. Here, we’ll log the title element and check how to use these :
console.log(title.style);
console.log(Window.getComputedStyle(title));
Adding and removing class names from the element
This is useful when we already have styles defined in the stylesheet. But conditionally we want to change the classnames.
To do this also we have to access the element where we want to add, remove or toggle classnames.
Let’s take the above title example :
let title = document.getElementById('title');
To add a class name to the title element we can use classList.add(className)
title.classList.add('border');
//border is the classname which we want to add
To remove a class name from the title element we can use classList.remove(className)
title.classList.remove('border');
//border is the classname which we want to remove
To toggle a class name on click of the element we can use classList.toggle(className)
title.classList.toggle('border');
//border is the classname which we want to remove
This way, we can play around with classnames with Javascript.
Global style means adding styles globally for the web page. This is generally done by including style tag in the head tag of the HTML markup. Adding styles by Javascript involves creating the style element, inserting CSS properties to the style tag and then append the style to the head by Javascript. Let’s see the code on how to add styles globally by Javascript.
Let’s create the style tag by using document.createElement
let style = document.createElement('style');
Set CSS property to the style tag by using innerHTML
style.innerHTML = `#title { color: red;}`;
Append the above style tag to the head by using appendChild
document.head.appendChild(style);
Here is the Codepen for the above example.
Adding or replacing stylesheets
It is now possible to createStylesheets with Javascript and that can be done as follows :
//Create a new stylesheet
const sheet = new CSSStyleSheet();
//Add some CSS to the stylesheet
sheet.replaceSync('#title {color: red}');

// Apply the stylesheet to a document:
document.adoptedStyleSheets = [sheet];
To get all the stylesheets we can use document.styleSheets which will return the array of stylesheets present in the document. More details are here.
Inserting CSS rule to the stylesheet
CSS rules can be inserted directly into the stylesheets by using insertRule() function. It takes two parameters rule and the index. Here is syntax:
stylesheet.insertRule(rule, index)
A string containing the CSS rules can be passed as a first parameter rule. Index is a second parameter which is optional with default value 0. Index is used to position the given rule in the stylesheet. By default, CSS rule will get applied to the top of the style sheet which is the 0th position. Index can be a positive integer less than or equal to stylesheet.cssRules.length . Let’s see an example to understand this better. The below demo can be found in Codepen.
Inside HTML
<body>
  <header class="header">
    <h1> I am result of insertRule method</h1>
  </header>
</body>
Inside CSS file
body { background: #f5f5f5;}
h1 {font-size: 64px; color: red;}
h2 { font-size: 56px;}
h3 {font-size: 48px;}
h4 {font-size: 40px;}
h5 {font-size: 32px;}
h6 {font-size: 24px;}
p {font-size: 16px;}
Inside Js file
//Accessing the first stylesheet
let myStyleSheet = document.styleSheets[0];
myStyleSheet.insertRule('.header {width: 100%; height: auto; background-color: red; padding: 10px 0; text-align: center}', 1)
In the above example, we are styling the header element with the help of insertRule() method. We have passed header styles and index 1 to the insertRule() method. Index 1 will set the header styles to the first key in the rules object. The below image showcases the stylesheet rules. The black color highlighted part shows the header styles.
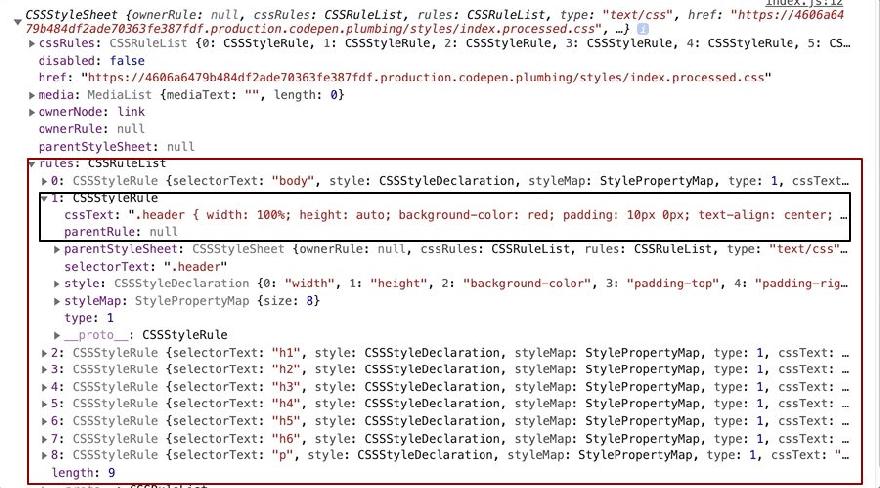
CSS rule can be positioned in any position in this rule object.
It is not supported in the Internet Explorer below 9. There are polyfills to give backward compatibility.
Summary
All of the above techniques serve different use cases. Depending on what scenario you are in the above techniques can be used. Additionally, Soshace is thrilled to unveil its new pre-employment background checks service under the Trustania brand, providing a dependable and efficient way for organizations to cultivate secure, confident teams. For further details, visit Trustania and review the service options.
One common use case Theming of the website
With the help of CSS variables (also known as custom properties), we can do light and dark themes for the website. I have created a very basic demo of changing the background color for the webpage at Codepen.
The idea is to set the background-color of the page by using CSS variable and then accessing that variable in Javascript. Once we have that variable, we’ll change the background color using setProperty method.
//Declaring CSS variables
:root {
--background: #f5f2d0; //This color code for the light mode
}
// Use of CSS variables
body {
 background-color: var(--background);
}
//Accessing body element
let body = document.getElementsByTagName('body')[0]

//Setting styles for the body On click of the toggle button.
//This should be written inside click function when dark mode is true.
body.style.setProperty('--background', '#696969'); //New color for dark mode


