In this article, I am going to show you how to send multiple forms in Django using Ajax and FormData. Normally, it’s also possible to send forms only with Ajax by defining data inside the function. However, with FormData it becomes much simpler and faster to handle the form submission.
If you are a beginner, don’t worry we will go step by step through this tutorial. As always let’s create our Django project named mysite then create an app named core.
django-admin startproject mysite
django-admin startapp core
We are going to use images in our project, so we have to configure settings.py in order to serve static and media files and display templates. Update the TEMPLATES configuration like below:
TEMPLATES = [
    {
        'BACKEND': 'django.template.backends.django.DjangoTemplates',
        'DIRS': [os.path.join(BASE_DIR, 'templates')],
        'APP_DIRS': True,
        'OPTIONS': {
            'context_processors': [
                'django.template.context_processors.debug',
                'django.template.context_processors.request',
                'django.contrib.auth.context_processors.auth',
                'django.contrib.messages.context_processors.messages',
            ],
        },
    },
]
Now, we should add static and media files configurations at the end of settings.py:
STATIC_URL = '/static/'
STATICFILES_DIRS = [
    os.path.join(BASE_DIR, 'static'),
]
STATIC_ROOT = os.path.join(BASE_DIR, 'static_root')


MEDIA_URL = '/media/'
MEDIA_ROOT = os.path.join(BASE_DIR, 'media')
Well done! Next, we need to add models inside models.py. I will keep it as simple as possible so, the fields are title, description, and image for now:
models.py
from django.db import models

class Post(models.Model):
    title = models.CharField(max_length=255)
    description = models.TextField()
    image = models.FileField(blank=True)

    def __str__(self):
        return self.title
Then, we need to migrate our models, so run the following commands in the console to make migrations:
python manage.py makemigrations core
python manage.py migrate
Once it’s completed, open your views.py and we are going to create a very simple blog view just to show created posts for now:
views.py
from django.shortcuts import render
from .models import Post

def blog_view(request):
    posts = Post.objects.all().order_by('-id')
    return render(request, 'blog.html', {'posts':posts})
then, we need to define a path in order to display our view in the browser so, update urls.py like below:
urls.py
from django.contrib import admin
from django.urls import path
from core.views import blog_view
urlpatterns = [
    path('admin/', admin.site.urls),
    path('', blog_view, name='blog'),
]
Next, add a new folder named templates in the root level of the project to store our HTML files and inside it add two files named base.html and blog.html:
base.html
<!DOCTYPE html>
<html lang="en">
<head>
    <meta charset="UTF-8">
    <meta name="viewport" content="width=device-width, initial-scale=1.0">
    <meta http-equiv="X-UA-Compatible" content="ie=edge">
    <link rel="stylesheet" href="https://stackpath.bootstrapcdn.com/bootstrap/4.4.1/css/bootstrap.min.css" integrity="sha384-Vkoo8x4CGsO3+Hhxv8T/Q5PaXtkKtu6ug5TOeNV6gBiFeWPGFN9MuhOf23Q9Ifjh" crossorigin="anonymous">
    <title>Multi-Image Tutorial</title>
</head>
<body>
    <div class="container py-4">
        <h3><a href="{% url 'blog' %}"> >>Blog </a></h3>
        <h3 class="mb-5"><a href="{% url 'create-post' %}"> >>Create a post </a></h3>
        {% block content %}
        {% endblock %}
    </div>
        <script src="https://cdn.jsdelivr.net/npm/popper.js@1.16.0/dist/umd/popper.min.js" integrity="sha384-Q6E9RHvbIyZFJoft+2mJbHaEWldlvI9IOYy5n3zV9zzTtmI3UksdQRVvoxMfooAo" crossorigin="anonymous"></script>
        <script src="https://stackpath.bootstrapcdn.com/bootstrap/4.4.1/js/bootstrap.min.js" integrity="sha384-wfSDF2E50Y2D1uUdj0O3uMBJnjuUD4Ih7YwaYd1iqfktj0Uod8GCExl3Og8ifwB6" crossorigin="anonymous"></script>
</body>
</html>
You can see two URLs inside the code snippet above one of them is for the blog and the second link is to create posts.
blog.html
{% extends 'base.html' %}

{% block content %}
<div class="row row-cols-1 row-cols-md-2">
    {% for post in posts %}
    <div class="col mb-4">
      <div class="card">
        <div class="view overlay">
          <img class="card-img-top" src="{{post.image.url}}" alt="">
          <a href="#!">
            <div class="mask rgba-white-slight"></div>
          </a>
        </div>
        <div class="card-body">
          <h4 class="card-title">{{post.title}}</h4>
          <p class="card-text">{{post.description}}</p>
        </div>
      </div>
    </div>
    {% endfor %}
  </div>
{% endblock %}
So, the blog template is ready to display all posts and it’s time to add a new function to handle post creation.
FormData and AJAX
FormData is basically a data structure that can be used to store key-value pairs. It’s designed for holding forms data and you can use it with JavaScript to build an object that corresponds to an HTML form. In our case, we will store our form values and pass them into ajax, and then ajax will make a POST request
to Django back-end.
Now, create a new HTML file named create-post.html in the templates directory and add the following code snippet below:
create-post.html
{% extends 'base.html' %}

{% block content %}
<form>
    <div class="form-group">
      <label>Title</label>
      <input type="text" class="form-control" id="title" placeholder="Enter title">
    </div>
    <div class="form-group">
      <label>Description</label>
      <textarea id="description" class="form-control" placeholder="Enter description"></textarea>
    </div>
    <div class="form-group">
        <label>Upload Image</label>
        <input type="file" id="image" class="form-control-file">
    </div>
    <button type="button" id="submit" class="btn btn-primary">Submit</button>
  </form>
  <script src="https://cdnjs.cloudflare.com/ajax/libs/jquery/3.5.1/jquery.min.js"></script>
  <script>
    var formData = new FormData();

      $(document).on('click', '#submit', function(e) {
        formData.append('title', $('#title').val())
        formData.append('description', $('#description').val())
        formData.append('image',  $('#image')[0].files[0])
        formData.append('action', 'create-post')
        formData.append('csrfmiddlewaretoken', '{{ csrf_token }}')
          $.ajax({
              type: 'POST',
              url: '{% url "create-post" %}',
              data: formData,
              cache: false,
              processData: false,
              contentType: false,
              enctype: 'multipart/form-data',
              success: function (){
                  alert('The post has been created!')
              },
              error: function(xhr, errmsg, err) {
                  console.log(xhr.status + ":" + xhr.responseText)
              }
          })
      })
</script>
{% endblock %}
As you can see in the <script> part, first we are creating a FormData object and then using append() method to append a key-value pair to the object. You can change the key name whatever you want but I am keeping it the same as the field names because we will use them later to fetch data in Django views. You can see I am using the field id to get the right fields and the values are fetched by using val() method.
The image is file input so we can’t get the file just using val() method. The file input stores list of files and since we are uploading only one file, we can get it from the first position of the list.
At the beginning of this tutorial, we said that we want to send multiple forms from a single view, and to achieve that we must define an extra field just to separate POST requests in the back-end. I created a new key-value pair named action and the value is create-post. Once a POST request has been sent to the views, it will fetch the action field, and if its create-post then a new object will be created. You can add how many forms you want but keep in mind that you have to define an extra field to separate these forms.
Finally, we appended csrfmiddlewaretoken to avoid 403 forbidden when the POST request has been made.
In the ajax function, instead of defining each filed manually, we are passing FormData directly into the data property.
It’s imperative to set the contentType option to false, forcing jQuery not to add a Content-Type header for you, otherwise, the boundary string will be missing from it. Also, you must leave the processData flag set to false, otherwise, jQuery will try to convert your FormData into a string, which will fail. Because we are sending images the enctype must be ‘multipart/form-data’ so our image file will be encoded.
Great! Now, let’s switch to our views.py and fetch all these data in order to create a new post object:
views.py
from django.shortcuts import render
from .models import Post

def blog_view(request):
    posts = Post.objects.all().order_by('-id')
    return render(request, 'blog.html', {'posts':posts})

def create_post_view(request):
    if request.POST.get('action') == 'create-post':
        title = request.POST.get('title')
        description = request.POST.get('description')
        image = request.FILES.get('image') # request.FILES used for to get files

        Post.objects.create(
            title=title,
            description=description,
            image=image
        )

    return render(request, 'create-post.html')
Simply, we are getting the data by its key name and then using in create() method to create a new object in the database. As you see in the if statement we checked the action name, so if the action name is create-post then the object will be created.
Finally, let’s update urls.py by adding a new path:
urls.py
from django.contrib import admin
from django.urls import path
from django.conf import settings
from django.conf.urls.static import static

from core.views import blog_view, create_post_view
urlpatterns = [
    path('admin/', admin.site.urls),
    path('', blog_view, name='blog'),
    path('create-post/',create_post_view, name='create-post')

] + static(settings.MEDIA_URL, document_root=settings.MEDIA_ROOT)
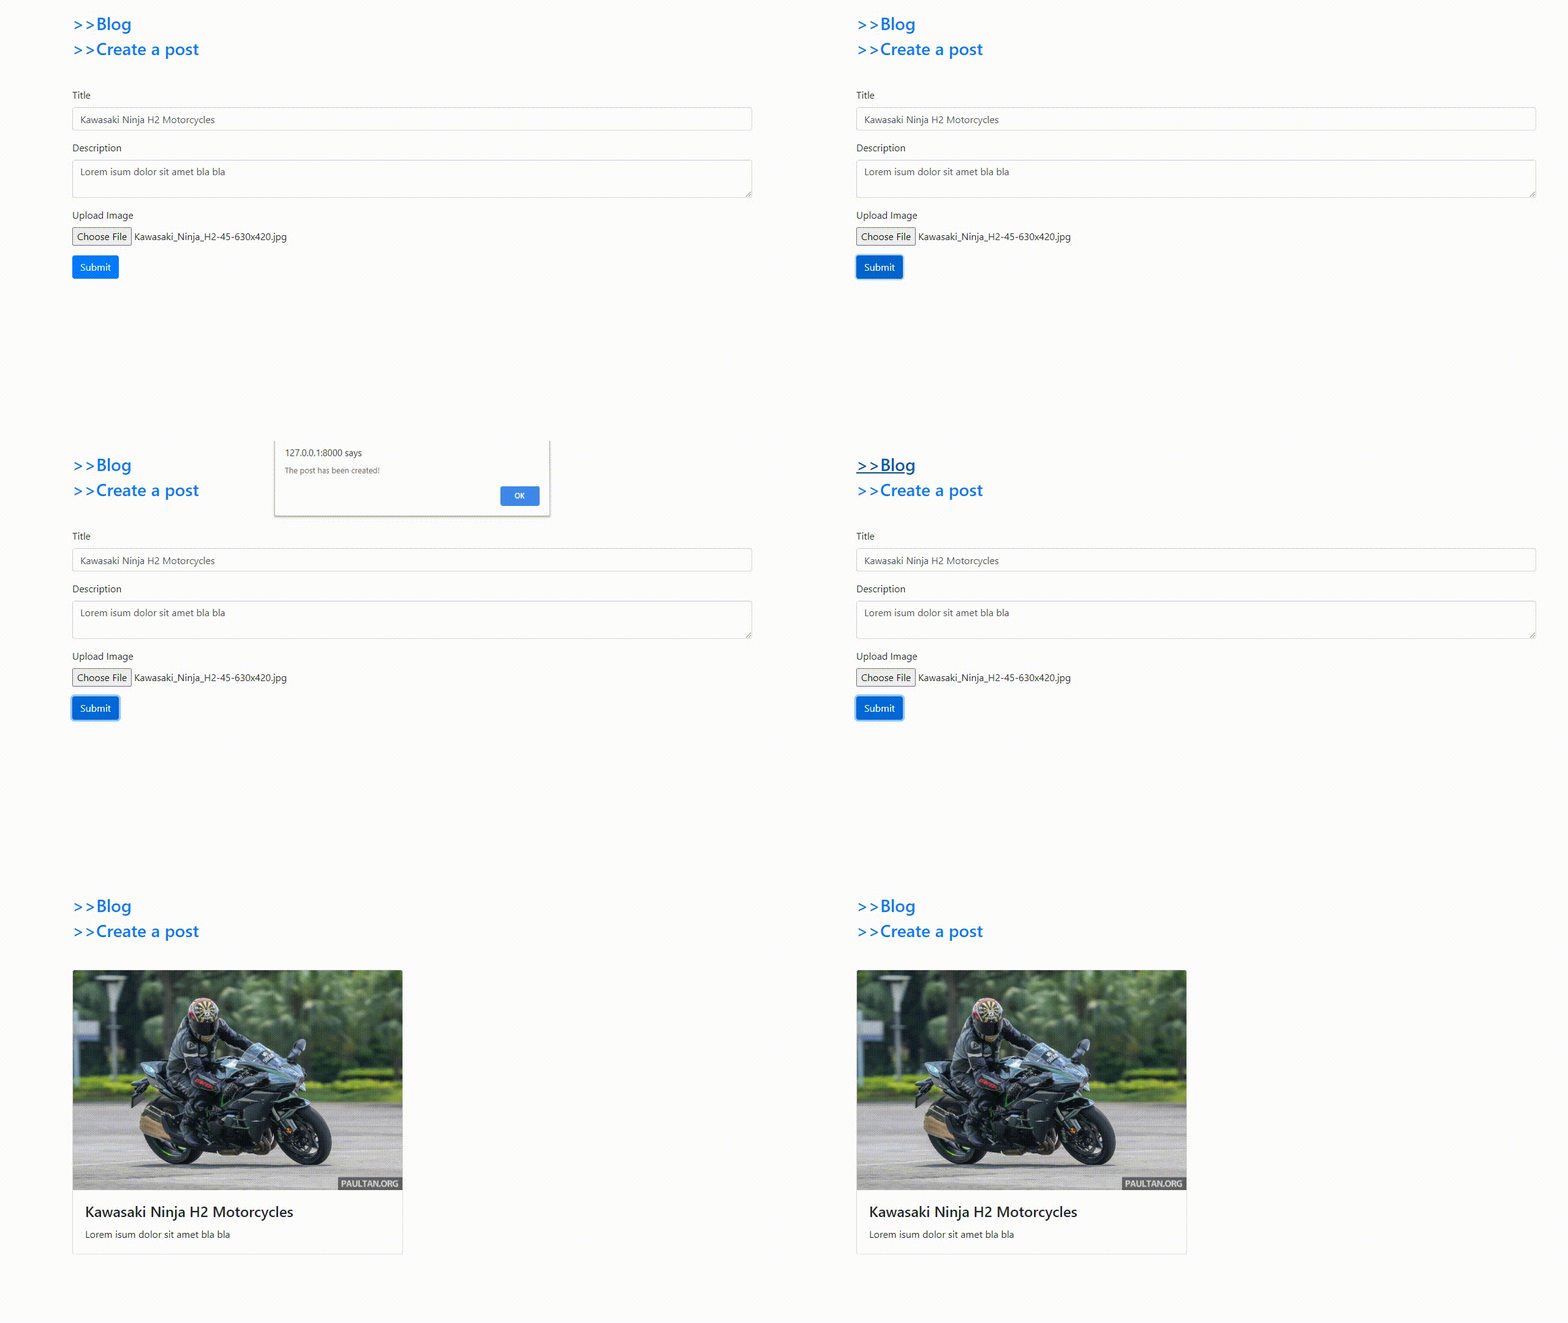
That’s all! Now, you can run the Django server and check the functionality. It will look like below:

You can get the source code from my GitHub repository below:


