As web developers, the architectural decisions we make significantly impact the performance, security, scalability, and development experience of our applications.
One architectural approach that has gained significant traction in addressing these needs is JAMstack — a modern web development architecture that focuses on delivering better performance, higher security, cheaper scaling, and improved development experience.
JAMstack, short for JavaScript, APIs, and Markup, aims to boost the performance and security of web applications by separating the front-end presentation from the back-end infrastructure. It achieves this by utilizing client-side JavaScript, reusable APIs, and prebuilt Markup, resulting in efficient and scalable web experiences.
Understanding JAMstack Architecture
The Jamstack architecture, a term coined by Mathias Biilmann, the co-founder of Netlify, encompasses a set of structural practices that rely on client-side JavaScript, reusable APIs, and prebuilt markup to build websites and applications. At its core, the Jamstack advocates for rendering web applications into static HTML files during the build process and serving them efficiently to clients.
This structural paradigm stands on three key pillars: JavaScript, APIs, and Markup.
JavaScript (Client-Side Code): JavaScript is utilized on the client-side to add interactivity and dynamic behavior to web applications. With JAMstack, JavaScript plays a crucial role in enhancing the user experience by enabling features like client-side routing, form submissions, and dynamic content updates.
APIs (Reusable Services): APIs serve as the backbone of JAMstack architecture, by acting as a gateway to reusable services and data sources. These APIs can be third-party services or custom-built endpoints to handle various functionalities such as authentication, data fetching, and content management.
Markup (Prebuilt Templates): Markup refers to the static content and templates that are prebuilt and served to users without requiring server-side processing. With JAMstack, Markup is generated during the build process and served as static files, eliminating the need for server-side rendering for every request. This approach significantly improves performance by reducing server load and enabling efficient caching mechanisms.
Rendering Logic and Data Storage
When considering the suitability of the Jamstack for a project, developers often evaluate where to implement rendering and logic in the application and where to store data. This decision involves trade-offs and considerations based on the specific requirements of the project.
There are various various viable options at the developer’s disposal to achieve rendering and data storage:
SSR — the monolithic method:
- Rendering Logic: Server-side rendering with the server rendering HTML per request.
- Data Storage: Database queries and render templates on the server.
Static site/Jamstack:
- Rendering Logic: Pre-rendered HTML served by server to the browser.
- Data Storage: Build process during which static site generators generate HTML from markdown or source data.
Single page application (SPA):
- Rendering Logic: Client-side rendering with the browser executing JavaScript code to generate HTML.
- Data Storage: Data fetched and manipulated on the client-side.
Data Storage with APIs
Since the Jamstack approach advocates for decoupling the client and server code, it mostly relies on an API based approach (GraphQL or REST) to statically generate the application during the build process. This pre-rendered app is then augmented with additional client-side functionality.
These APIs can be third-party services or custom-built APIs deployed as serverless functions or microservices, serving as a data storage mechanism, providing functionalities such as content management, ecommerce, identity/authentication, payments, and search.
Rendering Immediate User Interactions
One common challenge in Jamstack applications is rendering immediate user interactions, such as comments on blog posts. These interactions require rebuilding the application for every state change, which can be time-consuming.
Approaches to handling immediate user interactions in Jamstack applications include:
- Triggering a rebuild for every user interaction, which can become inefficient for frequent interactions.
- Delegating immediate interactions to the client-side, avoiding rebuilds for static content.
- Implementing incremental static re-generation to re-render pages as traffic comes in, reducing the time cost of builds.
Introduction to Next.js
Next.js, a React-based framework, offers hybrid static and server rendering, making it well-suited for Jamstack applications. It provides developers with a robust set of tools and features that streamline the development process and enable the creation of fast, SEO-friendly, and highly performant web applications.
Here are some of the key features and capabilities of Next.js:
Server-Side Rendering (SSR) and Static Site Generation (SSG): Next.js offers built-in support for server-side rendering (SSR) and static site generation (SSG), allowing developers to render React components on the server and generate static HTML files at build time. This approach ensures faster initial page loads and optimal SEO performance by serving pre-rendered content to users.
Automatic Code Splitting: Next.js automatically splits JavaScript bundles into smaller chunks, enabling efficient code splitting and lazy loading of resources.
Built-in CSS and Sass Support: Comes with built-in support for CSS and Sass, allowing developers to easily style their applications using popular styling languages.
Dynamic Route Generation: Simplifies the creation of dynamic routes by providing a flexible routing system that supports both static and dynamic routes. Developers can define dynamic routes using parameters and access route parameters within their components.
API Routes: Provides built-in support for creating API routes, allowing developers to define serverless functions that handle API requests directly within their Next.js projects. This enables seamless integration with external APIs and services, making it super easy to build backend functionality without the need for a separate server.
Initiating a Next.js Project
Before we begin, let’s ensure that you have npx installed globally on your system. npx is a package runner tool that comes with npm version 5.2.0 and higher. It allows you to execute packages directly from the npm registry without having to install them globally.
Install npx globally by running the following command:
npm install -g npx
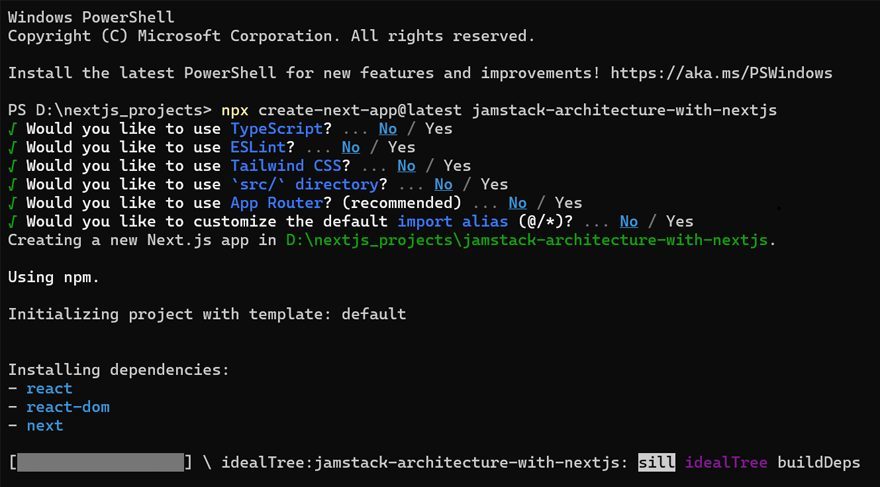
Next, use it to bootstrap a new Next.js project with the following command:
npx create-next-app@latest jamstack-architecture-with-nextjs

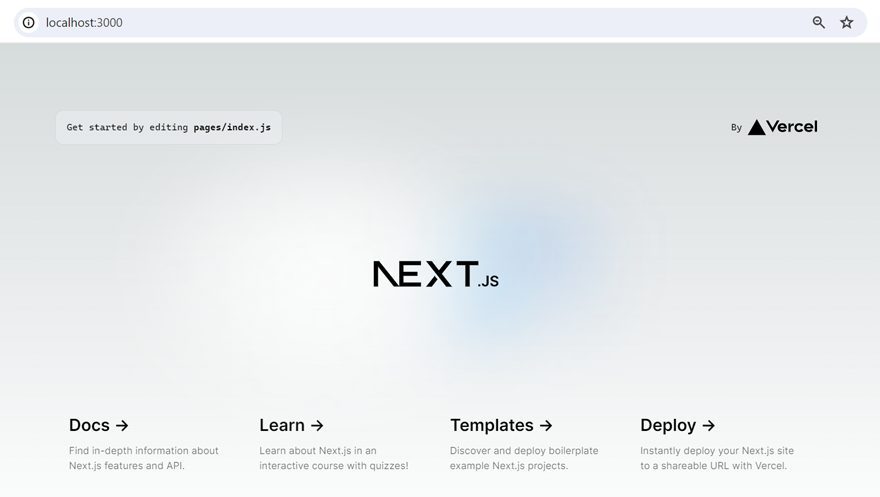
This command initializes a new Next.js project named jamstack-architecture-with-nextjs with the latest version of Next.js, along with all the necessary files and dependencies.

Understanding Next.js Project Structure
We now have a project structure that will serve as a basis for our Next.js application.
jamstack-architecture-with-nextjs/
├── .gitignore
├── README.md
├── node_modules/
├── package.json
├── public/
│   ├── favicon.ico
│   └── vercel.svg
├── styles/
│   └── Home.module.css
├── pages/
│   ├── api/
│   │   └── hello.js
│   └── index.js
└── yarn.lock
Let’s have a brief overview of some of the key elements in a Next.js project:
Pages and Routing: Next.js uses a file-based routing system where each page is represented by a corresponding file in the pages directory. Create the necessary pages for your application within the pages directory, and Next.js will automatically handle the routing based on the file structure.
Server-Side Rendering (SSR): Provides Next.js’s built-in support for server-side rendering (SSR) to pre-render React components on the server and deliver pre-rendered HTML to users.
Static Site Generation (SSG): Next.js also supports static site generation (SSG), where pages are pre-rendered at build time and served as static HTML files.
Data Fetching: Next.js provides various methods for fetching data, including fetching data on the server with getServerSideProps, fetching data at build time with getStaticProps, and fetching data on the client-side with useEffect and fetch. Choose the appropriate data fetching method based on your application’s requirements and performance considerations.
Styling and CSS: Next.js comes with built-in support for CSS and Sass, allowing you to easily style your components using popular styling languages. You can import stylesheets directly into your components or use CSS modules for scoped styles.
Data Fetching Methods in Next.js:
In Next.js, the selection of data fetching method is pivotal in shaping the rendering and delivery of content to users.
As briefly mentioned in the previous section, Next.js offers two primary methods for data fetching: getServerSideProps and getStaticProps, each with specific functions and benefits.
getServerSideProps
This method is essential for server-side rendering (SSR) in Next.js, fetching data with each request to enable direct server-side rendering of dynamic content. It is suitable for scenarios with frequently changing content or requiring user-specific data. By dynamically fetching data per request, getServerSideProps ensures up-to-date content that can adapt to user interactions or dynamic data sources.
Here is a basic code example of utilizing getServerSideProps method in your Next.js project:
// getServerSideProps example

export async function getServerSideProps(context) {
  // Fetch data from external API
  const res = await fetch(`https://api.example.com/data`);
  const data = await res.json();
  // Pass data to the page via props
  return {
    props: { data }
  };
}
export default function Home({ data }) {
  return (
    <div>
      {/* Render data */}
    </div>
  );
}
The getServerSideProps function retrieves data on the server and pass it as props to your Next.js page, while ensuring faster initial page loads and optimal SEO performance.
getStaticProps
On the other hand, getStaticProps is essential for static site generation (SSG) in Next.js. This method fetches data at build time and generates static HTML files for each page, which can then be served to users without needing to regenerate the page on each request.
Check out the below code snippet that uses getStaticProps to pass data to a Next.js page:
// getStaticProps example

export async function getStaticProps() {
  // Fetch data from external API
  const res = await fetch(`https://api.example.com/data`);
  const data = await res.json();
  // Pass data to the page via props
  return {
    props: { data }
  };
}
export default function Home({ data }) {
  return (
    <div>
      {/* Render data */}
    </div>
  );
}
The getStaticProps is particularly useful for content that doesn’t change frequently and can be pre-rendered at build time. By pre-rendering static content, getStaticProps significantly improves performance by serving pre-rendered HTML files directly from a CDN, reducing server load and improving page load times for users.
Bear in mind that in JAMstack architecture with Next.js, the choice between getServerSideProps and getStaticProps depends on the specific requirements of the application and the nature of the content being rendered.
Next.js provides extensive flexibility in choosing the pre-rendering approach for individual pages. Developers can create a “hybrid” Next.js application by combining static generation for the majority of pages and server-side rendering for specific ones. Moreover, statically generated pages can be re-generated at run-time, offering adaptability in enhancing performance and user engagement.
Installing Prisma
Prisma, an open-source ORM, handles database operations and integrates seamlessly with Next.js. Using Prisma allows you to interact with a range of databases using an auto-generated query builder.
Start by first installing Prisma globally on your system using npm or yarn:
npm install -g prisma

Initialize Prisma in your project directory by running the following command and follow the interactive prompts to set up your Prisma configuration:
prisma init

Define your database schema in the prisma/schema.prisma file. This file stores your data model using Prisma’s schema language.
A simple Prisma schema for a blog application might look like this:
generator client {
  provider = "prisma-client-js"
}

datasource db {
  provider = "your database provider"
  url      = "your database url"
}

model Post {
  id        Int      @id @default(autoincrement())
  title     String
  content   String
  createdAt DateTime @default(now())
  updatedAt DateTime @updatedAt
  comments  Comment[]
}
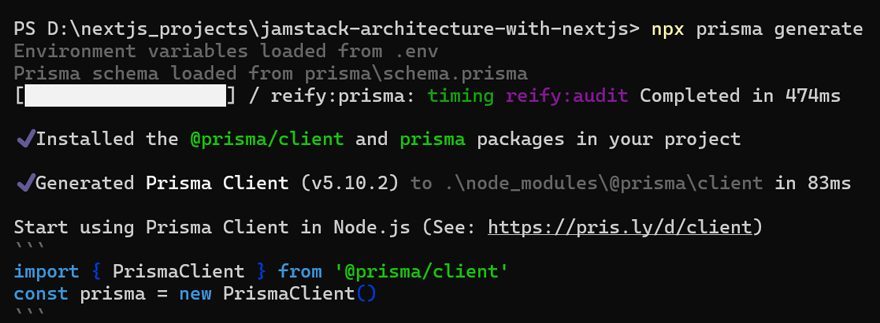
Finally generate the Prisma client by running:
npx prisma generate

The Incremental Static Generation Approach
Next.js allows developers to define how each page is rendered, supporting static generation and server-side rendering. Additionally, Next.js offers incremental static re-generation, allowing pages to be re-generated as traffic comes in, reducing build times.
Utilizing incremental static re-generation ensures that each page is efficiently rendered and updated as needed. This approach is crucial for Jamstack architecture as it allows for real-time updates without sacrificing performance. By revalidating at most once every second (revalidate: 1), the application ensures that the content is always fresh and up-to-date, providing users with a near perfect browsing experience.
For example, a blog page lists recent blog posts and supports incremental static re-generation for real-time updates. Here’s an example of how you can implement it in Next.js:
// pages/blog.js

import Link from 'next/link';
import { PrismaClient } from '@prisma/client';

const prisma = new PrismaClient();

const Home = ({ posts }) => {
  return (
    <main>
      <h1>Welcome to the Blog!</h1>
      <div>
        {posts.map((post) => (
          <Link href={`/post/${post.id}`} key={post.id}>
            <a>
              <h3>{post.title}</h3>
              <p>{post.excerpt}</p>
            </a>
          </Link>
        ))}
      </div>
    </main>
  );
};

export default Home;

export const getStaticProps = async () => {
  const posts = await prisma.post.findMany({
    orderBy: {
      id: 'desc',
    },
  });

  return {
    props: {
      posts,
    },
    revalidate: 1,
  };
};
We import the necessary modules and define the Post prop. The Home component renders a list of blog posts fetched from the database using the getStaticProps function.
The getStaticProps function fetches posts from the database and returns them as props, with the revalidate option set to 1 second for incremental static re-generation.
Next, you may also have a post pages to render individual blog posts and associated comments with incremental static re-generation for dynamic content.
Here’s an example of how you can implement it in Next.js:
// pages/post/[id].js

import { PrismaClient } from '@prisma/client';

const prisma = new PrismaClient();

const Post = ({ post }) => {
  return (
    <main>
      <h1>{post.title}</h1>
      <p>{post.content}</p>
    </main>
  );
};

export default Post;

export const getStaticPaths = async () => {
  const posts = await prisma.post.findMany({
    select: {
      id: true,
    },
  });

  const paths = posts.map((post) => ({
    params: { id: String(post.id) },
  }));

  return {
    paths,
    fallback: true,
  };
};

export const getStaticProps = async ({ params }) => {
  const postId = Number(params?.id);
  const post = await prisma.post.findUnique({
    where: {
      id: postId,
    },
    include: {
      comments: true,
    },
  });

  return {
    props: {
      post,
    },
    revalidate: 1,
  };
};
The Post component renders a single blog post fetched from the database using the getStaticProps function, while the getStaticPaths function fetches all existing post IDs from the database to generate paths for static generation.
The getStaticProps function fetches the data for a given post and includes associated comments, with the revalidate option set to 1 second for incremental static re-generation. Utilizing an incremental static re-generation ensures that each web page is efficiently rendered and updated as needed. This approach adheres to Jamstack principles by providing dynamic content while maintaining optimal performance.
JAMstack Architecture Diagram
Following is a JAMstack architecture diagram that illustrates the core components of JAMstack: JavaScript, APIs, and Markup. It visually represents how JAMstack decouples front-end presentation from back-end infrastructure, enabling fast, secure, and scalable web applications.
    +---------------------------------------------------+
    |            JAMstack Architecture                  |
    +---------------------------------------------------+
    |                                                   |
    |            +-------------------------+            |
    |            | JavaScript (Client-side)|            |
    |            +-------------------------+            |
    |                      |                            |
    |            +-------------------------+            |
    |            |      APIs (Reusable)    |            |
    |            +-------------------------+            |
    |                      |                            |
    |            +-------------------------+            |
    |            | Markup (Prebuilt)       |            |
    |            +-------------------------+            |
    |                                                   |
    |     Rendering Logic and Data Storage Options      |
    |                                                   |
    |  +-----------------+  +-----------------+         |
    |  |     SSR         |  |     Static      |         |
    |  |(Server-side)    |  | Site Generation |         |
    |  +-----------------+  +-----------------+         |
    |          |                    |                   |
    |          |                    |                   |
    |          |                    |                   |
    |          |                    |                   |
    |          |                    |                   |
    |          |                    |                   |
    |  +-----------------+  +-----------------+         |
    |  |   Page(Client-   |  |  Data Storage  |         |
    |  |   side)          |  |  with APIs     |         |
    |  +-----------------+  +-----------------+         |
    |                                                   |
    |     Incremental Static Generation                 |
    |                                                   |
    |     +---------------------------+                 |
    |     |   Server-side Rendering   |                 |
    |     +---------------------------+                 |
    |                                                   |
    |     +---------------------------+                 |
    |     |   Static Site Generation  |                 |
    |     +---------------------------+                 |
    |                                                   |
    |     +---------------------------+                 |
    |     |   Web Application         |                 |
    |     +---------------------------+                 |
    |                                                   |
    +---------------------------------------------------+
Conclusion
The Jamstack architecture offers a modern approach to building web applications with improved performance, security, and scalability, while Next.js stands as a powerful tools for implementing Jamstack applications, allowing developers to utilize static generation, server-side rendering, and incremental static re-generation.
It is also highly critical to have a clear understanding of the trade-offs and considerations involved in rendering and data storage, so as to make informed decisions when architecting Jamstack applications. Given the impressive flexibility and capabilities offered by Next.js, dynamic and interactive Jamstack applications can be build to meet the specific requirements of any project.


