Next.js is a React framework that allows you to build both client and server-side apps. It ships with handy features such as routing, static exporting, server rendering, internationalization, and so on, which make Next.js a great choice regarding developer experience. In this tutorial, we will be looking at Next.js, a popular framework for building static and dynamic React apps. We will conclude the article by telling you why you should keep an eye on Next.js.
What is Next.js?
As we said earlier, Next.js is the React Framework for production. It gives you a great developer experience with all the features you need for production, such as hybrid static and server rendering, TypeScript support, automatic code-splitting, route pre-fetching, and more. Next.js is created and maintained by Vercel. It’s built with React, Node.js, Babel, and Webpack. Next.js supports both client and server-side rendering, which make Next great regarding SEO.
Compared to React.js, Next is more advanced because it’s technically a framework, and as you might know, React is a library. If you want to build a multi-page app, then you’ll need to install React Router to do so. When rendering a React App on the server, you’ll need an extra library to achieve it. You also have to maintain these libraries, which might be time-consuming and a problem in some cases. It’s what Next.js intends to solve by offering all features you need for production.
Routing
Next.js uses the file-system to enables routing in your app. By default, Next creates the pages directory to holds your pages. It treats automatically every file with the extensions .js, .jsx, .ts, or .tsx as a route. With some configuration, you can use as well other extensions such as .md, .mdx, and so on. Even if Next does not rely on React Router to enable routing in your app, a page in Next.js is still a React component that has a route based on its file name. Now, let’s see how routing works in Next.js. Consider this folder structure as an example:
├── pages
|  ├── index.js
|  ├── contact.js
|  ├── about.js
|  ├── my-nested-routes
|  |  ├── about.js
|  |  └── index.js
|  └── api
|  |  └── my-api-endpoint.js
As you can see here, we have several files or pages, to be precise. Let’s break it down:
Routes
– index.js is the home page of our Next.js app. You can visit it on the browser on http://localhost:3000/.
– contact.js is the contact page of our Next.js app. You can visit it on the browser on http://localhost:3000/contact.
– about.js is the about page of our Next.js app. You can visit it on the browser on http://localhost:3000/about.
Nested routes
– my-nested-routes/index.js is a nested route. You can visit it on the browser on http://localhost:3000/my-nested-routes.
– my-nested-routes/about.js is also a nested route. You can visit it on the browser on http://localhost:3000/my-nested-routes/about.
API Routes
– api/my-api-endpoint.js is an API route. You can reach the endpoint on http://localhost:3000/api/my-api-endpoint.
Since version 9, Next.js enables you to add API routes to your app. Meaning that, now, you can use Next to build APIs with Node.js, Express, GrapQL, Apollo Server, and so on. Next.js will use the file-system to treat files inside the folder pages/api as API endpoints. With the routing in Next explained, we can now dive into data fetching.
Data fetching
Next.js offers several ways for fetching data since it supports both static generation and server-side rendering.
getStaticProps
getStaticProps is an asynchronous function provided by Next.js that allows you to get the props on your component. Next.js will pre-render the page at build time using the props returned by getStaticProps. It runs on the server-side and is only available on static generation.
getStaticPaths
Next.js enables you to define a dynamic route in your app. Instead of using a static name, you can use brackets and then let Next.js renames your dynamic route within the value that you passed in. With the function getStaticPaths, you can get the list of paths that have been rendered to HTML at build time. Next.js will statically pre-render all the paths specified by getStaticPaths. The method getStaticPaths runs on the server-side and is only available on static generation.
getServerSideProps
The function getServerSideProps is similar to getStaticProps. Except that this method is available on server-side rendering. And also, Next.js will pre-render the page on each request and not at build time using the data returned by getServerSideProps.
Fetching data on the client-side
The previous methods are only available on the server — they can’t run on the browser. On the client-side, you can use any methods supported by React.js for data fetching, such as Fetch API, Axios, React Query, SWR, and so on. With these core concepts of Next.js in place, we can now get hands dirty and setting up a new Next.js app in the next section.
Setting up a new Next.js app
Next.js enables you to create a new app either with Create Next App or manually with Babel, Webpack, Node.js, and so on. According to the documentation, Create Next App is the recommended way for starting a Next app since it ships with a modern setup and best practices. However, feel free to create a new app manually in order to dive more into the setup. Now, begin by opening your command-line interface (CLI) and then running this following command:
npx create-next-app next-starter-app
Next, let’s structure the project as follows:
├── components
|  └── Post.js
├── pages
|  ├── about.js
|  └── index.js
With this in place, let’s create our components and then use them on the home page.
Creating the components
– components/Post.js
const Post = ({ post }) => (
	<div className="Card">
	  <h1>{post.title}</h1>
	  <p className="Card--body">{post.body}</p>
	</div>
)

export default Post;
This component is responsible for the display of the post object. It receives the data as a parameter and then shows the item accordingly.
– pages/index.js
import Post from "../components/Post";

export default function IndexPage() {
const posts = [
	{
		id: 1,
		title: "Consectetur adipiscing elit",
		body: "Sed ut perspiciatis unde omnis iste natus error sit voluptatem accusantium doloremque laudantium"
	},
	{
		id: 2,
		title: "At vero eos et accusamus",
		body: "Itaque earum rerum hic tenetur a sapiente delectus, ut aut reiciendis voluptatibus maiores alias"
	},
	{
		id: 3,
		title: "Similique sunt in culpa qui officia",
		body: " Minus id quod maxime placeat facere possimus, omnis voluptas assumenda est, omnis dolor repellendus"
	}
];

return (
	<div className="container">
		<h1>My Posts</h1>
		{posts.map((post) => (
		<Post key={post.id} post={post} />
		))}
	</div>
);
}
As you can see here, we have an array that contains the posts. Next, we loop through the data and then use the Post component to display the items. Let’s add some style to our Next app using styled-jsx. You don’t need to install it since it comes with Next.js.
– pages/index.js
import Post from "../components/Post";

export default function IndexPage() {
const  posts = [
{
	id: 1,
	title: "Consectetur adipiscing elit",
	body: "Sed ut perspiciatis unde omnis iste natus error sit voluptatem accusantium doloremque laudantium"
},
{
	id: 2,
	title: "At vero eos et accusamus",
	body: "Itaque earum rerum hic tenetur a sapiente delectus, ut aut reiciendis voluptatibus maiores alias"
},
{
	id: 3,
	title: "Similique sunt in culpa qui officia",
	body: " Minus id quod maxime placeat facere possimus, omnis voluptas assumenda est, omnis dolor repellendus"
}
];

return (
<>
	<div className="container">
		<h1>My Posts</h1>
		{posts.map((post) => (
		<Post key={post.id} post={post} />
		))}
	</div>
<style jsx global>
	{`
	@import url("https://fonts.googleapis.com/css2?family=Nunito:wght@400;700&display=swap");

	* {
		margin: 0;
		padding: 0;
		box-sizing: border-box;
	}
	body {
		font-family: "Nunito", sans-serif;
		background: #222;
		color: #fff;
		font-size: 1rem;
	}
	.container {
		max-width: 728px;
		margin: auto;
		padding: 1rem;
	}
	.container > h1 {
		text-align: center;
		text-transform: uppercase;
		margin-bottom: 1rem;
		font-size: 1.4rem;
	}
	h1 {
		text-transform: capitalize;
		font-size: 1.1rem;
	}
	.Card {
		background: #333;
		padding: 1rem;
		margin-bottom: 1rem;
	}
	.Card--body {
		color: #999;
	}
	`}
</style>
</>
);
}
With this step further, we can now test if the app works on the browser. To do so, begin by opening the project on the CLI and then running this command:
yarn dev
Or for npm
npm run dev
Let’s visit on the browser http://localhost:3000

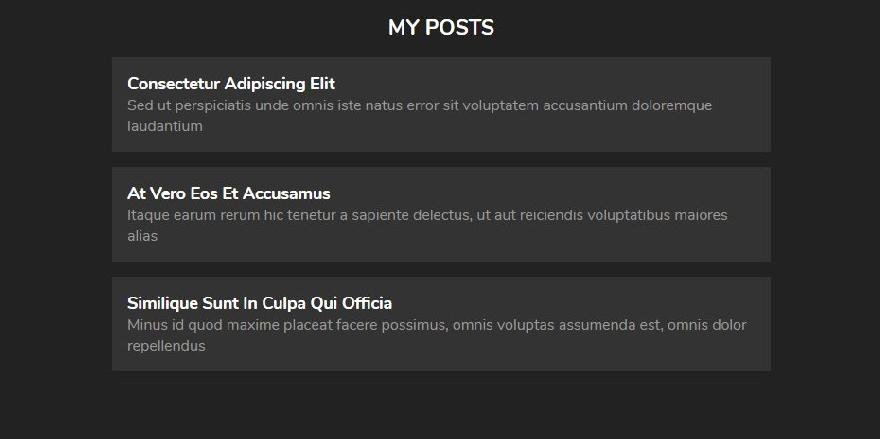
Great! Our very simple Next app is up and running. That’s it. This final step ends our getting started guide with Next.js.
Conclusion
In this tutorial, we introduced you to Next.js, the React framework for production. Next is used by big companies, and it keeps evolving very quickly. Version 10 has been released last week, which comes with nice features such as image optimization, internationalization, analytics, and more. Next.js makes building full-stack React Apps easy with the help of API Routes. It’s definitely something to try out on your next project.
You can find the finished project in this CodeSandbox. You can find other great content like this on my blog or follow me on Twitter to get notified. Thanks for reading!
Resources
Check out these resources to dive deeper into the content of this tutorial:
– Next.js basics
– Next.js Starter Templates
– Data fetching in Next.js
– Routing in Next.js
– Learn Next.js


