
Real-time chat applications are all the rage these days, and I can see why. They’ve transformed the way we communicate, collaborate, and socialize, making it easy to send and receive messages instantly. That’s why I’m excited to show you how to create your own real-time chat application using WebSockets and Node.js.
In my opinion, WebSockets are one of the best things to happen to real-time communication. They enable a single, long-lived connection between a client and a server, doing away with the need for constant polling or a barrage of HTTP requests. This reduces latency and gives your application a performance boost. And let me tell you, Node.js is the perfect partner for WebSockets. As a server-side JavaScript runtime built on Chrome’s V8 JavaScript engine, Node.js shines when it comes to real-time applications, thanks to its event-driven, non-blocking I/O model.
So, in this article, I’ll walk you through setting up your development environment, crafting the server-side and client-side components of your chat application, and adding some extra bells and whistles. By the time we’re done, you’ll have a fully functional real-time chat application that you can tweak and tailor to your heart’s content.

Prerequisites
Before we dive into building our chat application, I want to make sure you’re familiar with a few key concepts and tools. Trust me, having a good grasp of these will make your life a whole lot easier as we go through the process. So, here’s what you should have under your belt:
- Basic understanding of JavaScript, HTML, and CSS: We’ll be using these technologies to create both the server-side and client-side parts of our application. If you’re new to them or need a refresher, there are plenty of tutorials and resources available online.
- Familiarity with Node.js and npm: Node.js will be powering our chat application, while npm will help us manage packages and dependencies. If you haven’t used them before, I recommend checking out the Node.js and npm documentation, as well as some beginner-friendly tutorials.
- A trusty text editor and a modern web browser: You’ll need a comfortable place to write your code and a browser to test it out. Feel free to use your favorites—I’m a big fan of Visual Studio Code and Google Chrome, but you do you.
Now that we’ve got the prerequisites covered, let’s get our development environment set up!
Setting Up the Development Environment
Setting up a solid development environment is like laying the foundation for a house—it makes everything else go more smoothly. So let’s get everything in place to build our chat application.
- Installing Node.js and npm: First things first, make sure you have Node.js and npm installed on your machine. If you haven’t already, head over to the Node.js official website and download the latest LTS (Long Term Support) version. The good news is, npm comes bundled with Node.js, so you’ll get both in one shot.
- Creating a new project folder and initializing it with npm: Next, let’s create a new folder for our chat application. I like to keep things organized, so I suggest creating a folder named “real-time-chat” or something similar. Once you’ve got your folder, open up your favorite terminal or command prompt, navigate to the folder, and run
npm init -y. This will create a package.json file that’ll help us manage our project’s dependencies. - Installing required packages: Now, we’ll need a few packages to help us build our chat application. Run the following command in your terminal to install them:
npm install express websocket
Here’s a quick rundown of what these packages do:
express: A lightweight web framework for Node.js that makes it easy to create and manage web servers.websocket: A WebSocket library for Node.js that simplifies working with WebSocket connections.
With our development environment all set up, we’re ready to start building the server-side of our chat application. Let’s go!
Building the Server-side Application
Now that our development environment is ready, let’s dive into building the server-side portion of our chat application. We’ll be using Express.js and the WebSocket library to create a solid foundation for real-time communication.
- Creating the server using Express.js: First, let’s create a new file in our project folder named server.js. This is where the magic will happen. Open it up in your text editor and add the following code to set up a basic Express.js server:
const express = require('express');
const app = express();
const port = process.env.PORT || 3000;

app.use(express.static('public'));
This code sets up a simple server that listens on port 3000 (or another port, if specified in the environment variables) and serves static files from a “public” folder. We’ll create that folder in the next section when we work on the client-side part of our chat app.
- Setting up a WebSocket server using the WebSocket package: Now, let’s add WebSocket support to our server. First, import the WebSocket library at the top of your server.js file:
const WebSocket = require('websocket').server;Next, let’s create a WebSocket server and attach it to our Express.js server. Add the following code right after the app.use line in your server.js file:
const http = require('http'); const server = http.createServer(app); const wsServer = new WebSocket({ httpServer: server }); server.listen(port, () => { console.log(`Server listening on port ${port}`); }); - Handling WebSocket events for connecting, messaging, and disconnecting: With our WebSocket server in place, it’s time to handle the events that will drive our chat application. We’ll need to listen for three main events: when a client connects, when a client sends a message, and when a client disconnects. Add the following code to your server.js file, right after the wsServer declaration:
const clients = new Map();

wsServer.on('request', (request) => {
  const connection = request.accept(null, request.origin);
  const clientId = new Date().getTime();
  clients.set(clientId, connection);

  console.log(`Client ${clientId} connected`);

  connection.on('message', (message) => {
    if (message.type === 'utf8') {
      const data = JSON.parse(message.utf8Data);
      data.clientId = clientId;

      for (const [id, clientConnection] of clients.entries()) {
        if (id !== clientId) {
          clientConnection.send(JSON.stringify(data));
        }
      }
    }
  });

  connection.on('close', () => {
    clients.delete(clientId);
    console.log(`Client ${clientId} disconnected`);
  });
});
This code sets up event listeners for connection, message, and disconnection events. When a new client connects, we assign them a unique ID based on the current timestamp, which allows us to keep track of individual clients. When a client sends a message, we broadcast it to all other connected clients.
Now our server-side application is up and running! Next, let’s build the client-side portion of our chat app.
Creating the Client-side Application
With our server-side application in place, it’s time to create the client-side portion of our chat app. We’ll be building a simple yet functional chat interface using HTML, CSS, and JavaScript.
- Building the HTML structure for the chat interface: First, let’s create the HTML structure for our chat application. In your project folder, create a new folder named “public” (this is the folder our server is set to serve static files from). Inside the “public” folder, create a new file named index.html, and add the following code:
<!DOCTYPE html>
<html lang="en">
<head>
  <meta charset="UTF-8">
  <meta name="viewport" content="width=device-width, initial-scale=1.0">
  <title>Real-Time Chat</title>
  <link rel="stylesheet" href="style.css">
</head>
<body>
  <div class="chat-container">
    <div class="chat-messages" id="chatMessages"></div>
    <form class="chat-form" id="chatForm">
      <input type="text" class="chat-input" id="chatInput" placeholder="Type your message...">
      <button type="submit" class="chat-submit">Send</button>
    </form>
  </div>
  <script src="chat.js"></script>
</body>
</html>
This HTML structure includes a container for our chat messages, a form for sending messages, and references to our CSS and JavaScript files, which we’ll create next.
- Styling the chat interface using CSS: Now, let’s make our chat interface look nice and clean. Create a new file in the “public” folder named style.css, and add the following CSS code:
body {
  font-family: Arial, sans-serif;
  margin: 0;
  padding: 0;
}

.chat-container {
  max-width: 800px;
  margin: 40px auto;
  border: 1px solid #ccc;
  border-radius: 4px;
  display: flex;
  flex-direction: column;
  height: 70vh;
}

.chat-messages {
  flex-grow: 1;
  padding: 16px;
  overflow-y: auto;
}

.chat-form {
  display: flex;
  padding: 16px;
  background-color: #f5f5f5;
  border-top: 1px solid #ccc;
}

.chat-message {
  color: blue;
  margin-bottom: 0.5rem;
}

.chat-input {
  flex-grow: 1;
  border: none;
  border-radius: 4px;
  padding: 8px 16px;
  outline: none;
}

.chat-submit {
  margin-left: 8px;
  border: none;
  border-radius: 4px;
  padding: 8px 16px;
  background-color: #007bff;
  color: #fff;
  font-size: 16px;
  cursor: pointer;
}

.chat-submit:hover {
  background-color: #0056b3;
}
This CSS code gives our chat interface a clean, minimalistic look that’s easy on the eyes.
- Implementing the JavaScript logic to connect to the WebSocket server and handle events: Finally, let’s add the JavaScript logic to power our chat application. Create a new file in the “public” folder named chat.js, and add the following code:
const chatMessages = document.getElementById("chatMessages");
const chatForm = document.getElementById("chatForm");
const chatInput = document.getElementById("chatInput");

const serverUrl = "ws://" + window.location.hostname + ":3001";
const socket = new WebSocket(serverUrl);

socket.onopen = () => {
  console.log("Connected to the chat server");
};

socket.onmessage = (event) => {
  const data = JSON.parse(event.data);
  console.log(data);
  addMessageToChat(data);
};

socket.onclose = () => {
  console.log("Disconnected from the chat server");
};

chatForm.addEventListener("submit", (event) => {
  event.preventDefault();
  sendMessage(chatInput.value);
  chatInput.value = "";
});

function sendMessage(text) {
  if (!text.trim()) return;
  const message = {
    type: "text",
    content: text,
  };
  socket.send(JSON.stringify(message));
}

function addMessageToChat(message) {
  const messageElement = document.createElement("div");
  messageElement.classList.add("chat-message");
  messageElement.textContent = `Client ${message.clientId}: ${message.content}`;
  chatMessages.appendChild(messageElement);
  chatMessages.scrollTop = chatMessages.scrollHeight;
}
This JavaScript code connects to our WebSocket server, listens for incoming messages, sends messages, and updates the chat interface accordingly.
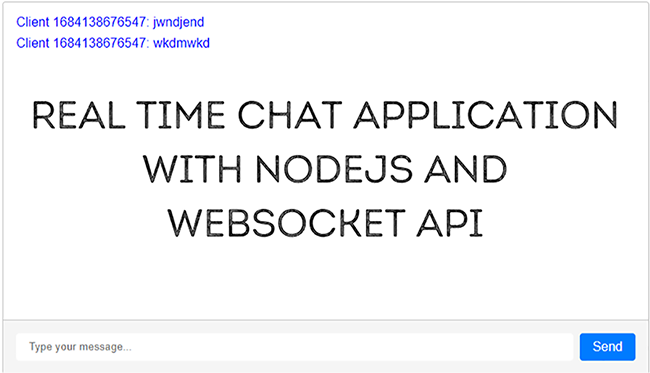
With the client-side application completed, you can now test your real-time chat application. Start your server by running node server.js in your terminal, and open your browser to http://localhost:3000. You should see the chat interface, and you can test the real-time functionality by opening multiple browser windows or tabs.

Adding Features and Improvements
Now that we’ve built the core functionality of our real-time chat application, there are countless features and improvements we can add to enhance the user experience. I’ll outline a few ideas to get your creative juices flowing, but feel free to come up with your own unique enhancements!
Usernames and Avatars
Let’s face it, identifying users by a timestamp-based ID isn’t the most friendly way to go. Why not add a username input field so users can choose their own display names? You could even allow users to upload or choose avatars for a more personalized touch. Here’s how you can do this:
- Implement a form or input field on the client-side to capture the username.
- Store the username in a user profile or session data on the server-side.
- Associate the username with the user’s chat messages and interactions.
- Implement an avatar storage system, either by allowing users to upload avatar images or by integrating with third-party avatar services.
- Associate the selected avatar with the user’s profile or session data.
Message Timestamps
To provide better context and help users track the timing of conversations, let’s add timestamps to chat messages. For example, when a message is sent, it can be displayed with a timestamp indicating the exact time it was posted, such as “May 24, 2024, 10:30 AM.
- On the server-side, capture the timestamp when a message is received or saved.
- Include the timestamp as metadata along with the message data when sending it to clients.
- On the client-side, format the timestamp using JavaScript’s Date object or a date formatting library.
- Display the formatted timestamp next to each message in the chat interface.
Message Formatting
Plain text is great, but sometimes you want to add a little flair to your messages. Consider implementing support for basic text formatting, like bold, italic, and underlined text. You could use markdown syntax or create your own custom formatting system. To add this functionality, follow these steps:
- Decide on a formatting syntax, such as surrounding text with special characters or using a specific syntax like Markdown.
- On the client-side, implement parsing and rendering logic to detect and apply formatting to the appropriate parts of the message.
- On the server-side, transmit the message content along with the formatting syntax or processed HTML tags to clients.
- Ensure that the formatting is properly escaped or sanitized to prevent any potential security vulnerabilities, such as cross-site scripting (XSS) attacks.
Private Messaging
While group chats are fun, there are times when users might want to have private conversations. You could add support for private messaging between users, allowing them to chat one-on-one without the rest of the group seeing their messages. Here’s how you can implement this:
- Provide a user interface element (e.g., a button or menu) to initiate a private conversation with another user.
- Implement server-side logic to handle private messages separately from group messages and restrict access to private conversations.
- Establish a separate WebSocket channel or messaging protocol for private messages.
- Ensure that only the intended recipient and sender have access to the private conversation by implementing appropriate authentication and authorization mechanisms.
Typing Indicators
Ever wonder if someone is typing a response or if they’ve just stepped away from their keyboard? Adding typing indicators to your chat application can give users a real-time indication of who’s actively participating in the conversation. Here’s how:
- Track user typing events on the client-side, such as detecting key presses or changes in text input fields.
- Send typing events to the server-side whenever a user starts or stops typing.
- Broadcast these events to other users in the same chat room or conversation.
- On the client-side, display visual indicators (e.g., “User is typing…”) when typing events are received from other participants.
These are just a few ideas to get you started, but the possibilities are endless. As you continue to refine and improve your chat application, always remember to consider your users’ needs and preferences. After all, a chat app is only as good as the conversations it enables.
Securing Your Chat Application
In the world of online communication, security is of the utmost importance. Ensuring the privacy and safety of your users should be a top priority when building any chat application. In this section, I’ll discuss a few key security considerations and best practices to help protect your real-time chat application from potential threats.
- Use SSL/TLS encryption for WebSocket connections: Encrypting data transmitted between your chat application’s client and server is essential to prevent eavesdropping and man-in-the-middle attacks. By using the wss:// protocol instead of ws:// when creating a WebSocket connection, you can establish a secure channel. For example, your code snippet for creating a secure WebSocket connection can look like this in JavaScript:
const socket = new WebSocket('wss://your-chat-application.com/chat');By utilizing SSL/TLS encryption, all data exchanged between the client and server is encrypted, ensuring that it cannot be intercepted or tampered with by malicious actors.
- Sanitize user input to prevent cross-site scripting (XSS): To protect your application from cross-site scripting (XSS) attacks, it’s crucial to sanitize user input that will be displayed to other users. Sanitization helps remove or escape potentially malicious content from user-generated data. You can leverage libraries like DOMPurify to safely sanitize HTML content. Here’s an example of using DOMPurify in a JavaScript function:
function sanitizeInput(input) {
  const sanitizedInput = DOMPurify.sanitize(input);
  return sanitizedInput;
}
By sanitizing user input, you ensure that any injected script tags or malicious code within user messages are neutralized, preventing potential security vulnerabilities.
- Implement rate limiting: To prevent spam and abuse within your chat application, implementing rate limiting can be beneficial. By tracking the number of messages each user sends within a given time frame, you can restrict users who exceed the allowed rate. Here’s an example of rate limiting implementation in a server-side application using a simple counter:
// Keep track of message counts per user
const messageCounts = {};

// Check message count and apply rate limiting
function sendMessage(user, message) {
  if (messageCounts[user] && messageCounts[user] >= 5) {
    return "You have exceeded the message limit. Please wait before sending more messages.";
  }

  // Process and send the message
  // ...

  // Increment the message count for the user
  messageCounts[user] = messageCounts[user] ? messageCounts[user] + 1 : 1;

  return "Message sent successfully.";
}
By implementing rate limiting, you ensure that users cannot flood the chat with excessive messages, thereby maintaining a better user experience and preventing abuse.
- Authenticate users: Adding an authentication layer to your chat application is crucial to prevent unauthorized access and protect user data. Implementing an authentication system, such as OAuth or JWT (JSON Web Tokens), can help you verify user identities and ensure that only authorized users can access your chat application. Here’s an example of using JWT for user authentication:
// User login
function login(username, password) {
  // Verify credentials and generate a JWT token
  const token = generateJWT(username);

  // Return the JWT token to the client
  return token;
}

// Verify JWT token for protected routes
function verifyToken(token) {
  try {
    // Verify and decode the token
    const decoded = jwt.verify(token, 'your_secret_key');
    // Access the decoded user information
    const username = decoded.username;

    // Perform further authorization checks if needed
    // ...

    return username;
  } catch (err) {
    // Token verification failed
    return null;
  }
}
By authenticating users, you can control access to your chat application and ensure that only authenticated users can participate in conversations.
If you’re interested in learning more about authentication, you can check out this article.
- Keep your server and dependencies up to date: Regularly updating your server software and any dependencies your chat application relies on is vital to ensure you’re protected against known security vulnerabilities. Stay informed about security alerts and follow best practices for maintaining a secure server environment. Promptly apply security patches and updates to mitigate potential risks and maintain a robust and secure chat application.
Resources
To further support your understanding and exploration of the topics discussed in this article, I’ve compiled a list of valuable resources.
- GitHub Project: The complete code for the project discussed in this article can be found on GitHub. Feel free to explore, clone, or fork the repository for your own experimentation and learning. Here’s the link to the GitHub project.
- Mozilla Websocket documentation
- JavaScript Info resource on Websockets
- Nodejs Documentaion
- Authentication and Authorization in Nodejs
Conclusion
Congratulations on building and deploying your own real-time chat application using WebSockets and Node.js! Along the way, we’ve covered key aspects of creating a chat application, including setting up a WebSocket server, creating a client-side chat interface, adding features and improvements, and securing your application.
Remember, the possibilities for enhancing your chat application are virtually endless. As you continue to develop and refine your chat app, keep user needs and feedback in mind to create an engaging and enjoyable experience for everyone involved.
Building a real-time chat application is just the beginning. There are countless other applications and use cases for WebSockets and real-time communication technology. So, explore new ideas, experiment, and continue honing your development skills. The world of real-time communication is vast and exciting, and your journey has only just begun.
Happy coding!