
In the ever-evolving digital landscape, multimedia content is vital to web and mobile applications. Integrating and managing images and videos within your Node.js application might seem challenging. However, with Cloudinary’s powerful API, incorporating cloud-based media management into your development workflow has never been easier.
Cloudinary is a cutting-edge, cloud-based media management platform offering comprehensive image and video management services, encompassing upload, storage, transformation, optimization, and delivery. The platform delivers a scalable, secure, and reliable solution for businesses of all sizes to manage their digital assets and streamline their media workflows.
By utilizing Cloudinary, you can upload media files in various formats, manipulate them in real-time with the platform’s dynamic image and video manipulation features, optimize them for faster delivery and improved user experience, and distribute them through a global content delivery network (CDN).
In this detailed tutorial, I will demonstrate how to upload images and videos to Cloudinary within a Node.js application. I’ll personally guide you through configuring your Cloudinary account and integrating the necessary packages into your application. Subsequently, we’ll delve into the implementation details, and I’ll provide code snippets to help you navigate the uploading process.

What is Cloudinary?
Cloudinary is more than just a Content Delivery Network (CDN); it’s a versatile cloud-based platform offering a wide range of services related to managing, manipulating, optimizing, and delivering digital assets such as images, videos, and other media files to end-users over the internet.
A key function of Cloudinary is to provide a dependable and high-performance CDN that can distribute digital assets rapidly and efficiently. With servers distributed globally, Cloudinary can store and cache content closer to end-users, minimizing latency and enhancing performance. Moreover, Cloudinary provides image and video enhancement capabilities, including compression and resizing, which can further boost the speed and quality of content delivery. Personally, I find these features extremely helpful in improving user experience and increasing overall efficiency.
What is a CDN?
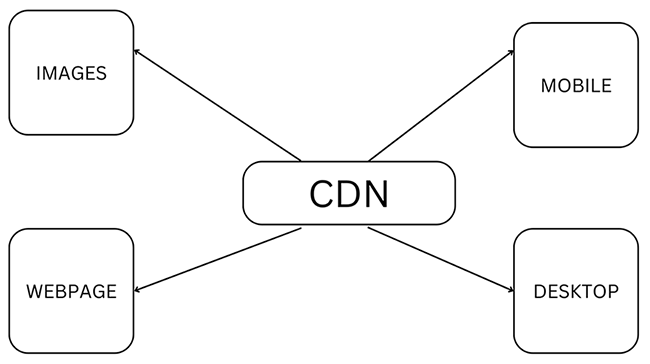
A CDN (Content Delivery Network) is a system of interconnected servers designed to deliver content to users across the globe. By reducing latency and improving website performance, a CDN caches and serves content from servers closer to the end user.
Here’s how a CDN functions:
- A user requests content from a website, which could range from images and videos to web pages or applications.
- The user’s request is directed to the nearest server within the CDN. Utilizing a network of servers situated in various regions, the CDN identifies the server closest to the user.
- The server in the CDN nearest to the user’s location responds to the request. This shortens the distance and, consequently, the time it takes for the requested data to reach the user.
- The content is delivered to the user’s device from the server in the CDN. Since the server is geographically closer to the user, the content loads more quickly, resulting in an enhanced user experience.
Benefits of a CDN
A Content Delivery Network (CDN) offers numerous advantages that enhance the performance, security, and reliability of websites or applications. Here are some key benefits:
- Improved Load Times: With content cached on multiple servers worldwide, a CDN enables users to access data from a geographically closer server, resulting in faster load times and reduced latency.
- Enhanced Scalability: CDNs can manage sudden traffic surges and high request volumes without overloading the origin server, increasing the website’s ability to accommodate more simultaneous users.
- Reduced Bandwidth Consumption: CDNs minimize data transfer between the origin server and users by caching and compressing content, leading to lower bandwidth consumption and cost savings.
- Enhanced Security: CDNs offer built-in security features such as Distributed Denial of Service (DDoS) protection, SSL encryption, and secure token authentication, safeguarding websites and applications against cyber threats.
- High Availability: Utilizing redundancies and load balancing, CDNs ensure content accessibility even when one or more servers face downtime or technical issues.
- Better User Experience: Faster load times, reduced latency, and minimal buffering contribute to a seamless and enjoyable experience for end-users, potentially boosting user engagement and conversion rates.
- Global Reach: CDNs enable websites and applications to serve a worldwide audience, guaranteeing fast and reliable content delivery regardless of users’ geographical locations.
- SEO Benefits: Improved performance and load times positively influence search engine rankings, increasing website visibility for potential visitors.
- Simplified Management: CDNs often feature user-friendly interfaces and automation tools, making content delivery management and performance monitoring more accessible for website owners and administrators.
CDNs offer substantial benefits by enhancing websites’ and applications’ performance, security, and reliability, ultimately resulting in a superior user experience and potential cost savings for website owners. As a developer, I find CDNs indispensable for creating high-quality web applications that cater to users around the globe.
Why use Cloudinary?
There are several reasons why a developer might choose to use Cloudinary:
- Efficient Digital Asset Management: Cloudinary offers a unified platform for managing, manipulating, and delivering digital assets like images and videos. It streamlines my workflow by eliminating the need for multiple tools and platforms to perform these tasks.
- Optimized Image and Video Delivery: Cloudinary provides advanced image and video optimization capabilities, such as compression, resizing, and format conversion, which enhance website or app performance and user experience.
- Scalability and Performance: As a cloud-based platform, Cloudinary automatically scales to accommodate traffic demands, ensuring reliable and fast content delivery worldwide.
- Developer-Friendly: Cloudinary boasts extensive documentation, SDKs, and integrations with various programming languages, frameworks, and platforms. This makes it incredibly straightforward for me to integrate and use the platform within my applications.
- Cost-Effective: With various pricing plans tailored to different needs and budgets, Cloudinary’s pay-as-you-go model ensures that users only pay for what they use. This flexibility helps optimize costs while maintaining high-quality media management.
Overview
This article offers a comprehensive guide on utilizing Cloudinary, a cloud-based media management solution, within a Node.js application. The tutorial encompasses everything from project setup to private key initialization and configuration, delivering step-by-step instructions for uploading, optimizing, and distributing images and videos via a global CDN. By following this guide, developers can proficiently manage media content in their applications, ultimately enhancing the user experience.
By the end of this tutorial, you’ll have a thorough understanding of managing image and video uploads within your Node.js development workflow using Cloudinary. Let’s get started!
Prerequisites
To fully grasp the content of this tutorial, you will need the following:
- Basic experience working with JavaScript and Node.js
- A recent version of Node and npm installed on your computer
- A code editor, preferably VS Code
- A Cloudinary account (If you don’t have one, sign up using this link)
- An API testing tool, preferably Postman
Project Setup
- Create a new folder on your local machine and open it in your code editor. In your terminal, navigate to the directory of your newly created project. Enter the following command to initialize a new Node.js environment:
npm init -y
- Next, install the packages and modules needed for this project by typing in the following command:
npm install cors express cloudinary dotenv express-fileupload & npm install --save-dev nodemon
These packages include:
cors: A Node.js package for providing middleware that can be used to enable CORS with various options.
express: A Node.js framework for building web and mobile API applications.
cloudinary: A package that enables communication with the Cloudinary robust API.
dotenv: A module that processes environment variables from a .env file.
express-fileupload: A simple express middleware for uploading files.
nodemon: A package that restarts the application whenever there is a change in the files present in the working directory of your project. - After installing these packages, create the file and folder structure of the application, following the format below.

Folders structure - Next, add this line of code within the “scripts” object in the package.json file:
"start": "nodemon server.js"
If you encounter an error, you might have forgotten to add a comma after the first item in the object. Add the comma and save the file. Your package.json file should now be properly configured and should look like this

package.json file


Configuring the App and Initializing Private keys
- Log in to your Cloudinary account and navigate to your dashboard. Copy the following details and paste them into your `.env` file with the respective variables. Your
.envfile should have the following variables (the details used here are not correct, so go ahead and grab yours from your dashboard):CLOUD_NAME=your_cloud_name API_KEY=your_api_key API_SECRET=your_api_secret
- Next, navigate to the server.js file and write the following lines of code:
const express = require("express");
const cors = require("cors");
const dotenv = require("dotenv");
const fileupload = require("express-fileupload");
const uploadRoute = require("./file-upload/route");

const app = express();

dotenv.config();

app.use(express.json());
app.use(
  cors({
    origin: "*",
  })
);
app.use(fileupload({ useTempFiles: true }));

app.get("/", (req, res) => {
  res.status(200).json({ msg: "Welcome to the server" });
});

app.use("/upload", uploadRoute);

app.listen(process.env.PORT || 5000, () => {
  console.log(`Server is up and running`);
});
In the given code snippet, the required packages (
express, cors, dotenv, and express-fileupload) are imported, and a new Express application is initialized. The `dotenv` package is configured to load environment variables from the `.env` file. The `express.json()` middleware is employed to configure the app for JSON data parsing, while thecorsmiddleware is used with an open policy, allowing requests from any origin. The` fileupload` module is integrated with the option to use temporary files during uploads. A root route is created with a welcoming response, and theuploadRouteis attached to the"/upload"path. Finally, the application listens on the specified port (from environment variables) or defaults to `port 5000`, and a confirmation message (Server is up and running) is displayed in the console when the server starts running.To test the server, use Postman to send a `GET` request to `http://127.0.0.1:5000/` and expect a response similar to the one below.

msg: “Welcome to the server” - Next, create the `upload.js` file within the
utilitiesfolder and type in the following lines of code:const cloudinary = require("cloudinary").v2; const dotenv = require("dotenv"); dotenv.config(); // Configuration cloudinary.config({ cloud_name: process.env.CLOUD_NAME, api_key: process.env.API_KEY, api_secret: process.env.API_SECRET, }); module.exports = cloudinary;Here I’ve initialized and configured Cloudinary using the secret keys that are required for secure communication with the Cloudinary API. These keys have been stored in a .env file to keep them confidential. By using the dotenv package, these environment variables are loaded into the application, allowing me to set up the Cloudinary configuration with the necessary credentials. This ensures a secure and efficient connection between the application and Cloudinary for media management tasks such as uploading, optimizing, and delivering images and videos.
- Next, go into the `controller.js` file located in the `file-upload` folder and type in the following lines of code
const cloudinary = require("../utilities/upload");

const upload_file = async (req, res) => {
  const file = req.files.image;

  try {
    if (!file) {
      return res.status(400).json({ error: "No File Selected" });
    }

    const result = await cloudinary.uploader.upload(file.tempFilePath, {
      public_id: `${Date.now()}`,
      resource_type: "auto",
    });

    return res.status(200).send({
      public_id: result.public_id,
      url: result.secure_url,
    });
  } catch (error) {
    return res.status(500).send(error.message);
  }
};

module.exports = { upload_file };
In this code snippet, I’ve defined the
upload_filefunction which will manage the file upload process. I’ve also utilized the Cloudinary upload endpoint to send thefileand receive a result object in return. The result object contains the` public id` of the uploaded file and aURLthat can be used to retrieve the file. - Next step is to create a route that will utilize our upload function. Go into the
route.jsfile and input the following lines of codeconst express = require("express"); const router = express.Router(); const { upload_file } = require("./controller"); router.post("/", upload_file); module.exports = router;

Testing the Application
To test the functionality of the application, follow the steps listed here:
- Go to Postman and create a new
postrequest to the following endpoint `http://127.0.0.1:5000/upload` - Click on `Body` and select
form-data. - Hover on the
Keybox, and you’ll see a drop-down menu that has “text” as a default. Click on it and select a file. - Next, type in “image” in the key input area. And select the picture you want to upload by clicking on the select file button in the Value input area.
- Now click “Send” to make the post request.
If everything is successful, you should get a `url` and `public_id` in the Response tab. Your Postman should look like this.

Now you can copy this `URL` and paste it into your browser (you can also make a get request on Postman), and you’ll get the picture you uploaded.
Note: In a more complex application, this URL can be stored in the database and used dynamically to see or render the file.
How to Optimize Image using Cloudinary SDK
Using Cloudinary’s robust Node.js SDK, we can also optimize images before saving them. Here’s how to do that:
Go into the controller.js file, and in the upload() method, you can specify various parameters to optimize your images, such as quality, width, and height. Here’s an example that sets the image quality to 60% and resizes the Image to 500 pixels wide and 500 pixels long:
const cloudinary = require("../utilities/upload");

const upload_file = async (req, res) => {
  const file = req.files.image;

  try {
    if (!file) {
      return res.status(400).json({ error: "No File Selected" });
    }

    const result = await cloudinary.uploader.upload(file.tempFilePath, {
      quality: 60,
      width: 500,
      height: 500,
      public_id: `${Date.now()}`,
      resource_type: "auto",
    });

    return res.status(200).send({
      public_id: result.public_id,
      url: result.secure_url,
    });
  } catch (error) {
    return res.status(500).send(error.message);   }
};

module.exports = { upload_file };
Resources
Conclusion
In conclusion, multimedia content has become a fundamental aspect of web and mobile applications. With the increasing demand for visually-rich content, developers need to rely on cloud-based media management solutions like Cloudinary to efficiently handle the growing volume of digital assets. With its comprehensive suite of services and ease of integration with Node.js applications, Cloudinary offers developers a reliable and efficient way to upload, store, optimize, and deliver media content globally. By following the step-by-step guide provided in this tutorial, developers can leverage Cloudinary’s features to improve the user experience of their applications by ensuring fast, optimized, and high-quality multimedia content delivery.