Introduction
Testing is a very important aspect of web application development. It can help reveal bugs before they appear and also instill confidence in your web application, especially during its launch. In this article, we will explore jsdom and AVA testing frameworks while writing tests for the Nuxt application.
Prerequisite
- Working knowledge of Vue.js
- Prior experience working with Nuxt.js
- Node.js and npm
Introducing end-to-end test
End-to-end testing is a testing technique where the different parts of the application are often tested together hence, it is often labeled as integration tests. such tests are written to mimic a user’s movement throughout the application.
Introducing jsdom
The server side has raw HTML with no access to the DOM hence there isn’t much you can do as regards DOM manipulation. With jsdom, the DOM can be accessed inside Node.js.
According to jsdom documentation: jsdom is a pure-JavaScript implementation of many web standards, notably the WHATWG DOM and HTML Standards, for use with Node.js.
The latest versions of jsdom require Node.js v10 or newer. (Versions of jsdom below v16 still work with previous Node.js versions, but are unsupported.)
jsdom is pre-configured by nuxtjs and in order to use it, we need to install jsdom package then convert the HTML to DOM fragment using nuxt.renderAndGetWindow and write our test.
Introducing AVA
AVA is a test runner for Node.js with a simple test syntax. It is minimal and fast, runs tests concurrently, Enforces writing atomic tests, and has typescript support.
We will build a demo nuxt app so that we can proceed with writing its corresponding test suit. Our demo app will allow users to log in and access their dashboard.
In this tutorial, we would use create-nuxt-app to scaffold our nuxtjs project so let’s get started. Open your terminal and run this command:
npx create-nuxt-app nuxt-ava
If you are using yarn run this command:
yarn create nuxt-app nuxt-ava
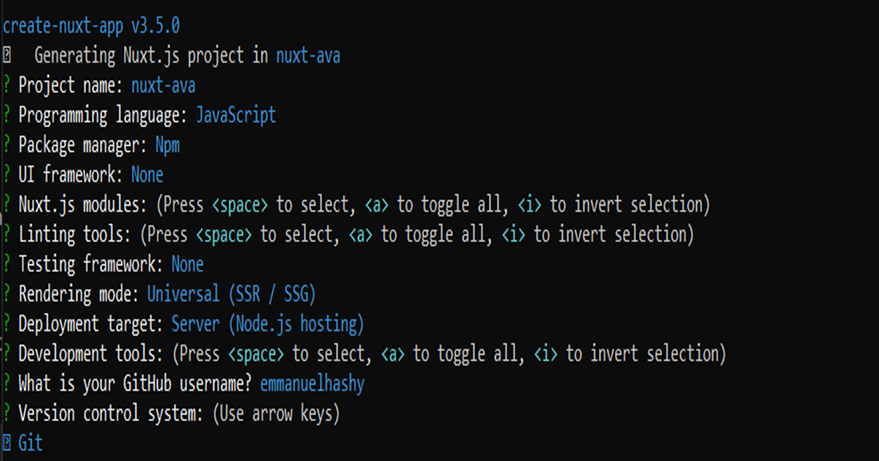
Next, you will have a prompt with a list of options that configures your application for development.
Your configuration should be similar to this:

Once that is done, we’ll run the following command in our terminal:
$ cd nuxt-ava
$ npm install
$ npm run dev
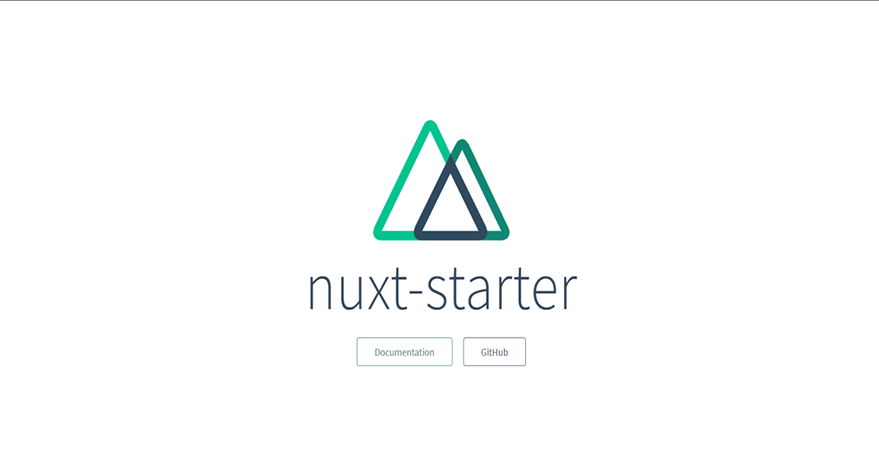
Your app should now be running on http://localhost:3000 as follows:

In the pages directory, create a login.vue file then add the following code snippet to it:
//pages/login.vue
<template>
  <div>
    <h1>Login</h1>
    <form @submit.prevent="login">
      <p>
        Username:
        <input
          v-model="username"
          class="username"
          type="text"
          name="username"
        />
      </p>
      <p>
        Password:
        <input
          v-model="password"
          class="password"
          type="password"
          name="password"
        />
      </p>
      <button class="button" type="submit">Login</button>
    </form>
  </div>
</template>

<script>
export default {
  data() {
    return {
      username: "",
      password: "",
    };
  },
  methods: {
    login() {
      if (this.username && this.password) {
        this.$router.push("/dashboard");
        this.formUsername = "";
        this.formPassword = "";
      } else {
        console.log("Invalid form entry")
      }
    },
  },
};
</script>

<style>
</style>
Here, we create a basic form with its input field values binds to the template through the v-model attribute. Also, we create a login method which redirects users to the dashboard if all the input values are provided otherwise, an error message is logged to the console.
In the pages directory, create a dashboard.vue file then add the following code snippet to it:
<template>
  <div>
    <h1>Dashboard</h1>
    <p class="green">{{ message }}</p>
    </div>
</template>

<script>
export default {
  async asyncData (context) {
    return {
      message: 'Welcome to your dashboard!'
    }
  }
}
</script>

<style>
.green {
  color: green;
}
</style>
The snippet above dynamically renders the content on the template. the asyncData hook ensures that Nuxt renders message in the template before navigating to the next page or display the error page).
Update pages/index.vue with the following code snippet:
<template>
  <div>
    <h1>Welcome to youChores</h1>
    <p>We are here to serve you</p>
  </div>
</template>

<script>
export default {
  //
}
</script>

<style>

</style>
Setting up the test environment
We will use the following steps to setup our test environment:
step1
Run the command below to install ava and jsdom as dev dependencies:
$ npm install ava --save-dev
$ npm install jsdom --save-dev
step2
Update package.json file with the following AVA configuration:
// package.json
{
 "scripts": {
 "test": "ava --verbose",
 "test:watch": "ava --watch"
 },
 "ava": {
 "require": [
 "./setup.js",
 "@babel/polyfill"
 ],
 "files": [
 "test/**/*"
 ]
 }
}
step3
Create a setup.js file in the root directory, then add the following code:
// setup.js
require('@babel/register')({
 babelrc: false,
 presets: ['@babel/preset-env']
})
step 4
Since we will likely use the es6 features in our test, we need to install the Babel package in the app:
$ npm install @babel/polyfill
$ npm install @babel/core --save-dev
$ npm install @babel/preset-env --save-dev
$ npm install @babel/register --save-dev
Building the test suite
Now, we are done with the configurations and we are ready to write our test. We will test our Nuxt app with the following user flow:
- User access the home page
- User access the login page
- User enters his login details
- User is taken to his dashboard
In the tests directory, create tests.js and add the following test suite:
// test/tests.js
import test from 'ava'

import { Nuxt, Builder } from 'nuxt'
import { resolve } from 'path'

// We keep a reference to Nuxt so we can close
// the server at the end of the test
let nuxt = null

// Init Nuxt.js and start listening on localhost:5000
test.before('Init Nuxt.js', async t => {
  const rootDir = resolve(__dirname, '..')
  let config = {}
  try { config = require(resolve(rootDir, 'nuxt.config.js')) } catch (e) {}
  config.rootDir = rootDir // project folder
  config.dev = false // production build
  config.mode = 'universal' // Isomorphic application
  nuxt = new Nuxt(config)
  await new Builder(nuxt).build()
  nuxt.listen(5000, 'localhost')
})
The above code snippet initializes nuxt with the required configurations for our tests, setup a test server, and starts listening on localhost:5000.
User access the home page
Add the code snippet to test/tests.js below the previous code snippet.
test.serial('Route / exits and renders correct HTML', async (t) => {
  let context = {}
  const { html } = await nuxt.renderRoute('/', context)
  t.true(html.includes('<h1>Welcome to youChores</h1>'))
  t.true(html.includes('<p>We are here to serve you</p>'))

})
The test suit above checks for the existence of the home route and also check if its content is properly rendered.
N/B: The test.serial method ensures that the test cases execute orderly from top to bottom.
User access the login page
Add the code snippet to test/tests.js below the previous code snippet.
test.serial('Route /login exits and renders correct HTML', async (t) => {

  const window = await nuxt.renderAndGetWindow('http://localhost:5000/login')
  const username = window.document.querySelector('.username')
  const password = window.document.querySelector('.password')
  const button = window.document.querySelector('.button')

  t.not(username, null)
  t.not(password, null)
  t.not(button, null)
})
The test suit above checks for the existence of the /login route and also check if its content is properly rendered. The test suit above performs DOM manipulation on the server-side with jsdom.
Confirm the default values of the input fields
Add the code snippet to test/tests.js below the previous code snippet.
test.serial('Route /login exits and set correct default data', async (t) => {
  const window = await nuxt.renderAndGetWindow('http://localhost:5000/login')
  const username = window.document.querySelector('.username')
  const password = window.document.querySelector('.password')

  t.is(username.value, '')
  t.is(password.value, '')

})
The test suit above checks for the existence of the /login route and also check if its default values are set properly.
A user enters his login details
Add the code snippet to test/tests.js below the previous code snippet.
test.serial('Route /login exits and should update input values then click the login button', async (t) => {
  const window = await nuxt.renderAndGetWindow('http://localhost:5000/login')
  const username = window.document.querySelector('.username')
  const password = window.document.querySelector('.password')
  const button = window.document.querySelector('.button')

  t.pass(username.value, 'admin')
  t.pass(password.value, 'password')
  button.click()
})
The test suit above checks for the existence of the /login route and also ensures the user has provided values for the input fields then clicks the login button.
User is taken to his dashboard
Add the code snippet to test/tests.js below the previous code snippet.
test.serial("Route /dashboard exits and renders correct HTML", async (t) => {
  let context = {};
  const { html } = await nuxt.renderRoute("/dashboard", context);
  t.true(html.includes("<h1>Dashboard</h1>"));
  t.true(html.includes('<p class="green">Welcome to your dashboard!</p>'));
});
The test suit above checks for the existence of the /dashboard route and also ensure that its content is properly rendered.
Running the test suite
Open your terminal and run the test suite with the following command:
npm run test
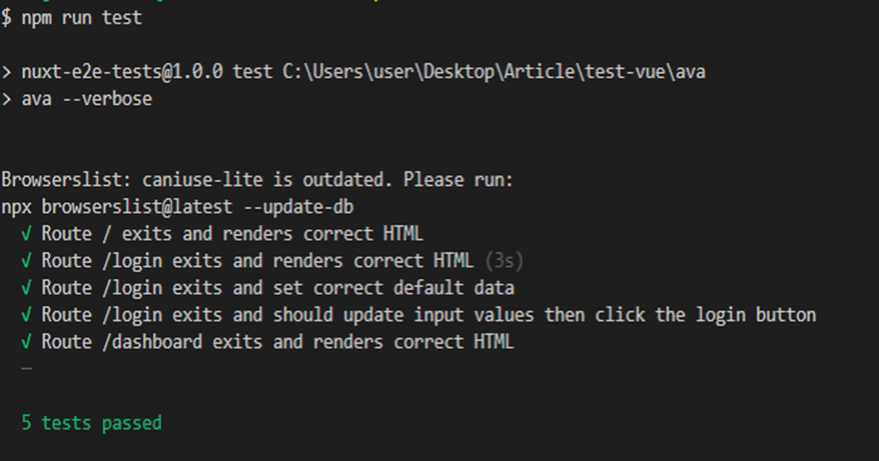
If all your test suite passes, you should get the following result:

Conclusion
Finally, we have an idea of what an end-to-end test is and how to write end-to-end tests for Nuxt apps using jsdom and AVA. I hope you have learned a great deal from this tutorial. Do reach out in the comment section below if you have any questions or suggestions. Here is the Github repo for the demo Nuxt application.


this page very useful for all java programmer. and it`s page give almost many information about java.
Thank you, very helpful!
Yeah, this is very helpful