In today’s fast-paced digital landscape, providing a responsive and user-friendly experience has become paramount for web applications. One common challenge developers face is efficiently handling time-consuming tasks, such as sending emails, without affecting the overall application performance. In this article, I introduce a powerful Flask Email Sender with Background Runner, a cutting-edge solution that leverages Flask-Mail and Flask-Executor to seamlessly send emails asynchronously, ensuring your application remains highly responsive and delivers a delightful user experience. I decided to create this BackgroundRunner because I wanted to be able to send emails in my Flask application without my users waiting for a response from the application. This also allowed me to be able to create a Task Manager for sending emails and resending emails in cases where the email did not get delivered. I’ll walk you through the implementation, discussing the importance of BackgroundRunner in improving app responsiveness, scalability, and user satisfaction. By the end of this article, you’ll be equipped with the knowledge to create an efficient and user-centric application that can handle time-consuming tasks with ease.
Introduction
A background runner, also known as a background worker or background task, is a mechanism that allows you to offload long-running or resource-intensive tasks from the main application thread to separate threads or processes. This helps to keep your application responsive and prevents it from becoming unresponsive or slow when handling tasks that may take a considerable amount of time to complete.
In the context of web applications, such as those built with Flask, a background runner is crucial because web applications need to be highly responsive and handle multiple user requests simultaneously. If a web application were to handle long-running tasks directly within the main thread, it could become unresponsive or slow down, leading to a poor user experience.
A background runner typically works by:
- Queueing tasks: When a long-running task needs to be executed, the application puts the task in a queue, often with some metadata, like the task’s priority or required resources.
- Processing tasks: The background runner, which runs in a separate thread or process, picks up tasks from the queue and executes them. It can handle multiple tasks concurrently, depending on the available resources and configuration.
- Monitoring and managing tasks: The background runner often provides a way to monitor the progress of tasks, manage their priorities, and cancel them if necessary. It can also handle failures, retries, and scaling, depending on the implementation.
- Communicating results: Once a task is complete, the background runner can notify the main application, store the results in a database, or take any other action as required.
There are several ways to implement background runners in Python web applications, such as using the built-in concurrent.futures library, dedicated task queues like Celery or RQ, or Flask-specific solutions like Flask-Executor.
In this article, I’ll be creating a Background Runner using Flask-Executor with a real-life example. I will consider a real-life scenario where you have a Flask application that sends out email notifications. Sending emails can take some time, depending on the email service and network latency, so it’s a good candidate for a background process.
Why Flask-Executor?
Flask-Executor is a better option in this case because it allows you to offload time-consuming tasks, like sending emails, to background threads, ensuring that your Flask application remains responsive and provides a smooth user experience. Let’s dive deeper into the advantages of using Flask-Executor in this context:
- Asynchronous execution: Flask-Executor is built on top of the Python concurrent.futures module and provides a simple, high-level API for asynchronously executing callables (e.g., functions or methods). This means that you can run tasks in parallel without blocking the main application thread, allowing your Flask application to continue processing other requests while the background tasks are running.
- Integration with Flask: Flask-Executor is specifically designed for Flask applications, making it easy to integrate with your existing Flask app. It automatically manages the lifecycle of the executor and its worker threads, ensuring that they are properly initialized and shut down when your application starts and stops.
- Task management: Flask-Executor provides features for managing tasks, such as submitting tasks, checking task status, and retrieving results. This makes it easy to monitor and control background tasks in your Flask application.
- Scalability: Flask-Executor can help improve the scalability of your Flask app by offloading time-consuming tasks to background threads, freeing up the main thread to handle more incoming requests. This is particularly important for tasks like sending emails, which can take a significant amount of time depending on the email service and network latency.
- Flexibility: Flask-Executor supports different types of executors, such as ThreadPoolExecutor and ProcessPoolExecutor, which allow you to choose the most appropriate execution model for your background tasks. ThreadPoolExecutor is suitable for I/O-bound tasks like sending emails, while ProcessPoolExecutor can be used for CPU-bound tasks.
- Error handling: Flask-Executor allows you to handle exceptions raised by background tasks, making it easier to manage errors and ensure that your application continues running smoothly even if some tasks fail.
In summary, Flask-Executor is a better option for this email-sending Flask application because it provides asynchronous execution, seamless integration with Flask, task management features, improved scalability, flexibility in choosing the execution model, and error handling capabilities. Using Flask-Executor helps ensure that your application remains responsive and provides a smooth user experience, even when handling time-consuming tasks like sending emails.
Setting up the Flask Application
To set up a Flask app for sending emails, you will use the Flask-Mail extension, which makes it easy to integrate email functionality into your application. Here’s a step-by-step guide to creating a simple Flask app that sends emails:
First, install the Flask-Mail library using pip:
pip install flask-mail
Create a new Python file, for example, email_app.py, and create a basic Flask application:
from flask import Flask, request, jsonify
from flask_mail import Mail, Message

app = Flask(__name__)

# Configure email settings
app.config.update(
    MAIL_SERVER='smtp.example.com',
    MAIL_PORT=465,
    MAIL_USE_SSL=True,
    MAIL_USERNAME='your_email@example.com',
    MAIL_PASSWORD='your_email_password')
mail = Mail(app)

@app.route('/')
def hello():
    return 'Email Sender App'

if __name__ == '__main__':
    app.run(debug=True)
Replace the email settings with your own email server and credentials.
Next step, add a new route to your Flask app that sends an email with the given recipient, subject, and content:
@app.route('/send_email', methods=['POST'])
def send_email():
    recipient = request.form.get('recipient')
    subject = request.form.get('subject')
    content = request.form.get('content')
    if not all([recipient, subject, content]):
        return jsonify({"error": "recipient, subject, and content parameters are required"}), 400
    msg = Message(subject, sender='your_email@example.com', recipients=[recipient])
    msg.body = content
    mail.send(msg)
    return jsonify({"status": "email_sent"})
Now, you can run your Flask app by executing the email_app.py file:
python email_app.py

You can now test the email-sending process by sending a request to the /send_email endpoint:
curl -X POST -F "recipient=test@example.com" -F "subject=Test Email" -F "content=This is a test email." http://127.0.0.1:5000/send_email
Replace test@example.com with a valid recipient email address. If the email is sent successfully, you’ll get a response with an “email_sent” status.
Create BackgroundRunner
To create a background runner with Flask-Executor for the email-sending Flask app, follow these steps:
Install Flask-Executor:
pip install Flask-Executor
Modify your Flask application:
We will create a BackgroundRunner class that uses Flask-Executor to manage background tasks.
The class has three methods:
- send_email: This method sends an email using the provided recipient, subject, and content.
- send_email_async: This method submits the send_email method as a background task using the executor and returns the task ID.
- task_status: This method takes a task ID and returns the status of the corresponding task.
from flask import Flask, request, jsonify
from flask_mail import Mail, Message
from flask_executor import Executor
import uuid

app = Flask(__name__)

# Configure email settings
app.config.update(
    MAIL_SERVER='smtp.example.com',
    MAIL_PORT=465,
    MAIL_USE_SSL=True,
    MAIL_USERNAME='your_email@example.com',
    MAIL_PASSWORD='your_email_password')

mail = Mail(app)
executor = Executor(app)


@app.route('/')
def hello():
    return 'Email Sender App'


class BackgroundRunner:
    def __init__(self, executor):
        self.executor = executor

    def send_email(self, recipient, subject, content):
        msg = Message(subject, sender='your_email@example.com', recipients=[recipient])
        msg.body = content
        mail.send(msg)

    def send_email_async(self, recipient, subject, content):
        task_id = uuid.uuid4().hex  # Generate a unique task ID
        task = self.executor.submit_store(task_id, self.send_email, recipient, subject, content)
        return task_id

    def task_status(self, task_id):
        task = executor.futures._state(task_id)
        if task.done():
            return "completed"
        else:
            return "running"

background_runner = BackgroundRunner(executor)


@app.route('/send_email', methods=['POST'])
def send_email():
    recipient = request.form.get('recipient')
    subject = request.form.get('subject')
    content = request.form.get('content')
    if not all([recipient, subject, content]):
        return jsonify({"error": "recipient, subject, and content parameters are required"}), 400
    task_id = background_runner.send_email_async(recipient, subject, content)
    return jsonify({"task_id": task_id})


@app.route('/task_status/<task_id>')
def task_status(task_id):
    status = background_runner.task_status(task_id)
    return jsonify({"status": status})


if __name__ == '__main__':
    app.run(debug=True)
Finally, having created an instance of the BackgroundRunner class, passing the executor as an argument, and updated the /send_email and /task_status routes to use the BackgroundRunner instance, You can run the updated Flask app by executing the email_app.py file and test the background email sending process using the same instructions provided in the previous examples.
You can go to the /task_status/<task_id> on your browser to check the status of your BackgroundRunner. You would have the view below.
BackgroundRunner Status on Browser
Organise Flask App
Let’s separate the code into different files for better structure and organization. Create the following files:
- config.py: This file will store the configuration settings for the Flask app and the email server.
# config.py
MAIL_SERVER = 'smtp.example.com'
MAIL_PORT = 465
MAIL_USE_SSL = True
MAIL_USERNAME = 'your_email@example.com'
MAIL_PASSWORD = 'your_email_password'
- background_runner.py: This file will contain the BackgroundRunner class.
# background_runner.py from flask_mail import Message import uuid class BackgroundRunner: def __init__(self, mail, executor): self.mail = mail self.executor = executor def send_email(self, recipient, subject, content): msg = Message(subject, sender='me@oluwabukunmi.com', recipients=[recipient]) msg.body = content self.mail.send(msg) def send_email_async(self, recipient, subject, content): task_id = uuid.uuid4().hex # Generate a unique task ID self.executor.submit_stored(task_id, self.send_email, recipient, subject, content) return task_id def task_status(self, task_id): if not self.executor.futures.done(task_id): return "running" self.executor.futures.pop(task_id) return "completed" - email_app.py: This file will contain the main Flask application, routes, and import the BackgroundRunner class.
# email_app.py
from flask import Flask, request, jsonify
from flask_mail import Mail
from flask_executor import Executor
from background_runner import BackgroundRunner

app = Flask(__name__)
app.config.from_pyfile('config.py')
mail = Mail(app)
executor = Executor(app)
background_runner = BackgroundRunner(mail, executor)


@app.route('/')
def hello():
    return 'Email Sender App'


@app.route('/send_email', methods=['POST'])
def send_email():
    recipient = request.form.get('recipient')
    subject = request.form.get('subject')
    content = request.form.get('content')
    if not all([recipient, subject, content]):
        return jsonify({"error": "recipient, subject, and content parameters are required"}), 400
    task_id = background_runner.send_email_async(recipient, subject, content)
    return jsonify({"task_id": task_id})


@app.route('/task_status/<task_id>')
def task_status(task_id):
    status = background_runner.task_status(task_id)
    return jsonify({"status": status})


if __name__ == '__main__':
    app.run(debug=True)
Now, you have a more structured and organized Flask application with separate files for configuration, the BackgroundRunner class, and the main Flask app.
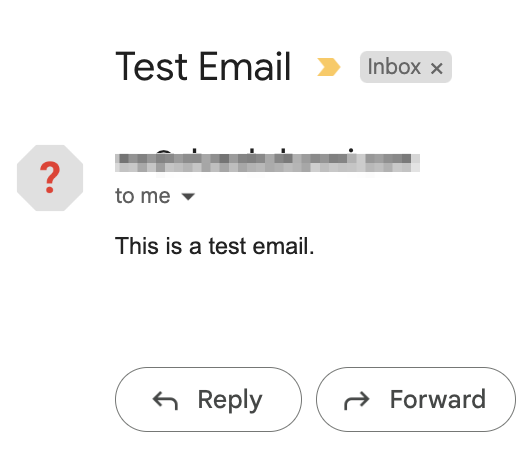
You can run the updated Flask app by executing the email_app.py file and test the background email-sending process using the same instructions provided in the previous examples and we should receive an email similar to the image below from the backgroundRunner.

TL;DR
- I created a Flask application that sends emails using a background runner.
- I used Flask-Mail to integrate email-sending functionality into the Flask application.
- I used Flask-Executor to create a background runner that offloads email-sending tasks to separate threads.
- I created a BackgroundRunner class that uses Flask-Executor to manage background tasks, including sending emails asynchronously and checking task status.
- The Flask app has three main routes:
- /: A simple route that returns a welcome message.
- /send_email: A route that accepts POST requests with recipient, subject, and content form parameters, submits an email-sending task to the background runner, and returns the task ID.
- /task_status/<int:task_id>: A route that accepts GET requests with a task ID, checks the status of the corresponding task, and returns the status as JSON.
- To test the email-sending process, you can send a POST request to the /send_email endpoint, and then use the returned task ID to check the task status by sending a GET request to the /task_status/<int:task_id> endpoint.
The complete solution provides a scalable and efficient way to handle email-sending tasks in a Flask application without blocking the main application thread, ensuring responsiveness and a smooth user experience.
In conclusion, the Flask Email Sender with Background Runner offers a robust and efficient solution for handling time-consuming tasks like email sending without compromising your application’s responsiveness and user experience. By utilizing Flask-Mail for email integration and Flask-Executor for background task management, this solution ensures that your application can handle concurrent requests and deliver a seamless experience to users. The implementation of the BackgroundRunner class further demonstrates the importance of modularity, separation of concerns, and error isolation in creating maintainable and scalable applications. With this powerful combination, you can now build web applications that excel in performance, responsiveness, and user satisfaction, setting your projects apart in the competitive digital landscape.
Find the code to this repo here


