Pinia + Vue.js
Introduction to State Management in Vue.js
The maintenance of the application’s data and ensuring that other components can access and modify the data as necessary depending on state management in Vue.js applications. Because of its component-based architecture, Vue.js comes with a straightforward state management system pre-installed. Yet, developers frequently require increasingly sophisticated state management systems as applications increase in size and complexity. The Vuex package is frequently used by Vue.js developers for more sophisticated state management. Popular state management library Vuex offers a centralized store to manage the state of the application. Vuex is strong and has a ton of functionality, but it can occasionally be too much for beginners and may not be the ideal choice for smaller projects. This is where Pinia, a different state management library for Vue.js apps, comes into play.
What is Pinia?
For Vue.js apps, Pinia is a small, simple state management library. It is intended to serve as a substitute for Vuex by providing a more streamlined and uncomplicated method of state management. Pinia is a great option for beginning developers and smaller projects because it attempts to offer a better developer experience with a more manageable learning curve.
Pinia’s important characteristics include:
Simplified API: Pinia is easier to learn and use than Vuex because it has a more condensed and simple API.
Automated type inference: Pinia infers types automatically, making working with TypeScript simpler.
Integration of DevTools: Pinia has native support for Vue DevTools, which enables developers to view the state, actions, and mutations in real-time.
Plugins: Because Pinia accepts plugins, developers can expand its functionality.
Why Use Pinia?
If you’re a Vue.js developer seeking a less complex and more user-friendly state management solution than Vuex, Pinia is a great option. You should think about using Pinia for a number of reasons, including:
Simplified learning curve: Pinia’s API is simpler and more concise, making it simpler to understand and use, especially for novice developers.
Lightweight: Pinia is a more manageable library than Vuex and is better suited for smaller applications that don’t require all of the functionality that Vuex provides.
Support for TypeScript: Pinia’s automatic type inference streamlines TypeScript development and eliminates the need for type definitions to be manually written.
Versatile: Pinia is a flexible solution for a range of use cases thanks to its plugin architecture, which enables developers to expand its capabilities and link it with other libraries.
Setting Up Your Vue.js Project
To start, set up a Vue.js project using the Vue CLI. First, ensure that you have Node.js and NPM installed. Then, install the Vue CLI globally:
npm install -g @vue/cli
Next, create a new Vue.js project:
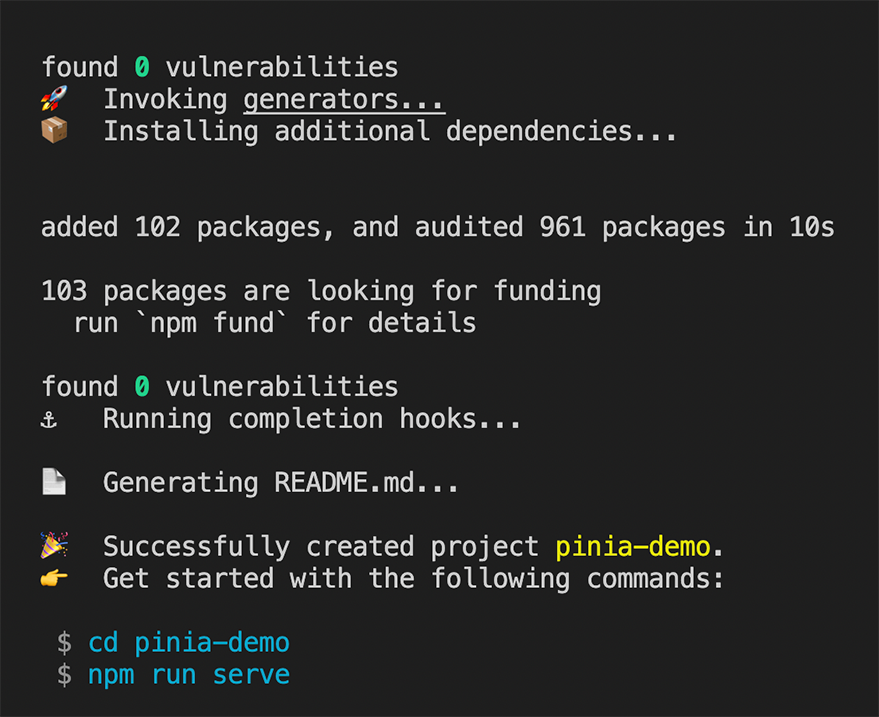
vue create pinia-demo
Choose the default preset or customize it according to your needs and choose your preferred package manager. For this demonstration, I will use NPM.
![> Default ([Vue 3] babel, eslint) > Default ([Vue 3] babel, eslint)](https://soshace.com/wp-content/uploads/2023/03/screenshot-2023-03-27-at-20.52.png)

cd pinia-demo
npm run serve

Now, install Pinia as a dependency:
npm install pinia
Creating a Simple Demo App with Pinia

In this section, I will create a simple demo app to demonstrate the use of Pinia for state management in a Vue.js application. First, create a new file called store.js in the src folder and set up the Pinia store:
// src/store.js
import { createPinia } from 'pinia';
export const setupPinia = () =>
 {return createPinia();
};
Now, update the src/main.js file to add Pinia to the Vue app:
// src/main.js
import { createApp } from 'vue';
import App from './App.vue';
import { setupPinia } from './store';const app = createApp(App);
app.use(setupPinia());
app.mount('#app');
Next, create a simple store for managing a list of tasks. Create a new file called tasks.js in the src folder:
import { defineStore } from 'pinia';

export const useTasksStore = defineStore('tasks', {
  state: () => ({
    tasks: ["east",'dance'],
  }),

  actions: {
    addTask(task) {
      this.tasks.push(task);
    },

    removeTask(index) {
      this.tasks.splice(index, 1);
    },
  },
});
Here, I defined a store called tasks with an initial state containing an empty array of tasks. You also defined two actions, addTask and removeTask, to manipulate the task array.
Now, create a simple Vue component to display the list of tasks and allow the user to add and remove tasks. Create a new file called TaskList.vue in the src/components folder:
<!-- src/components/TaskList.vue -->
<template>
  <div class="task-list">
    <h1>Task List</h1>
    <ul class="tasks">
      <li v-for="(task, index) in tasks" :key="index" class="task-item">
        {{ task }}
        <button @click="removeTask(index)" class="remove-btn">Remove</button>
      </li>
    </ul>
    <input v-model="newTask" @keyup.enter="addTask" class="task-input" />
    <button @click="addTask" class="add-btn">Add Task</button>
  </div>
</template>

<script>
import { useTasksStore } from '@/tasks';
import { ref } from 'vue';

export default {
  setup() {
    const tasksStore = useTasksStore();
    const newTask = ref('');

    const addTask = () => {
      if (newTask.value.trim()) {
        tasksStore.addTask(newTask.value);
        newTask.value = '';
      }
    };

    const removeTask = (index) => {
      tasksStore.removeTask(index);
    };

    return {
      tasks: tasksStore.tasks,
      newTask,
      addTask,
      removeTask,
    };
  },
};
</script>
In the above code snippets, I used the useTasksStore function to access the tasks store. Then you defined local addTask and removeTask functions that call the corresponding actions from the store. Finally, I used the v-model directive to bind the input field to the newTask property and keep it as a local reactive reference. Then add some styles to the TaskList.vue component with the code snippets below:
<style scoped>
.task-list {
  font-family: Arial, sans-serif;
  max-width: 600px;
  margin: 0 auto;
  padding: 1rem;
  background-color: #f5f5f5;
  border-radius: 4px;
  box-shadow: 0 4px 6px rgba(0, 0, 0, 0.1);
}

h1 {
  text-align: center;
}

.tasks {
  list-style-type: none;
  padding: 0;
}

.task-item {
  display: flex;
  justify-content: space-between;
  align-items: center;
  padding: 0.5rem 1rem;
  margin: 0.5rem 0;
  background-color: #fff;
  border-radius: 4px;
  box-shadow: 0 2px 4px rgba(0, 0, 0, 0.1);
}

.remove-btn {
  background-color: #f44336;
  color: #fff;
  border: none;
  border-radius: 4px;
  padding: 0.5rem 1rem;
  cursor: pointer;
}

.task-input {
  width: 100%;
  padding: 0.5rem 1rem;
  border: 1px solid #ccc;
  border-radius: 4px;
  margin-bottom: 1rem;
}

.add-btn {
  display: inline-block;
  background-color: #4caf50;
  color: #fff;
  padding: 0.5rem 1rem;
  border: none;
  border-radius: 4px;
  cursor: pointer;
}
</style>
I have also added a <style scoped> block containing the CSS rules for the TaskList component. The scoped attribute ensures that the styles only apply to this specific component. The provided styles include basic styling for layout, colors, and typography to make the task list visually appealing. To display the Tasks the component in the app, I will update the src/App.vue file:
<!-- src/App.vue -->
<template>
  <div id="app">
    <Tasks />
  </div>
</template>

<script>
import Tasks from './components/TaskList.vue';

export default {
  components: {
    Tasks,
  },
};
</script>
Migrating from Vuex to Pinia
Migrating an existing Vuex-based project to Pinia can be a straightforward process when you follow these steps:
- Converting Vuex store modules to Pinia stores. First, you need to convert each Vuex store module into a Pinia store. In Vuex, you define store modules with an object containing
state,mutations,actions, andgetters. But with Pinia, you use thedefineStore()function to create a store. Suppose you have the following Vuex store module:
    // Vuex store
    const tasks = {
      namespaced: true,
      state: {
        tasks: [],
      },
      mutations: {
        addTask(state, task) {
          state.tasks.push(task);
        },
        removeTask(state, index) {
          state.tasks.splice(index, 1);
        },
      },
      actions: {
        addTask({ commit }, task) {
          commit('addTask', task);
        },
        removeTask({ commit }, index) {
          commit('removeTask', index);
        },
      },
      getters: {
        taskCount: (state) => state.tasks.length,
      },
    };
Convert it to a Pinia store:
    // Pinia store
    import { defineStore } from 'pinia';

    export const useTasksStore = defineStore('tasks', {
      state: () => ({
        tasks: [],
      }),
      actions: {
        addTask(task) {
          this.tasks.push(task);
        },
        removeTask(index) {
          this.tasks.splice(index, 1);
        },
      },
      getters: {
        taskCount: (state) => state.tasks.length,
      },
    });
Replacing Vuex mutations with Pinia actions
In Pinia, you don’t need separate mutations and actions like in Vuex. Instead, you can directly update the state within actions. As demonstrated in the above example, the addTask and removeTask mutations were replaced with Pinia actions that directly modify the state.
Replacing Vuex actions with Pinia actions
Since Pinia actions can directly update the state, you can remove Vuex actions and replace them with Pinia actions. In the example above, the Vuex actions addTask and removeTask were replaced with Pinia actions with the same names.
Converting Vuex getters to Pinia getters
Getters in Pinia work similarly to Vuex getters, but with a slightly different syntax. In the example above, the Vuex getter taskCount was converted to a Pinia getter with the same name and functionality.
Updating components to use Pinia stores instead of Vuex stores
In your Vue components, you need to replace the Vuex mapState, mapActions, and mapGetters helpers with Pinia’s store hooks.
For example, suppose you have the following component using Vuex:
   <template>
      <!-- ... -->
   </template>

    <script>
    import { mapState, mapActions } from 'vuex';

    export default {
      computed: {
        ...mapState('tasks', ['tasks']),
      },
      methods: {
        ...mapActions('tasks', ['addTask', 'removeTask']),
      },
    };
    </script>
Update it to use Pinia:
    <template>
      <!-- ... -->
    </template>

    <script>
    import { useTasksStore } from '@/tasks';

    export default {
      setup() {
        const tasksStore = useTasksStore();

        return {
          tasks: tasksStore.tasks,
          addTask: tasksStore.addTask,
          removeTask: tasksStore.removeTask,
        };
      },
    };
    </script>
Handling namespaced modules and nested
In Vuex, you use namespaced modules to separate concerns and avoid naming conflicts. In Pinia, you can achieve a similar result by defining stores with unique names using the defineStore() function. You can then access these stores directly within your components using their respective hooks.
To demonstrate this, let’s assume you have two namespaced Vuex modules, user and tasks:
    // Vuex user module
    const user = {
      namespaced: true,
      // ...
    };

    // Vuex tasks module
    const tasks = {
      namespaced: true,
      // ...
    };

    // Vuex store setup
    import Vuex from 'vuex';

    const store = new Vuex.Store({
      modules: {
        user,
        tasks,
      },
    });
To convert these namespaced modules to Pinia stores, first create separate Pinia store files for each module:
    // Pinia user store
    import { defineStore } from 'pinia';

    export const useUserStore = defineStore('user', {
      // ...
    });

    // Pinia tasks store
    import { defineStore } from 'pinia';

    export const useTasksStore = defineStore('tasks', {
      // ...
    });
Now, you can import and use these stores in your components as needed:
    <template>
      <!-- ... -->
    </template>

    <script>
    import { useUserStore } from '@/user';
    import { useTasksStore } from '@/tasks';

    export default {
      setup() {
        const userStore = useUserStore();
        const tasksStore = useTasksStore();

        // Access user and tasks store properties and methods
        return {
          user: userStore.user,
          tasks: tasksStore.tasks,
          login: userStore.login,
          addTask: tasksStore.addTask,
          removeTask: tasksStore.removeTask,
        };
      },
    };
    </script>
With the above steps, you can migrate your existing Vuex-based projects to Pinia. The conversion process mainly involves refactoring store modules, updating components to use Pinia store hooks, and making minor syntax changes. The resulting Pinia-based project will be more straightforward to manage and maintain, thanks to Pinia’s simpler API and improved development experience.
Comparing Pinia with Other Vue State Management Frameworks
Now that you have seen Pinia in action, let’s compare it with other Vue state management frameworks, primarily Vuex:
- Pinia offers a more straightforward API with fewer concepts, making it simpler to learn and use, particularly for novice developers.
- Pinia’s automatic type inference streamlines TypeScript development by eliminating the need to manually write type definitions.
- Pinia is more suitable for smaller projects that don’t require all of the functionality that Vuex offers because it is lighter than Vuex.
- Pinia is a flexible solution for a variety of use cases thanks to its plugin system, which enables developers to expand its functionality and link it with other libraries.
Pinia might not always be the best option, despite these benefits. If a developer is already familiar with Vuex and prefers its feature-rich capabilities, they might decide to continue with it for increasingly challenging projects. Also, some middleware and plugins that were created for Vuex particularly in the past might not work with Pinia.
Conclusion
In this tutorial, you’ve been introduced to Pinia as an alternative state management library for Vue.js applications. You learned its key features, and advantages, and demonstrated its use in a simple demo app. Pinia is an excellent choice for junior developers and smaller projects due to its simpler API, lighter weight, and TypeScript support. It is also a viable alternative to Vuex for developers looking for a more accessible state management solution.
By using Pinia, developers can enjoy a better development experience, improved maintainability, and easier collaboration in their Vue.js projects. With its growing popularity and active development, Pinia is becoming an increasingly prominent choice for state management in Vue.js applications.
To learn more about Pinia, visit the official documentation and feel free to clone the demo project for this tutorial on my GitHub repository.


