In this chapter, we will create a simple form in the Feedback.js file using Formik and submit form data to the Firebase Realtime Database. Then, we will subsequently forward the message to the sender’s email using Cloud Function and Sendgrid. The form will be for users to send their feedback on the post articles and the app.
Let’s get started!
Setup Formik and Yup
First, we are going to install the required packages Formik and Yup. Formik package enables us to build forms whereas the Yup package is for form validation. We are also going to install another package that is react-native-keyboard-aware-scroll-view which enables us to scroll the view upwards when the keyboard pops up from the bottom. This will provide a better user experience. Now, in order to install these packages, we need to run the command given in the following code snippet in our project terminal:
yarn add formik yup react-native-keyboard-aware-scroll-view
Now, we need to open the Feedback.js file and import the necessary packages and their components as shown in the code snippet below:
import React from 'react'
import { View, StyleSheet } from 'react-native'
import { TextInput as Input, Button, HelperText } from 'react-native-paper'
import { KeyboardAwareScrollView } from 'react-native-keyboard-aware-scroll-view'
import { Formik } from 'formik';
import * as Yup from 'yup'
Next, we need to create a simple form using Formik. First, we need to set the initial input values as blank. When a user submits the form, we need to call the submitForm function which will also display an error if any using helper text. The function that returns the form configuration is provided in the code snippet below:
const Feedback = () => {
return (
       <Formik
           initialValues={{ email: '', name: '', message: '' }}
           onSubmit={(values, { setSubmitting }) => {
               console.log(values)
               submitForm(values);
               setSubmitting(false);
           }}
           validationSchema={FeedbackSchema}
       >
           {({ handleChange, handleBlur, handleSubmit, values, isValid, dirty, errors, touched, isSubmitting }) => (
               <KeyboardAwareScrollView>
                   <View style={styles.container}>
                       <Input

                           placeholder={'Name'}
                           onChangeText={handleChange('name')}
                           onBlur={handleBlur('name')}
                           value={values.name}
                           underlineColor="transparent"
                           mode="outlined"

                       />
                       <HelperText
                           type="error"
                           visible={errors.name && touched.name}
                       >  {errors.name}</HelperText>
                       <Input

                           placeholder={'Email'}
                           onChangeText={handleChange('email')}
                           onBlur={handleBlur('email')}
                           value={values.email}
                           underlineColor="transparent"
                           mode="outlined"

                       />
                       <HelperText
                           type="error"
                           visible={errors.email && touched.email}
                       >  {errors.email}</HelperText>
                       <Input

                           placeholder={'Message'}
                           onChangeText={handleChange('message')}
                           onBlur={handleBlur('message')}
                           value={values.message}
                           underlineColor="transparent"
                           mode="outlined"
                           multiline={true}
                           numberOfLines={12}
                       />
                       <HelperText
                           type="error"
                           visible={errors.message && touched.message}
                       >  {errors.message}</HelperText>
                       <View >
                           <Button icon="email" disabled={!isValid} mode="contained" onPress={handleSubmit}>
                              Submit
                              </Button>
                       </View>
                   </View>
               </KeyboardAwareScrollView>
           )}
       </Formik>
   )
}

export default Feedback
Next, we need to create the validation rules using Yup as shown in the code snippet below:
const FeedbackSchema = Yup.object().shape({
   name: Yup.string()
       .min(2, "name is Too Short!")
       .max(50, "name is Too Long!")
       .required("name is Required"),
   // recaptcha: Yup.string().required(),
   email: Yup.string()
       .email("Invalid email")
       .required("Email is Required"),
   message: Yup.string()
       .min(12, "message is Too Short!")
       .max(50, "message is Too Long!")
       .required("message is Required"),
});
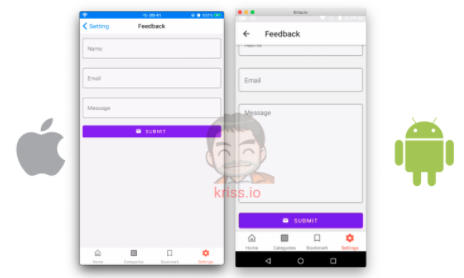
Hence, we will get the form view as shown in the emulator screenshots below:
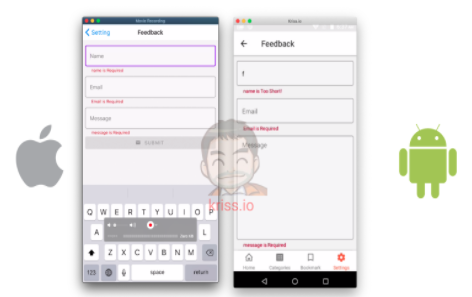
And, when we submit the form with empty fields, we will get the error message as well as shown in the emulator screenshots below:
Now that we have the form view, we will move on to set up Firebase in our React Native project.
Setting up React Native Firebase
Here, we are going to use the react-native firebase version 6 package in order to access Firebase services. Initially, we only require the core Firebase package and real-time database. So, we need to install them using the command provided below:
yarn add @react-native-firebase/app @react-native-firebase/database
Setup on iOS
In iOS, we start by installing React native Firebase on cacao pod by using the command provided below:
cd ios ; pod install
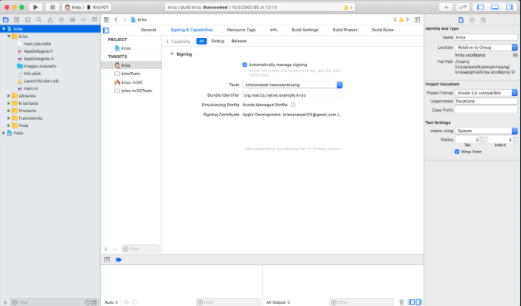
Next, we need to open the project with Xcode and find the Bundle identifier as shown in the screenshot below:
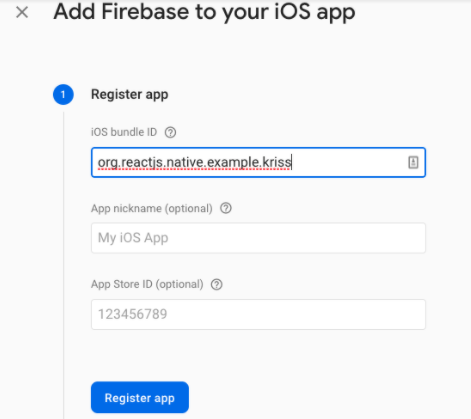
Next, we need to go to Firebase Console and create a new app. Then, choose an iOS app and add Bundle identifier as shown in the example screenshots below:
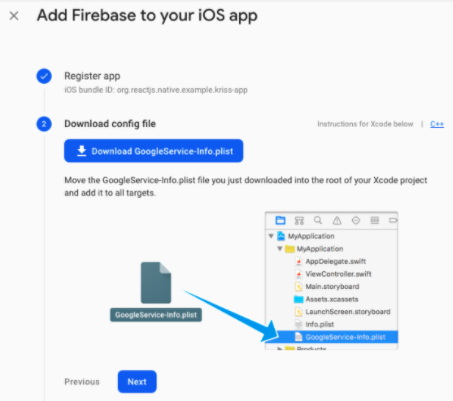
Next, we need to download the GoogleService-info.plist file as shown in the screenshot below:
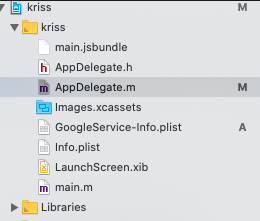
Then, we need to move the plist file to the Xcode project structure as shown in the screenshot below:
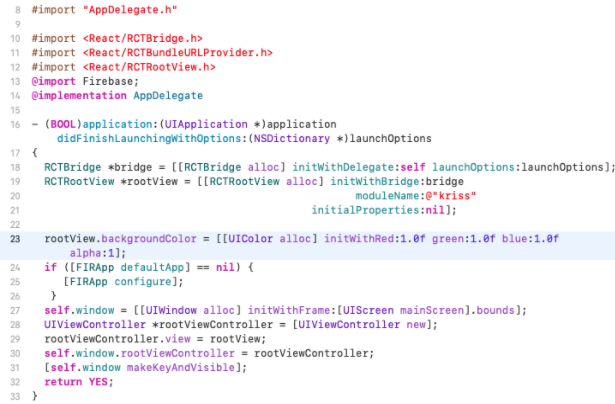
Next, we need to open Appdelegate.m file in Xcode and import Firebase then activate [FIRApp configure]; as highlighted in the example screenshot below:
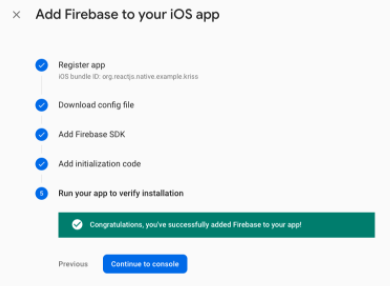
Now, if everything works according to the right setup then we will see the following status on Firebase when we re-run the app:
Setup on Android
For Android, we need to locate the file named MainApplication.java as shown in the screenshot below:
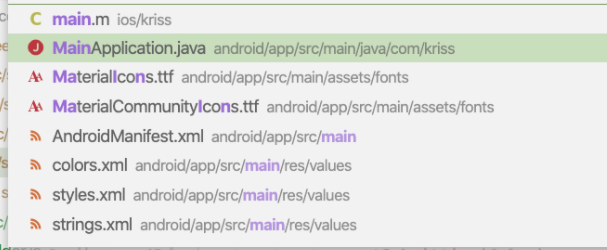
Then, we need to copy the package name back to the Firebase console. The package name that we will get in the MainApllication.java file is shown below:
package com.kriss;
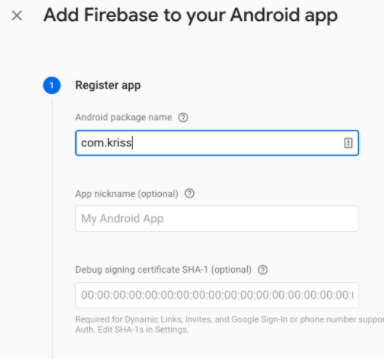
After copying, we need to create a new android app in the Firebase console and paste the package name in the config form as shown in the screenshot below:
After that, we will get the google-service.json file which we need to download as shown in the screenshot below:
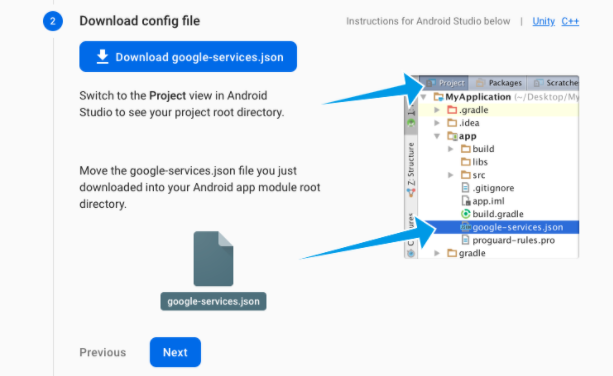
After downloading, we need to copy it to the location as shown in the screenshot below:
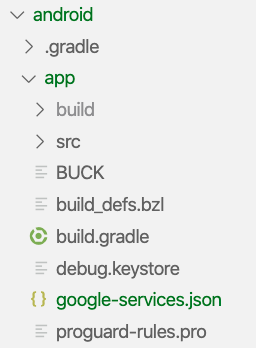
Next, we need to open android/build.gradle and add classpath as ‘com.google.gms:google-services:4.2.0’ to dependencies as shown in the code snippet below:
buildscript {
   ext {
       buildToolsVersion = "28.0.3"
       minSdkVersion = 16
       compileSdkVersion = 28
       targetSdkVersion = 28
   }
   repositories {
       google()
       jcenter()
   }
   dependencies {
       classpath("com.android.tools.build:gradle:3.4.2")
       classpath 'com.google.gms:google-services:4.2.0'
       // NOTE: Do not place your application dependencies here; they belong
       // in the individual module build.gradle files
   }
}
Then, we also need to add apply plugin: ‘com.google.gms.google-services’ configuration to the last line of android/app/build.gradle file as shown in the code snippet below:
task copyDownloadableDepsToLibs(type: Copy) {
   from configurations.compile
   into 'libs'
}

apply from: file("../../node_modules/@react-native-community/cli-platform-android/native_modules.gradle"); applyNativeModulesAppBuildGradle(project)
apply from: "../../node_modules/react-native-vector-icons/fonts.gradle"
apply plugin: 'com.google.gms.google-services'
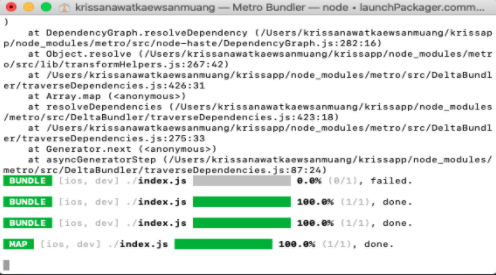
Hence if we re-run the app, we will get the following logs in our metro bundler:
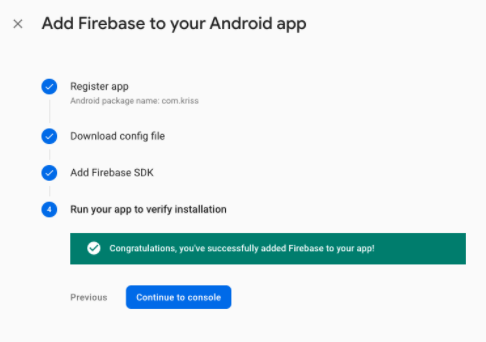
Now, if everything works fine, we will get the following result in our Firebase:
Using Database package
Here, we go back to Feedback.js and import Firebase realtime database package as shown in the code snippet below:
import database from '@react-native-firebase/database'
First, we need to create a function named submitForm and call the realtime database as shown in the code snippet below:
const submitForm = (values) => {
       database()
           .ref("feedback/")
           .push(values)
           .then(res => {
               alert("thank for giving feedback");
           })
           .catch(err => {
               console.error(err);
           });
   }
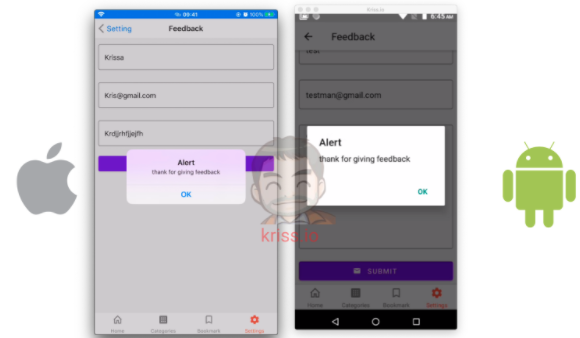
Now, if we try to submit the form, we will get an alert as shown in the emulator screenshot below:
In order to make a navigation link to the Feedback screen, we need to add a menu option to our Settings.js screen file. For this, we need to use the code from the following code snippet:
import React, { useContext, useState } from 'react';
import { View, TouchableOpacity } from 'react-native';
import {
   List, Switch,
} from 'react-native-paper';
import React, { useContext, useState } from 'react';
import { View, TouchableOpacity } from 'react-native';
import {
   List, Switch,
} from 'react-native-paper';
Then, we need to use the TouchableOpacity component to implement clickable menu option as shown in the code snippet below:
const Setting = ({ navigation }) => {
   return (
   <View style={{ flex: 1 }}>
       <TouchableOpacity
           onPress={() => navigation.navigate('Feedback')}>
           <List.Item
               title="Send Feedback"
               left={() => <List.Icon icon="email" />}
           />
       </TouchableOpacity>
   </View >
   );
}
export default Setting;
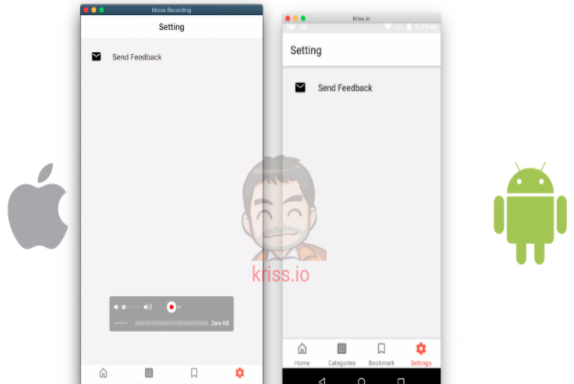
Here, we have added a navigation configuration to the Feedback screen using the navigate function provided by the navigation option.
Hence, we will get the following result as shown in the emulator screens below:
Sending email with Firebase Cloud Function
The last thing we need to do is to forward a message to the user’s inbox using the Firebase cloud function.
For that we need to install the firebase-tools package globally using NPM as shown below:
npm install -g firebase-tools
firebase login
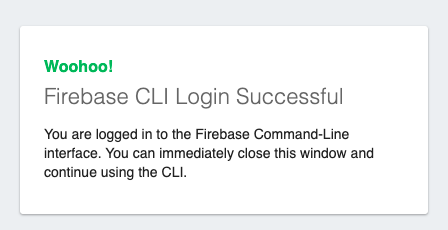
Here, we are also logging into Firebase services. As a result, we will get the following success message:
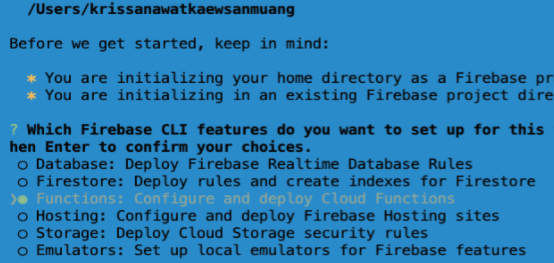
Then, by running the Firebase init command, we need to choose the required Firebase CLI feature function as shown in the screenshot below:
Next, we need to choose the Firebase project as highlighted in the screenshot below:

Now, we need to open the firebase functions folder by running the following command.
code functions/
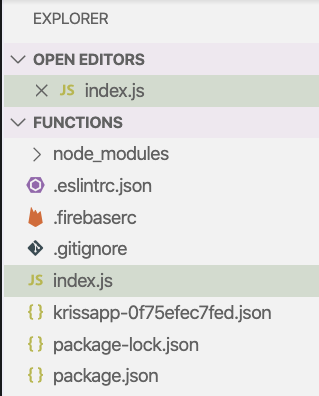
Hence, we can now start implementing the Firebase project. The project structure is shown in the screenshot below:
Now, in order to send the email, we are going to use Sendgrid. So, we need to install it first by running the following command:
npm i @sendgrid/mail
Next, we need to open the index. file and import firebase functions and Sendgrid main module. We also need to setup Sendgrid with a new API key as shown in the code snippet below:
const functions = require('firebase-functions');
const sgMail = require("@sendgrid/mail");
sgMail.setApiKey("Sendgrid api key");
Next, we need to call an event observer onCreate that will trigger when new data is added to the database as a new column that we define. Then, we need to call Sendgrid and send an email. The overall coding implementation for this is provided in the code snippet below:
exports.sendEmailConfirmation = functions.database
   .ref('/feedback/{orderId}')
   .onCreate(async (snapshot, context) => {
       const val = snapshot.val();
       const mailOptions = {
           from: 'me@kriss.app',
           to: 'mymail@gmail.com',
           subject: 'Hey new message from ' + val.name+':'+val.email,
           html: '<b>' + val.message + '</b>',
       };

       sgMail
           .send(mailOptions)
           .then(res => {
               return res.json({
                   result: "Success",
                   message: `Email has been sent to ${email}. `
               });
           })
           .catch(res => {
               // console.log('SIGNUP EMAIL SENT ERROR', err)
               return res.json({
                   result: "error",
                   message: res.message
               });
           });
       return null;
   });
Finally, we send this function to Firebase by using the command provided below:
firebase deploy
And now, when we open the Function menu in the Firebase console, we will see the following configuration:

Hence, if we submit the Feedback form again from our React Native app, we will get an email notification as shown in the emulator screenshot below:
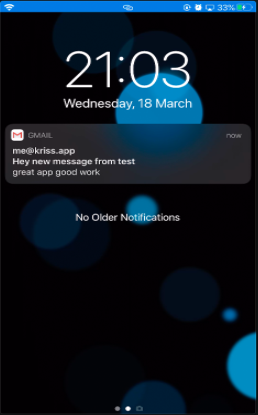
Hence, we have successfully implemented the Feedback screen with the form submit feature and also setup Firebase along with Sendgrid to send an email notification when the form is submitted.
Conclusion
In this chapter, we learned some important features and packages. First, we learned how to implement a form interface using the Formik package and validate it using the Yup package. Then, we got a detailed insight on how to set up Firebase on both Android and iOS platforms. Lastly, we also learned how to set up the Firebase Cloud Function and send email notifications using Sendgrid.
All code available on Github.

