
Machine learning is the art of training a machine to think for itself. It is slowly becoming a must have in today’s software applications. Nearly all applications that provide users with improved and user-specific information are applying Machine learning. Popular websites like YouTube, Instagram, Facebook, and Pinterest all apply machine learning to improve their user experiences.
Django is a Python web development framework that uses Model – View – Controller architecture to make web development easy and concise.
Scikit-Learn is an open-source machine learning library used for data analysis, data mining and data science.
Prerequisites for this tutorial:
- You have Python installed on your local machine
- Basic knowledge of Python
- Basic knowledge of Django
- Basic knowledge of Machine learning
This will make the learning process a lot more easier and seamless. Once the above prerequisites for this tutorial are met, we now proceed. In this article, we will be building a simple NLP project for spam detection using Django and Scikit-Learn libraries to learn how to build machine learning enabled web applications.
Creating a Python environment for our project
Creating a virtual environment is a recommended practice when developing Python projects, especially when working with different libraries and dependencies. A virtual environment is an isolated workspace where you can install and manage specific versions of packages required for a project without affecting the global Python installation or other projects.
To create a virtual environment, first create a new folder for the project. Say ` Django-ml` as follows:
mkdir django-ml
cd django-ml
Next, we will use Python’s default virtual environment manage “Venv” to create a virtual environment to manage your project’s dependencies separately from our system’s global Python environment using the following command:
python -m venv env
Activate the virtual environment using the appropriate command for your operating system:
– For Windows:
cd env\Scripts\activate
– For macOS and Linux:
source env/bin/activate
Installing Django and Scikit-Learn
With the virtual environment activated, install Django and Scikit-Learn using pip:
pip install django scikit-learn numpy pandas
We are using `pip`, the Python package installer, to install the necessary libraries for our project. `django` is the web framework we will use, `scikit-learn` is the machine learning library, and `pandas` and `numpy` are libraries for data manipulation and analysis.
Creating a new Django project
After installing the Django and Scikit-Learn, proceed to create a new django project using the following command:
django-admin startproject spam_detector
Navigate to the project directory:
cd spam_detector
Configuring the settings file
Open the settings.py file located in the core directory and configure the necessary settings, such as the database, timezone, and static files.
Add the following lines of code to handle static files:
STATIC_URL = "static/"
STATIC_ROOT = os.path.join(BASE_DIR, 'staticfiles')
# location of static files in local development
STATICFILES_DIRS = [os.path.join(BASE_DIR, 'detector/static'),]
Creating a new Django app
It is a good practice to always create all your django apps into one folder named apps. To do this, in your project directory, create a new folder called apps. Navigate into the apps directory and create a new folder called classifier.
In you project directory, now create a new Django app within your project that will be used to handle the classification functionality using the command below:
python manage.py startapp detector spam_detector/apps/detector
Your directory structure should look like this:
spam_detector/
    manage.py
    spam_detector/
        __init__.py
        settings.py
        urls.py
        asgi.py
        wsgi.py
    apps/
       detector/
        __init__.py
        models.py
        views.py
        tests.py
        admin.py
        apps.py
Register the new app, classifier in the settings.py file by adding it to the INSTALLED_APPS list as follows:
INSTALLED_APPS = [
    "django.contrib.admin",
    "django.contrib.auth",
    "django.contrib.contenttypes",
    "django.contrib.sessions",
    "django.contrib.messages",
    "django.contrib.staticfiles",

          # Local Apps
    "spam_detector.apps.detector",]
On your apps.py file, make the following changes:
from django.apps import AppConfig

class  DetectorConfig(AppConfig):
    default_auto_field = "django.db.models.BigAutoField"
    name = "spam_detector.apps.detector"
Next, we migrate our database by running the migration command below:
Python manage.py migrate
Run the server to see if our application was set up correctly:
Python manage.py runserver
Expected output:

Front page of the web application
Creating the Model
We will use Scikit-Learn to build a spam detection model, which will be trained on a dataset containing spam and non-spam messages.
Download the SMS Spam Collection dataset from the UCI Machine Learning Repository: https://archive.ics.uci.edu/ml/datasets/SMS+Spam+Collection
Create a new file called train_model.py in the ‘detector’ app folder and add the following blocks of code:
import pandas as pd
from sklearn.feature_extraction.text import CountVectorizer
from sklearn.naive_bayes import MultinomialNB
from sklearn.model_selection import train_test_split
from sklearn.metrics import accuracy_score, classification_report
import pickle
def train_model():
    # Load dataset
    data = pd.read_csv('SMSSpamCollection', sep='\t', names=['label', 'message'])

    # Feature extraction

    count_vectorizer = CountVectorizer(stop_words='English')
    X = count_vectorizer.fit_transform(data['message'])
    y = data['label']

    # Split dataset into training and testing sets

    X_train, X_test, y_train, y_test = train_test_split(X, y, test_size=0.2, random_state=42)

#   # Train the model

    clf = MultinomialNB()
    clf.fit(X_train, yttrian)

    # Evaluate the model

    y_pred = clf.predict(X_test)
    accuracy = accuracy_score(y_test, y_pred)
    print("Accuracy:", accuracy)
    print("\nClassification Report:")
    print(classification_report(y_test, y_pred))

    # Save the model and vectorizer

    with open('spam_detector_model.pkl', 'wb') as model_file:
        pickle. Dump(clf, model_file)
    with open('count_vectorizer.pkl', 'wb') as vectorizer file:
        pickle. Dump(count_vectorizer, vectorizer_file)

if __name__ == "__main__":
    train_model()
In this script, we first load the spam messages dataset using Pandas’ `read_csv` function. Then, we use the `CountVectorizer` from Scikit-Learn to convert the text messages into numerical features. This process is called feature extraction and is essential for training machine learning models with text data. Next, we split the dataset into training and testing sets using the `train_test_split` function. We then created a `MultinomialNB` classifier, which is a Naive Bayes classifier suitable for text classification tasks. We train the classifier using the training data and evaluate its performance on the test data.
Finally, we save the trained classifier and the count vectorizer to files using the `pickle` module. These files will be used later in our web application to make predictions. Run the ‘train_model.py’ script to train the spam detection model as follows:
$ python spam_detector/apps/detector/train_model.py
Expected output:

From the classification report, you can see the accuracy and classification report. The command will generate two files: spam_detector_model.pkl and count_vectorizer.pkl. These files contain the trained model and the count vectorizer, respectively.
Integrating the Model into Django
Once done with building and saving the model and vectorizer, we will now integrate the trained model into our Django application using the steps below. First, move the spam_detector_model.pkl and count_vectorizer.pkl files to the detector app folder.
Creating the View
Now that we have our model and vectorizer, we can create the views for our web application. In views.py of the detector app, create a new view called predict as follows:
from django.shortcuts import render
from django.http import JsonResponse
import pickle
import os

def index(request):
    return render(request, 'detector/index.html')

def predict(request):
    if request.method == 'POST':
        message = request.POST.get('message')

        # Load the saved model and vectorizer
        model_path = os.path.join(os.path.dirname(__file__), 'spam_detector_model.pkl')
        vectorizer_path = os.path.join(os.path.dirname(__file__), 'count_vectorizer.pkl')
        with open(model_path, 'rb') as model_file:
            clf = pickle.load(model_file)
        with open(vectorizer_path, 'rb') as vectorizer_file:
            count_vectorizer = pickle.load(vectorizer_file)


        # Make a prediction
        message_vector = count_vectorizer.transform([message])
        prediction = clf.predict(message_vector)

        return JsonResponse({'prediction': prediction[0]})
    else:
        return JsonResponse({'error': 'Invalid request method'})
In this file, we define two views: `index` and `predict`. The `index` view renders the main HTML template for our application, while the `predict` view handles POST requests containing a message to be classified as spam or not spam. In the `predict` view, we first load the saved model and vectorizer from the files generated in from training our model, then, we use the vectorizer to transform the input message into a numerical feature vector, which is then passed to the classifier to make a prediction. The prediction is returned as a JSON response.
Creating the Template
Create a new folder called templates inside the detector app folder. Inside the templates folder, create another folder called detector. In the detector folder, create a new file called index.html and update as follows:
{% extends "detector/base.html" %}
{% load static %}
<head>
    <meta charset="UTF-8">
    <meta name="viewport" content="width=device-width, initial-scale=1.0">
    <title>Text Spam Detection</title>
    <script src="{% static 'detector/script.js' %}"></script>
</head>
{% block content %}
    <h2>Text Spam Detection</h2>
    {% csrf_token %}

    <form id="predict-form">
        <label for="message">Message:</label>
        <textarea id="message" name="message" rows="4" cols="50"></textarea>
        <button type="submit">Predict</button>
    </form>
    <p id="prediction-result"></p>
{% endblock %}
This HTML template contains a form with a textarea input for the message and a submit button. When the form is submitted, the JavaScript code (which we will create in the next step) will handle the submission, make an AJAX request to the `predict` view, and display the prediction result.
Creating the Base Template
Create a new file called ‘base.html’ inside the ‘detector/templates’ folder:
<
<!DOCTYPE html>
<html lang="en">
<head>
    <meta charset="UTF-8">
    <meta name="viewport" content="width=device-width, initial-scale=1.0">
    <title>Spam Detector</title>
</head>
<body>
    <div id="content" style="margin: 50px;">
        {% block content %}
        {% endblock %}
    </div>
</body>
</html>
The base.html file is used to keep base code for the website that is similar to all pages.
Creating the Static Files
Create a new folder called static inside the detector app folder, and create another folder called detector inside the static folder. In the detector/static/detector folder, create a new file called script.js and add the following lines of code:
document.getElementById('predict-form').addEventListener('submit', async (e) => {
    e.preventDefault();

    const message = document.getElementById('message').value;
    const response = await fetch('/predict/', {
        method: 'POST',
        headers: {
            'Content-Type': 'application/x-www-form-urlencoded',
            'X-CSRFToken': document.querySelector('[name=csrfmiddlewaretoken]').value
        },
        body: `message=${encodeURIComponent(message)}`
    });

    if (response.ok) {
        const result = await response.json();
        document.getElementById('prediction-result').innerText = `Prediction: ${result.prediction}`;
    } else {
        document.getElementById('prediction-result').innerText = 'Error: Failed to predict';
    }
});
In this JavaScript file, we add an event listener to the form submission. When the form is submitted, we prevent the default submission behavior, extract the message from the textarea, and send an AJAX request to the `/predict/` endpoint with the message as the request body. We then update the prediction result element with the result received from the server.
Configuring the URLs
The urls.py files are responsible for defining URL patterns and mapping them to corresponding views. Each URL pattern is associated with a specific view function, which gets executed when a user requests the matched URL. The URL patterns are defined using regular expressions or simple path converters, making it easy to capture specific parts of the URL as parameters to be passed to the view.
Now, we will modify the urls.py file in the detector app folder to as shown below:
from django.urls import path
from . import views

urlpatterns = [
    path('', views.index, name='index'),
    path('predict/', views.predict, name='predict'),
]
Modify the urls.py file in the spam_detector project folder as follows:
from django.contrib import admin
from django.urls import path, include

urlpatterns = [
    path('admin/', admin.site.urls),
    path('', include('spam_detector.apps.detector.urls')),
]
These modifications configure the URL routing for our application. The `index` view is associated with the root URL (`/`), and the `predict` view is associated with the `/predict/` URL.
Running the Web Application
Now, everything is set up. Run the Django development server to see the application in action:
$ python manage.py runserver
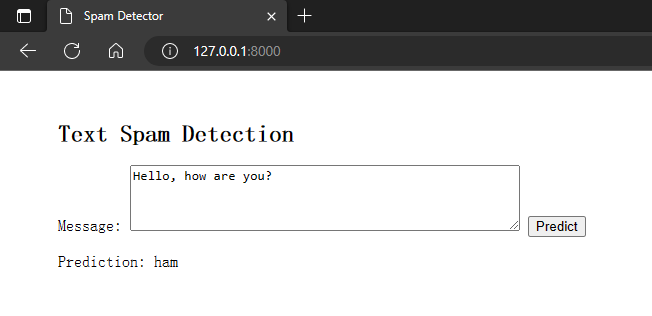
Open your web browser and go to `http://127.0.0.1:8000/`. You should see the text spam detection web application. Enter a message and click “Predict” to see if it is classified as spam or not. Expected output:

Enter a message and click the Predict button to get a prediction. Ham means good while spam means Spam. Expected output:

You can get the code of this project from GitHub.
Conclusion
In this tutorial, we have built a machine learning-enabled web application for detecting text spam messages using Django and Scikit-Learn. This is just a starting point, and you can expand this project by adding more features and improving the user interface. By following the steps outlined in this tutorial, you have gained experience in integrating machine learning models into web applications, and you can apply these concepts to other projects and problem domains.
Sources
– Scikit-learn official documentation
– Django official documentation