Unlike traditional JavaScript environments limited to web browsers, Node.js empowers developers to execute JavaScript code directly on servers and development systems. This versatility enables the creation of dynamic and scalable applications across a chain of hardware and software architectures.
Node.js modules, comprising of collections of files and directories adhering to specific guidelines, facilitate the organization and encapsulation of code in Node.js applications. This modular approach allows for efficient software development practices with code reusability, maintainability, and scalability.
Node-API: Bridging the Gap
In addition to JavaScript-based modules, Node.js offers support for native modules written in C and C++, hence expanding the spectrum of module development beyond the dependency of JavaScript. This capability enables developers to utilize existing C and C++ libraries by compiling them into native modules to allow compatibility with Node.js applications.
Central to the development of Node native modules is Node-API, a groundbreaking toolkit introduced since Node.js 8.0.0. Node-API serves as an intermediary between C/C++ code and the Node JavaScript engine, facilitating a smooth interaction and manipulation of JavaScript objects from native code. Node-API also abstracts its API from the underlying JavaScript engine, ensuring backward compatibility and stability across Node.js versions.
Prerequisites
While the level of familiarity required may vary depending on the complexity of your project, a solid grasp of JavaScript fundamentals and proficiency in C/C++ programming are the primary prerequisites. Whether you’re integrating existing C/C++ code or crafting new functionalities from scratch, a deep understanding of both languages is critical to achieving your objectives effectively.
A basic understanding and comfort level with navigating the command line environment will also come in handy, since many of the tools utilized in the development of Node-API modules are executed from the command line interface.
Node-API Levels & node-addon-api Package
Node-API operates at two distinct levels: the C level and the C++ level, each offering unique advantages and functionalities. The C level code, integrated directly into Node, provides low-level access to the inner workings of Node, which is particularly useful for projects requiring intricate system-level interactions.
The node-addon-api package complements Node-API by introducing a C++ wrapper to the Node-API code. This wrapper simplifies the development process while ensuring ABI stability and forward compatibility. By abstracting away the complexities of detailed coding, this package offers a streamlined development experience, making it an excellent choice for developers seeking efficiency and ease of use.
For the purposes of this tutorial, we’ll utilize the node-addon-api package to build our Node-API project.
The generator-napi-module
The generator-napi-module package offers a specialized Yeoman generator designed to streamline the creation of Node-API projects. It automates the setup process by generating the initial project structure, complete with essential files and source code templates, based on user-defined project specifications. This tool significantly accelerates project initiation, ensuring adherence to Node-API best practices while minimizing the need for manual configuration.
Installation
We will start by installing Yeoman globally, a powerful scaffolding tool and workflow automation toolkit tailored for modern web development.
npm install -g yo
Yeoman will simplify the project setup and enhance development workflows for us by generating boilerplate code, configuration files, and directory structures based on predefined templates and user inputs.
Next, execute a global installation of generator-napi-module:
npm install -g generator-napi-module
Prepare a new folder for your project and then navigate to your project directory:
mkdir n-api-file-system-native-module

cd n-api-file-system-native-module
To create a new Node-API project, we will use the Yeoman generator specifically designed for Node-API projects.
yo napi-module
This command triggers the Yeoman generator, and prompts you to provide project-specific details such as the project name, description, author information, and other configuration options.
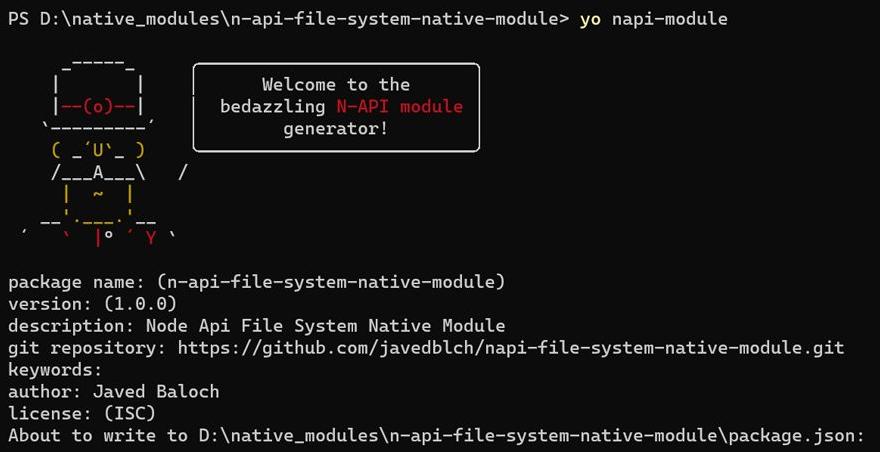
You will continue to see the Yeoman generator generating a number of files on your command line.
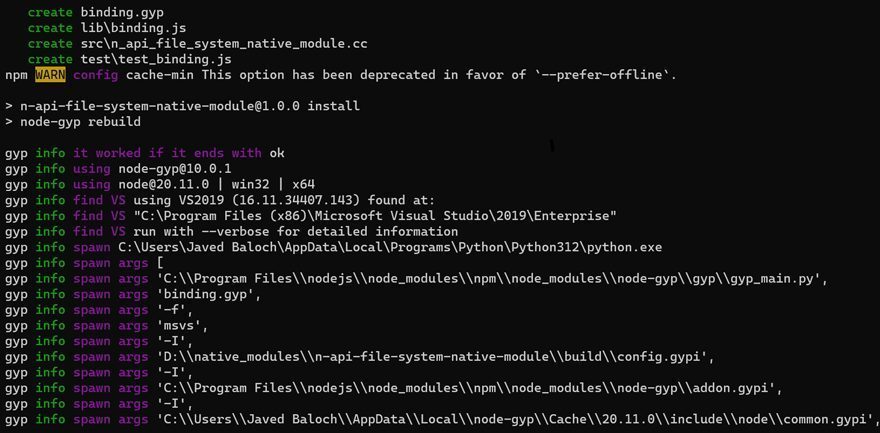
Project Structure:
Once the project is successfully generated, we will have a structured directory containing essential files for our Node-API project:
n-api-file-system-native-module/
├── binding.gyp            # Used by gyp to compile the C code
├── build                  # Intermediary and final build products
│   └── ...
├── lib                    # Node-API code accessing the C/C++ binary
│   └── binding.js
├── node_modules           # Required Node modules
│   └── ...
├── package.json           # npm description of your module
├── package-lock.json      # Used by npm to ensure deployment consistency
├── src                    # C/C++ code
│   └── n_api_file_system_native_module.cc
└── test                   # Test code
    └── test_binding.js
Understanding Key Files:
Inside the package.json, the noteworthy entries include the node-addon-api dependency and the “gypfile”: true setting, indicating the use of node-gyp for building.
// package.json
{
  "main": "lib/binding.js",
  "dependencies": {
    "node-addon-api": "^1.1.0"
  },
  "scripts": {
    "test": "node --napi-modules ./test/test_binding.js"
  },
  "gypfile": true,
  "name": "n-api-file-system-native-module",
  "version": "1.0.0",
  "description": "Node Api File System Native Module",
  "repository": {
    "type": "git",
    "url": "git+https://github.com/javedblch/napi-file-system-native-module.git"
  },
  "author": "Javed Baloch",
  "license": "ISC",
  "bugs": {
    "url": "https://github.com/javedblch/napi-file-system-native-module/issues"
  },
  "homepage": "https://github.com/javedblch/napi-file-system-native-module#readme"
}
Node-gyp is a command-line tool designed to streamline the compilation of native add-on modules for Node.js applications. It simplifies the compilation and linking process by orchestrating platform-specific build commands, ensuring compatibility across various platforms and architectures.
It relies on a binding.gyp file, which contains compilation instructions, and executes platform-specific build commands to generate the final binary module.
// binding.gyp {
{
  'targets': [
    {
      'target_name': 'n-api-file-system-native-module-native',
      'sources': [ 'src/n_api_file_system_native_module.cc' ],
      'include_dirs': ["<!@(node -p \"require('node-addon-api').include\")"],
      'dependencies': ["<!(node -p \"require('node-addon-api').gyp\")"],
      'cflags!': [ '-fno-exceptions' ],
      'cflags_cc!': [ '-fno-exceptions' ],
      'xcode_settings': {
        'GCC_ENABLE_CPP_EXCEPTIONS': 'YES',
        'CLANG_CXX_LIBRARY': 'libc++',
        'MACOSX_DEPLOYMENT_TARGET': '10.7'
      },
      'msvs_settings': {
        'VCCLCompilerTool': { 'ExceptionHandling': 1 },
      }
    }
  ]
}
We also have n_api_file_system_native_module.cc, a C++ file which defines a method and initializes the NApiFileSystemNativeModule function.
// src/n_api_file_system_native_module.cc

#include <napi.h>

using namespace Napi;

Napi::String Method(const Napi::CallbackInfo& info) {
  Napi::Env env = info.Env();
  return Napi::String::New(env, "world");
}

Napi::Object Init(Napi::Env env, Napi::Object exports) {
  exports.Set(Napi::String::New(env, "NApiFileSystemNativeModule"),
              Napi::Function::New(env, Method));
  return exports;
}

NODE_API_MODULE(addon, Init)
The binding.js is another JavaScript file acting as an intermediary to the C++ binary.
// lib/binding.js

const addon = require('../build/Release/n-api-file-system-native-module-native');

module.exports = addon.NApiFileSystemNativeModule
The test_binding.js script file demonstrates loading and calling the NApiFileSystemNativeModule function using JavaScript.
//test/test_binding.js

const NApiFileSystemNativeModule = require("../lib/binding.js");
const assert = require("assert");

assert(NApiFileSystemNativeModule, "The expected function is undefined");

function testBasic()
{
    const result =  NApiFileSystemNativeModule("hello");
}

console.log("Tests passed- everything looks OK!");
We are now ready to verify the project setup by running npm test

With a basic structure successfully set up and key files in place, let’s further explore and expand upon the capabilities of our Node-API project.
Creating a File Utility
Next, we will initiate a process of creating a file utility using Node-API, that will allow to us to read from and write to files using C++ functionality within JavaScript. We will achieve that by implementing two key functions: readFile and writeFile.
Start by updating our n_api_file_system_native_module.cc file within the src folder to define functions to read from and write to files.
// src/n_api_file_system_native_module.cc

#include <fstream>
#include <string>
#include <napi.h>

std::string readFile(const std::string& filePath) {
    std::ifstream file(filePath);
    std::string content;

    if (file.is_open()) {
        std::string line;
        while (getline(file, line)) {
            content += line + "\n";
        }
        file.close();
    } else {
        throw std::runtime_error("Unable to open file");
    }
    return content;
}

void writeFile(const std::string& filePath, const std::string& data) {
    std::ofstream file(filePath);

    if (file.is_open()) {
        file << data;
        file.close();
    } else {
        throw std::runtime_error("Unable to create or open file for writing");
    }
}

Napi::Value ReadFileWrapper(const Napi::CallbackInfo& info) {
    Napi::Env env = info.Env();

    if (info.Length() < 1 || !info[0].IsString()) {
        Napi::TypeError::New(env, "String expected").ThrowAsJavaScriptException();
        return env.Null();
    }

    std::string filePath = info[0].As<Napi::String>().Utf8Value();
    std::string content;

    try {
        content = readFile(filePath);
    } catch (const std::exception& e) {
        Napi::Error::New(env, e.what()).ThrowAsJavaScriptException();
        return env.Null();
    }

    // Return the content as a Napi::String
    return Napi::String::New(env, content);
}

Napi::Value WriteFileWrapper(const Napi::CallbackInfo& info) {
    Napi::Env env = info.Env();

    if (info.Length() < 2 || !info[0].IsString() || !info[1].IsString()) {
        Napi::TypeError::New(env, "Two strings expected").ThrowAsJavaScriptException();
        return env.Null();
    }

    std::string filePath = info[0].As<Napi::String>().Utf8Value();
    std::string data = info[1].As<Napi::String>().Utf8Value();

    try {
        writeFile(filePath, data);
    } catch (const std::exception& e) {
        Napi::Error::New(env, e.what()).ThrowAsJavaScriptException();
        return env.Null();
    }

    // Return success message as a Napi::String
    return Napi::String::New(env, "File written successfully");
}

Napi::Object Init(Napi::Env env, Napi::Object exports) {
    exports.Set(Napi::String::New(env, "readFile"), Napi::Function::New(env, ReadFileWrapper));
    exports.Set(Napi::String::New(env, "writeFile"), Napi::Function::New(env, WriteFileWrapper));
    return exports;
}

NODE_API_MODULE(file_util, Init)
We have now defined functions to read from and write to files using standard C++ input/output file streams. The readFile function takes a file path as input, opens the file, reads its content line by line, and returns the content as a string. Similarly, the writeFile function takes a file path and data as input, opens the file for writing, writes the data to the file, and closes it.
To interact with these functions from JavaScript, we provide wrapper functions (ReadFileWrapper and WriteFileWrapper) that handle argument validation, error handling, and conversion between C++ and JavaScript data types.
Now update the previously created binding.js file in order to export the readFile and writeFile functions from our native module.
// lib/binding.js

const fileUtil = require('../build/Release/n-api-file-system-native-module-native');

module.exports = {
    readFile: fileUtil.readFile,
    writeFile: fileUtil.writeFile
};
We will also need to update test_binding.js to ensure that our file utility functions work as expected.
// test/test_binding.js

const FileUtil = require("../lib/binding.js");
const assert = require("assert");

// Ensure the FileUtil object exists
assert(FileUtil, "The expected object is undefined");

function testReadWrite() {

    const text = "This text was created using Node-API and C++, demonstrating the seamless integration and versatile capabilities of native modules in Node.js development.";

    const filePath = "test.txt";

    // Write test data to a file
    FileUtil.writeFile(filePath, text);

    // Read data from the file
    const result = FileUtil.readFile(filePath); // Use filePath instead of testFilePath

}

console.log("Congratulations - test.txt file created successfully!");
Our test_binding.js file is now ready to write test data to a file, as well as reads the data back.
Next, build the updated files using node-gyp:
node-gyp rebuild
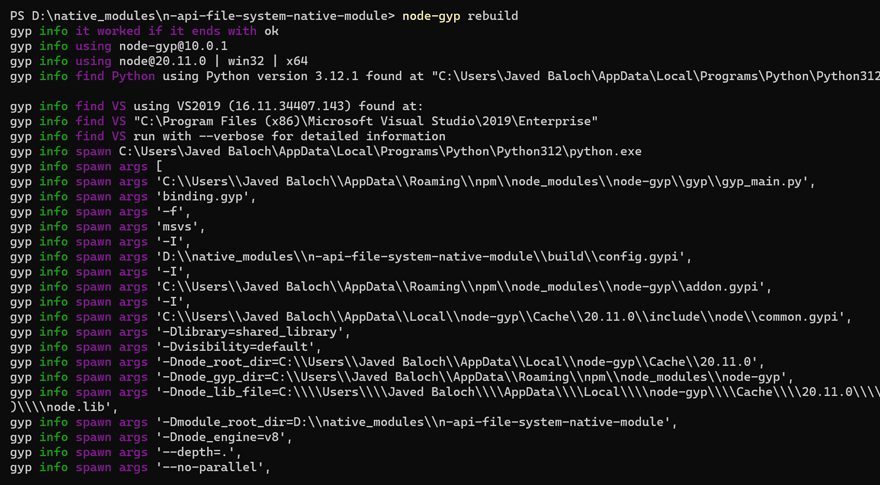
Verify the changes in code by running npm test

You will see a test.txt file written at the root of your project folder with the content.
// test.txt

This text was created using Node-API and C++, demonstrating the seamless integration and versatile capabilities of native modules in Node.js development.
Exploring Practical Applications of Node-API
There are some exciting possibilities on application development level where Node-API can shine and completely change the way developers can utilize native code within their Node.js applications.
Using Existing C/C++ Libraries: Imagine you’ve invested significant time and effort in developing a robust C/C++ codebase for a critical component of your application. With Node-API, you can bridge the gap between your C/C++ code and JavaScript, unlocking the potential to utilize your existing investment and make it accessible to a broader audience of JavaScript programmers and projects.
Node-API also allows you to maintain and refine your existing C/C++ codebase as the reference implementation, to ensure compatibility and consistency across both JavaScript and native code.
Accessing System Resources: In certain scenarios, applications built on platforms like Electron or NW.js may require access to system toolkits and APIs that are not readily available through standard Node.js modules. Node-API will allow the necessary access, and developers can tap into a wealth of system resources, from interacting with hardware devices to utilizing platform-specific APIs.
Optimizing Computational Tasks: For applications deployed on low-powered devices demanding computationally intensive tasks, Node-API offers a viable solution; by coding performance-critical tasks in C or C++ and integrating them into Node.js applications through Node-API and achieve optimal performance and efficiency.
Unlike traditional approaches where Node’s JavaScript runtime engine eventually compiles JavaScript code to binary, developers can compile C/C++ code once and integrate the binary directly into Node.js applications from the outset. This streamlined approach not only enhances performance but also streamlines development workflows, unlocking new possibilities in Node.js development.
Conclusion:
Utilizing Node-API and native modules in Node.js presents developers with a multitude of opportunities. By integrating C/C++ code with JavaScript applications, developers can create robust, feature-rich applications that push the limits of conventional approach to development process, while ensuring compatibility and efficiency across various environments.


