In the previous chapter, we configured the in-app purchase in our React Native app. In this chapter, we are going to apply it in order to implement the Remove Ads feature. First, we are going to implement the Remove ads screen which will have a privacy policy and terms of use along with buttons to trigger the subscription-based payments. The chapter is a bit complex since we are dealing with the actual money here. But, we are going to go step by step to make the implementation simple and easy to understand. At the end of this tutorial, we will be able to make the test remove ads purchase from the app itself.
Let’s get started!
Control banner display on the home screen
Hence, the subscription-based purchase is also successful. Since the purchase is successful, the ads will auto-hide themselves.
Now in the Home screen, we need to import the state that we are going to use in order to toggle the ads state. First, we need to import IApContext as shown in the code snippet below:
import { IApContext } from '../components/IApController'
Then, we need to get the showads function from IApContext using the useContext hook as shown in the code snippet below:
const { showads } = useContext(IApContext)
Hence, we can now use it as a condition on render as shown in the code snippet below:
renderItem={({ item ,index}) => (
         <React.Fragment>
                <FlatlistItem item={item} navigation={navigation} />
                {showads && index % 3 == 0 ? renderBanner() : <View />}
          /React.Fragment>
  )}
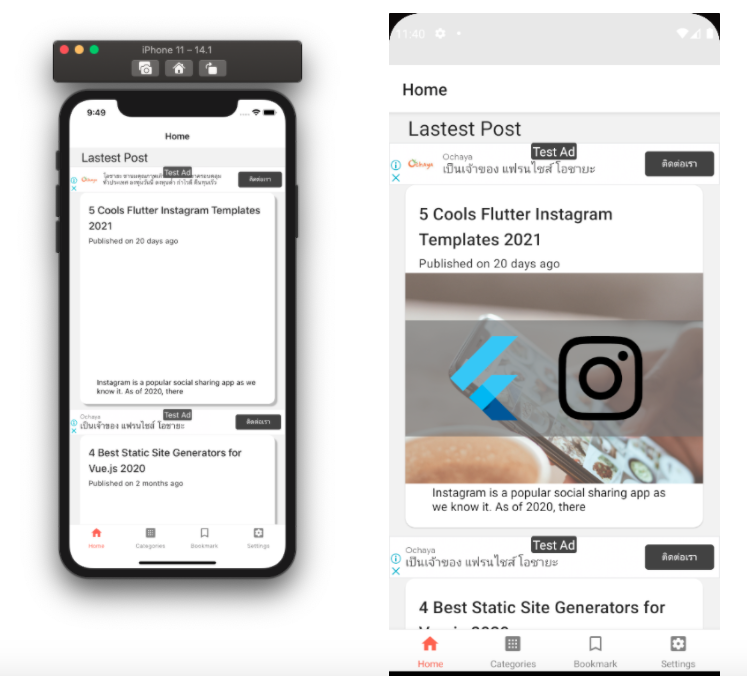
Hence, we will get the result as displayed in the screenshots below:
Control banner display on the single post screen
Another screen is the SinglePost post screen in which we do the same thing. We start by importing the context class as shown in the code snippet below:
import { IApContext } from '../components/IApController'
Then, we need to pick the state that we can use for toggling as shown in the code snippet below:
const { showads } = useContext(IApContext)
Thus, apply it for conditional rendering as shown in the code snippet below:
              </Card.Content>
                   {showads && renderBanner()}
                   <ImageLoad
                       style={{ width: '100%', height: 250 }}
                       loadingStyle={{ size: 'large', color: 'grey' }}
                       source={{ uri: post[0].jetpack_featured_media_url }}
               />
Also, we need to add it to reward ads as shown in the code snippet below:
const renderContent = () => {

       if (point <= 0 && showads) {
           return renderRewardAdsButton();
       }
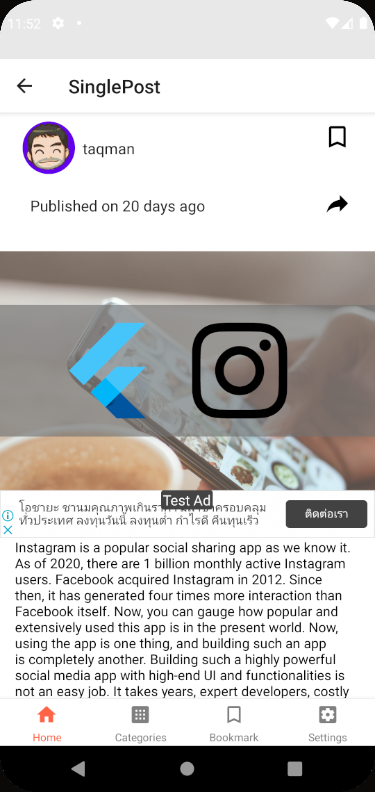
Hence, we get the result as shown in the screenshot below:
Checking Product status
Now when we load the app again, we also need to check user status if the user has already bought the product or not by using the getAvaliablePurchase function. The coding implementation for this is provided in the code snippet below:
checkValidPurchase = async () => {
       try {
           const purchases = await RNIap.getAvailablePurchases();

           purchases.forEach(async (purchase) => {
               switch (purchase.productId) {
                   case 'kriss.once.removeads':
                       // await AsyncStorage.setItem('removeadsmonthly', JSON.stringify(res));
                       toggleAds(false)
                       break

                   case 'kriss.sub.removeads':
                       //   await AsyncStorage.setItem('removeadsmonthly', JSON.stringify(res));
                       toggleAds(false)
                       break
                   case 'com.kriss.remove_ads_monthly':
                       // await AsyncStorage.setItem('removeadsmonthly', JSON.stringify(res));
                       toggleAds(false)
                       break
                   case 'com.kriss.remove_ad_forever':
                       //   await AsyncStorage.setItem('removeadsmonthly', JSON.stringify(res));
                       toggleAds(false)
                       break
                   default: console.warn('your did not have any purchase');

               }
           })

       } catch (err) {
           console.warn(err);
       }
   }
Then, we need to activate it in the Navigator.js file as shown in the code snippet below:
const { initIAp, checkValidPurchase } = useContext(IApContext);

   useEffect(() => {
       initIAp()
       checkValidPurchase()
   }, [])
Setup in-app purchase on Android
The setup in Android is more complicated than in iOS. In Android, we need to release APK in order to add billing permission before activating the billing feature on the Playstore dashboard.
First, we need to open the AndroidManifest.xml file and add the following line of code:
<uses-permission android:name="com.android.vending.BILLING" />
Then, we need to generate a keystore file for release APK by using the following command:
keytool -genkeypair -v -keystore myupload.keystore -alias mykeyalias -keyalg RSA -keysize 2048 -validity 10000
The keystore file will appear in app folder as shown in the screenshot below:

Now, we need to open build.gradle file and add keystore file name as directed in the code snippet below:
signingConfigs {
       debug {
           storeFile file('debug.keystore')
           storePassword 'android'
           keyAlias 'androiddebugkey'
           keyPassword 'android'
       }
        release {
           storeFile file('myuploadkey.keystore')
           storePassword '111111'
           keyAlias 'my-key-alias'
           keyPassword '111111'
       }

   }
   buildTypes {
       debug {
           signingConfig signingConfigs.debug
       }
       release {
            crunchPngs false

           signingConfig signingConfigs.release
           minifyEnabled enableProguardInReleaseBuilds
           proguardFiles getDefaultProguardFile("proguard-android.txt"), "proguard-rules.pro"
       }
   }
Now, we can generate the release APK for our app by running the following commands:
cd android/ ; ./gradlew bundleRelease
Then, our APK file will appear in the following path:
android/app/build/outputs/bundle/release/app.aab
Next, we need to go to the Playstore dashboard and create a new app as shown in the screenshot below:

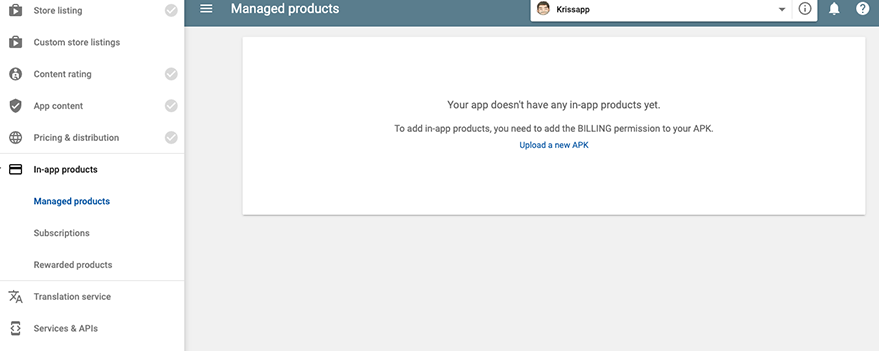
Then, we need to goto in-App purchase where we will see the APK requirement information that has billing permission as displayed in the screenshot below:
Next, we need to select the APK and upload the new APK. Then, we need to scroll to Internal app sharing as directed in the screenshots below:
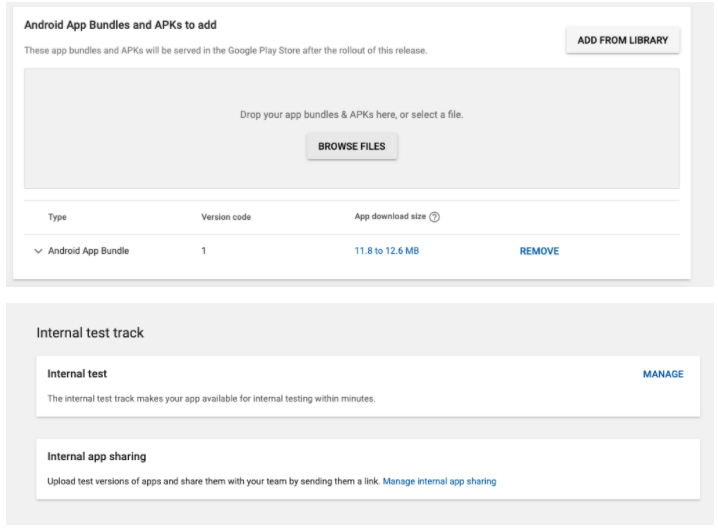
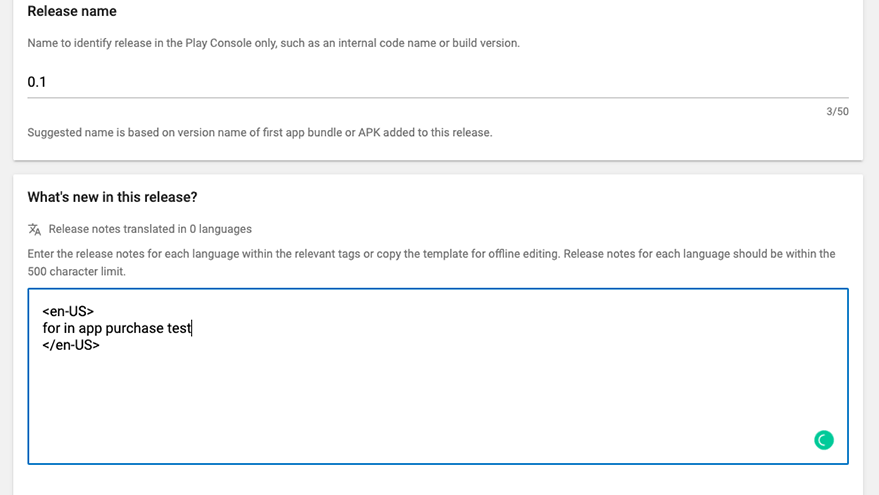
Then, we need to pick the released APK and fill in version and description information as shown in the screenshot below:
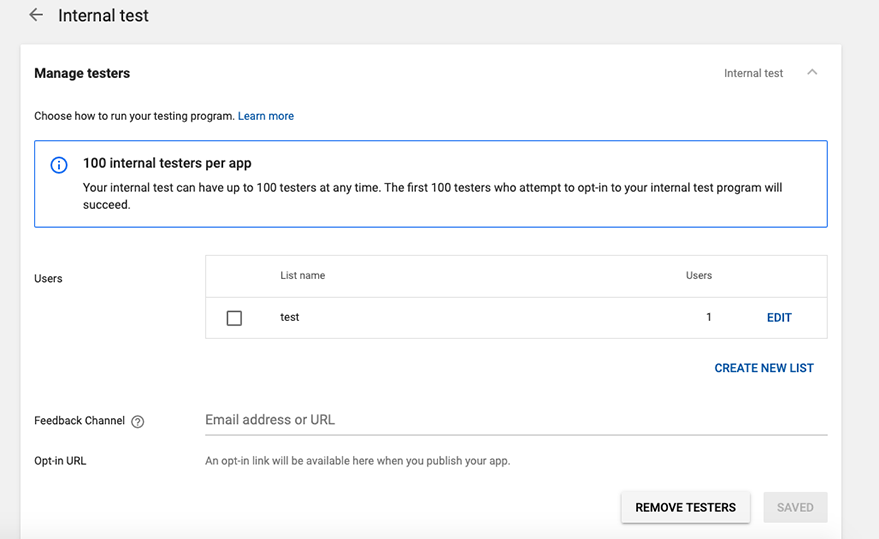
The last step is to invite tester to use their email to register on Android device as shown in the screenshot below:
Now, we can test the in-app purchase option on Android as well:

If we get the following status, we can install and start testing in the Android platform as well:

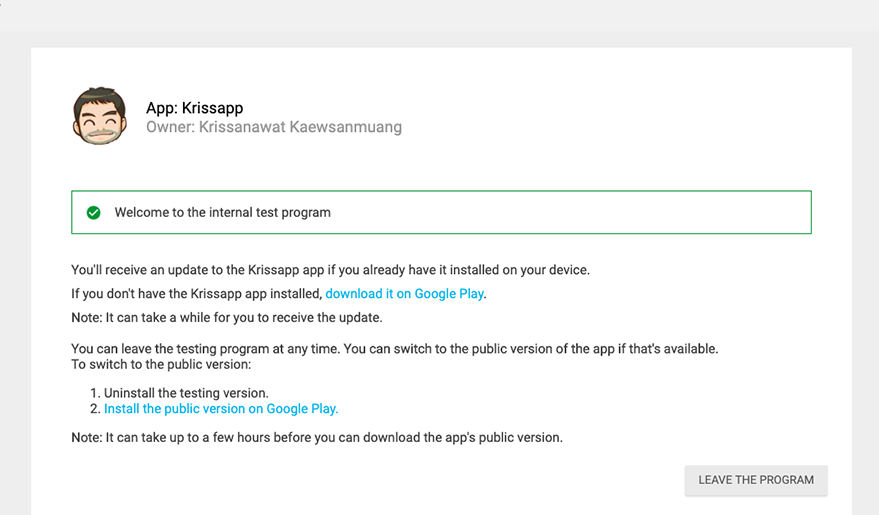
For testers, they will receive the email invitation as shown in the screenshot below:
Hence, they can now install the app as well:

Thus, we have successfully set up the testers for the app as shown in the screenshot below:

Create in-app product
Now, we can create the in-app Purchase product in Android as well. First, let us learn about some of the types of In-App purchase products.
Types Of In-App Purchases
In-app purchases product has many types of product :
- Consumable: Consumable products are those products that users need to buy every time on reinstalling or changing the device. These products cannot be used for free once bought. Hence, repeated purchasing is required. Some examples can be the currency, hints, and health in gaming apps.
- Non-consumable: This is bought once and use for free forever in the future kind of product. Once subscribed or purchased, users don’t need to purchase again in the future. The subscription to these kinds of products is not lost even on reinstalling or changing devices. Some examples can be subscribing to the pro version or removing advertisements.
- Non-renewing subscriptions: These kinds of products can be used by the user for a fixed period of time. Once the period ends, users have to purchase or subscribe to them again. The service is free over a certain period of time.
- Auto-renewable subscriptions: These kinds of services have the due date for re-subscription of re-purchase which is done automatically when the end period strikes. The items are available for a certain period of time once purchased and the items are re-purchased automatically once the period ends.
Now, let’s start creating the Android In-app purchase product.
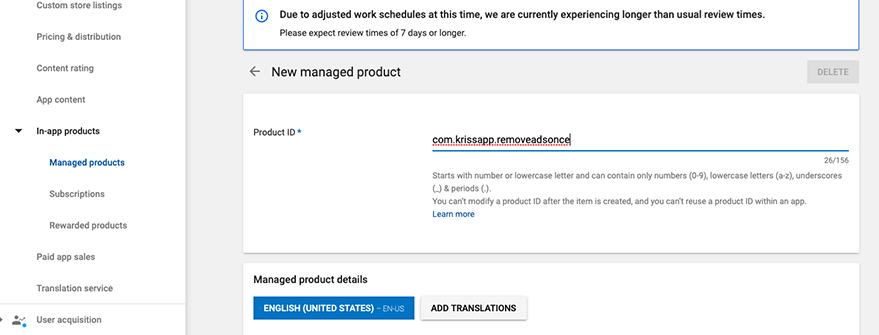
First, we need to goto Managed Product tab and insert the product ID as shown in the screenshot below:
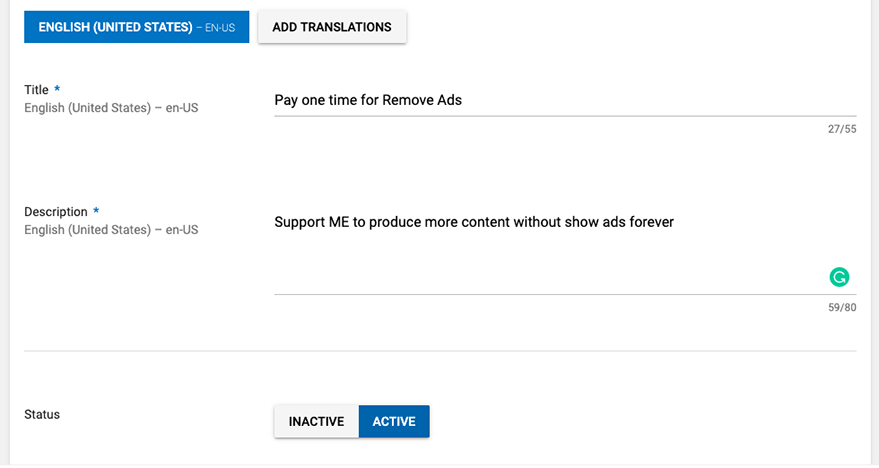
Next, we need to add the description as directed in the screenshot below:
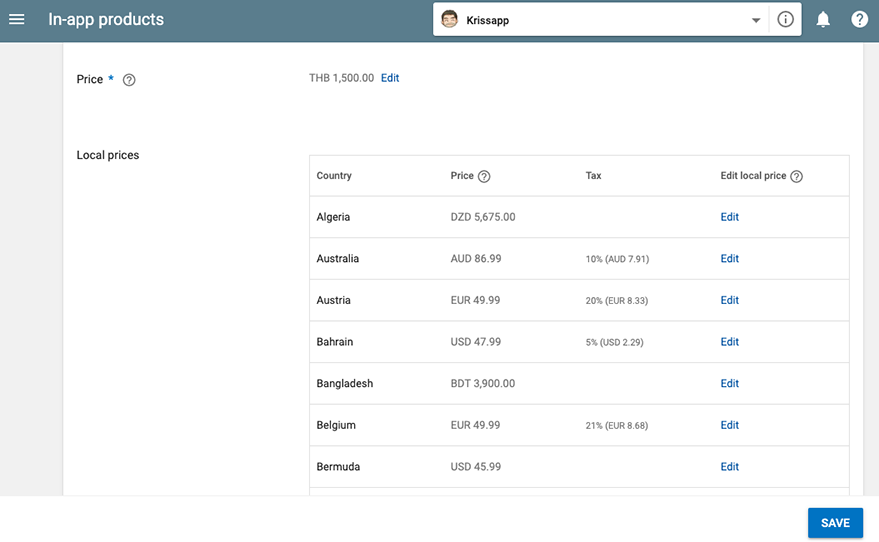
Lastly, we need to set the pricing information as directed in the screenshot below:
Hence, we have configured the one-time purchase product as shown in the screenshot below:

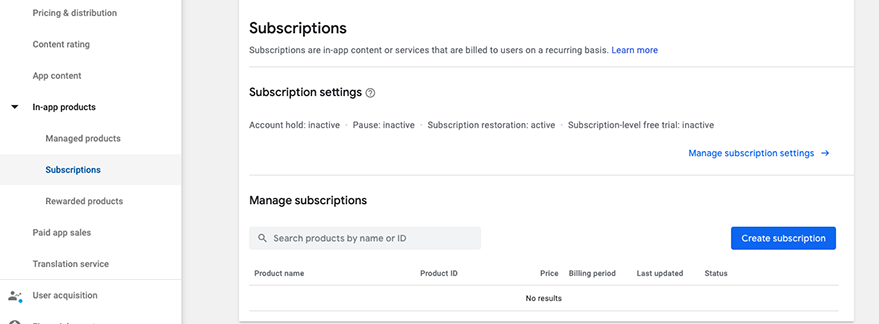
Next, we move to subscription-based purchases. For that, we need to go to the Subscription tab to create the subscription product as shown in the screenshot below:
Then, we need to add the product ID as shown in the screenshot below:
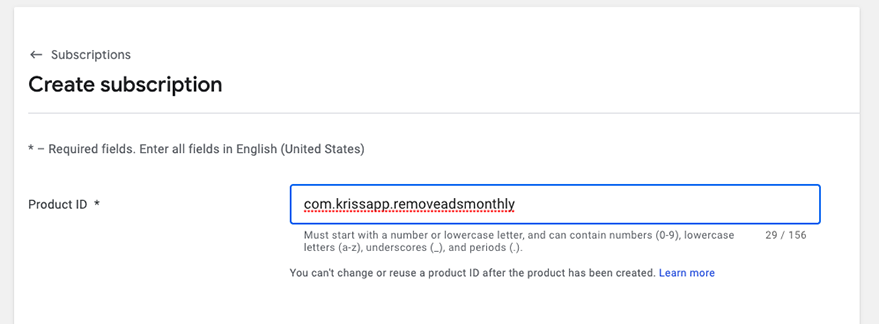
Add subscription product idNext, we need to add the pricing, duration, and description detail as directed in the screenshots below:
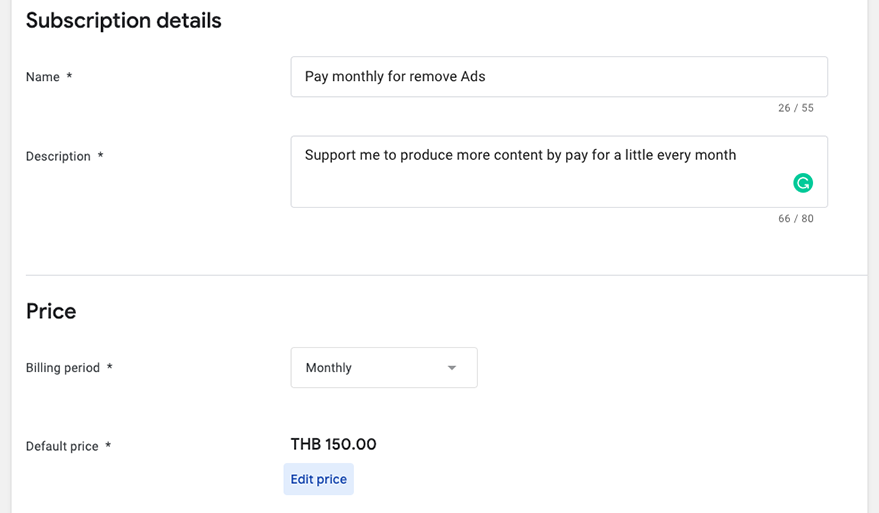
Hence, we have successfully set up the subscription-based purchase as well as shown in the screenshot below:

Note that we need to wait around 6-12 hours for the approval.
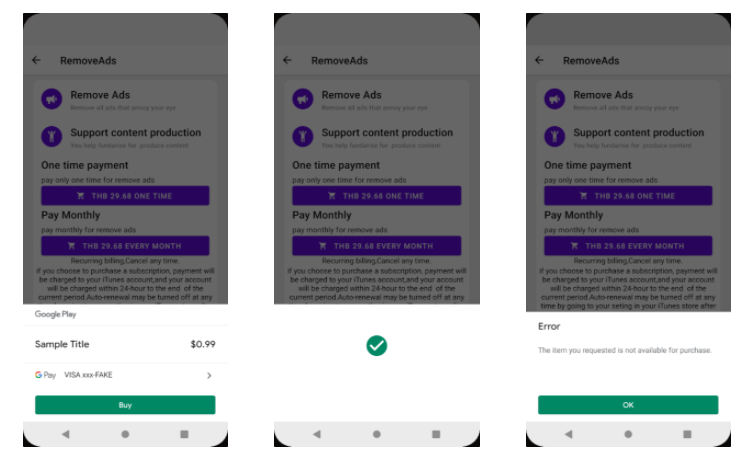
perform Static Test
While waiting for approval, we can use these three product IDs for testing:
- android.test.purchased success case
- android.test.canceled – cancel case
- android.test.item_unavailable – unavailable case
Hence, we can change the product ID as directed in the following screenshot:
const itemSkus = Platform.select({
   ios: [
       'kriss.once.removeads',
       'kriss.sub.removeads'
   ],
   android: [
       'android.test.purchased',
       'android.test.canceled',
       'android.test.item_unavailable'
   ]
});
Hence, the result for the product purchase on the emulator device is shown below:
Real Test
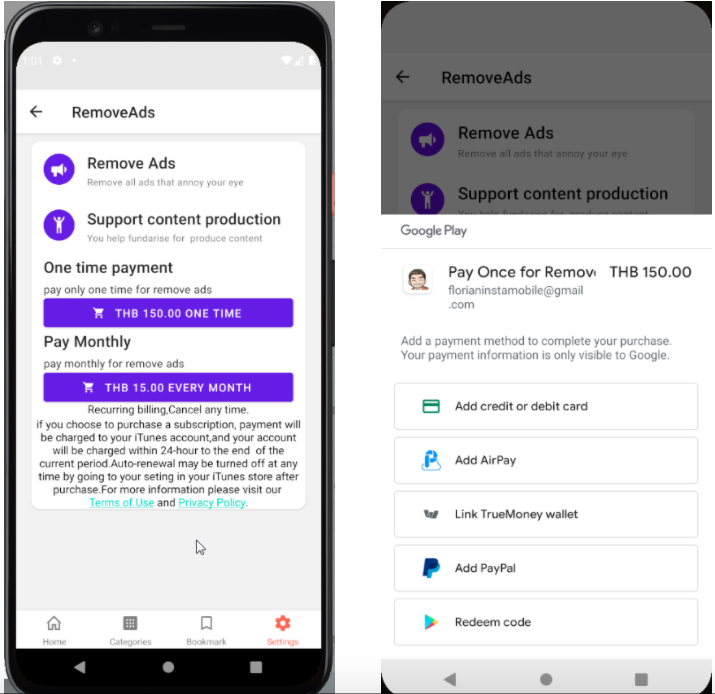
Once our In-App products get published on the Playstore, we can perform the real-time test from the actual device. Here, we will be able to fetch the real data from the Playstore.
There is also an option for multiple payment options as shown in the screenshot below:
Pay to Read
Another way we can implement the in-app purchase in this app is to limit the user’s readable access to the post. And, implement a mechanism that requires users to pay the credit in order to access the full post to read.
first, we give initial credit at ten on App.js
async function initPoint() {
    let initPoint = await AsyncStorage.getItem('yourcanreadfreepost');
    if (initPoint == null) {
      await AsyncStorage.setItem('yourcanreadfreepost', '10')
    }
  }
Then, we call the function every time the app launches as shown in the code snippet below:
export default function App() {
  React.useEffect(() => {
    SplashScreen.hide()
    initPoint()
............other code.......
Next, we need to add the function that triggers the payment event:
const renderPaymentButton = () => {
    return (
      <View>
        <Title style={{textAlign: 'center'}}>
          Pay {products.products[1].localizedPrice} for read more 10 post
        </Title>
        <Button
          icon="bullhorn"
          color={'#53ccf9'}
          mode="contained"
          onPress={() => makePurchase(products.products[1].productId)}>
          Pay now
        </Button>
      </View>
    );
  };
Now in IAPController, we need to make updates to the function to make the payment successful. First, we need to check the product SKU if it matches while fetching the credit. If it does not match then we need to add new credit and set the point to the state for immediate access to the screen. The overall coding implementation is provided in the code snippet below:
const [pointfromiap, setPointfromiap] = useState()

  makePurchase = async sku => {
    try {
      await RNIap.requestPurchase(sku, false).then(async res => {
        toggleAds(false);
        if(sku == 1){
          await AsyncStorage.setItem('yourcanreadfreepost', '10').then(res => {
            setPointfromiap(10)
        });
        }
      });
    } catch (err) {
      console.warn(err.code, err.message);
    }
  };
Now, if the user runs out of credit, we will see the following results:
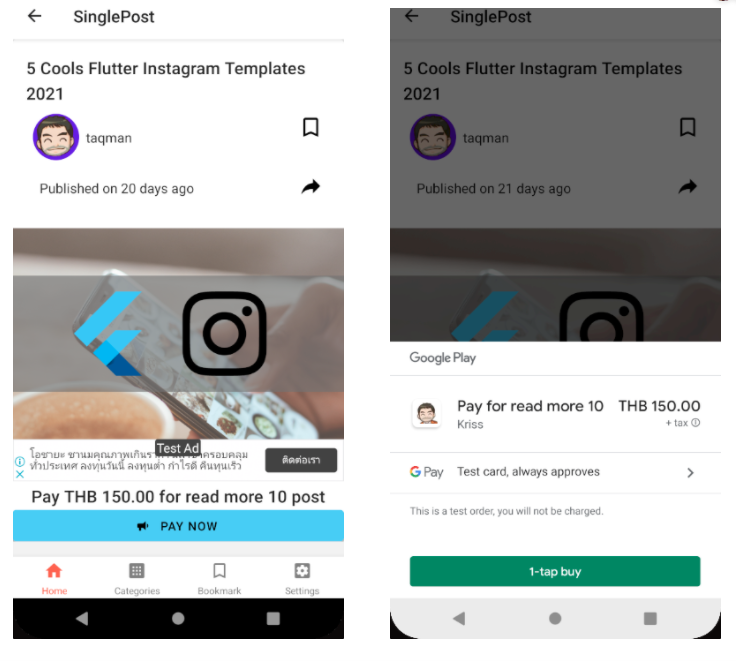
Lastly, when the payment is successful, there will be the addition of 10 credit and also unblock the screen access for the user subsequently
Conclusion
Well, this chapter was a bit complex. We continued from where we left off in the previous chapter. We found a way to make a little bit of money using In-app purchase. We dealt with the actual money here to make the in-app purchase to remove ads from the app. We got stepwise guidance on how to integrate one-time and subscription-based in-app purchases in both Android and iOS platforms. We implemented this feature to offer users the choice to remove the annoying advertisements. We also configured the tester option in both Android and iOS to enable the testing mechanism as well.
All code available on Github.




Thank for a great tutorial 🙏🏼
getAvaliablePurchase() function, promotes a login alert “Sign in with Apple ID” every time the app opens am I doing something wrong? or is this a normal behavior and there’s a way around it?
Should I store user purchase in a server or local storage? What’s the right approach here